


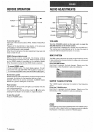
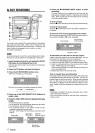

BASIC RECORDING
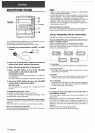
This section explains how to record from the tuner, CD player, or
external equipment.
Preparation
● Set the tape to the point where recording will start.
● Use Type I (normal) and Type II (high/CrOz) tapes for recording.
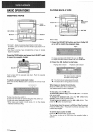
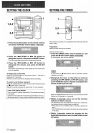
1 Insert the tape to be recorded on into deck 2.
Insert the tape with the side to be recorded onfirst facing
out from the unit.
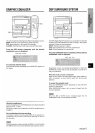
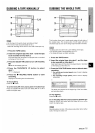
2 Press the REV MODE button to select the reverse
mode.
To record on one side onry, select =.
To record on both sides, select Z> or C=).
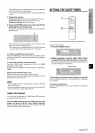
3 Press the DOLBY NR button to turn Dolby NR on
or off.
\
‘
To record with DOLBY NR, tury on ❑U NR.
To record without DOLBY NR, turn off Do NR.
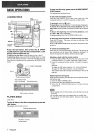
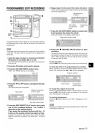
4 Press one of the function buttons and prepare
the
source to be. recorded.
‘To record from a CD, press the CD button and load the
disc(s).
To record from a radio broadcast, press the TUNER button
and tune in to a station.
To record from the connected source, press the VIDEO/
AUX or MD buttpn and play.
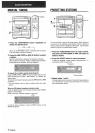
5
Press the ~ REC/REC MUTE button to start
recording.
@
When the selected function is C,D, playback and recording
start simultaneously.
15 ENGLISH
To stop recording, press the ■ button.
To pause recording, press the II button. (Applicable when the
source is TUNER, VIDEO/AUX or MD.) To resume recording,
press again.
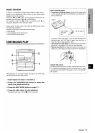
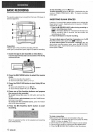
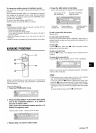
INSERTING BLANK SPACES
Insertion of 4-second blank spaces enables you to activate the
Music Sensor function. (Applicable when the source is TUNER,
VIDEO/AUX or MD)
1 Press the ● REC/REC MUTE buiton during recording or
while in recording pause mode.
~ on the display flashes for 4 seconds and the tape runs
without recording. After 4 seconds, the deck enters the
recording pause mode.
2 Press the 11 button to resume recording.
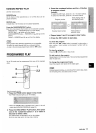
To insert a blank space of less than 4 seconds, press the
●
REC/REC MUTE button again while ~ is flashing.
To insert blank spaces of more than 4 seconds, after the
deck enters recording pause mode, press the
● REC/REC
MUTE button again. Each time the button is pressed, a 4-second
blank space is added.
To erase a recording
Make sure the microphone is not connected to this unit.
1 Insert the tape to be erased into deck 2 and press the TAPE/
~ DECK 1/2 button to display “TP 2.
2 Set the tape to the point where the erasure is to be started.
3 Set the reverse mode by pressing the REV MODE button.
4 Press the
● REC/REC MUTE button to start the-erasure.