


17
Domain/workgroup configuration
Domain/workgroup configuration Domain/workgroup configuration
Domain/workgroup configuration
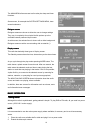
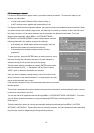
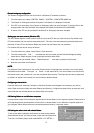
The Domain configuration item can be found on a Windows XP machine as follows:
1. From the start menu, select CONTROL PANEL > SYSTEM > COMPUTER NAME tab.
2. The Domain or Workgroup that this Computer is a member of is displayed in this tab.
3. If the PC is not a member of any Domain or Workgroup then one must be joined. To do this click on the
change button and enter the name of the domain (the default for Windows XP is MSHOME).
4. A reboot of the PC may be prompted if the Domain or Workgroup has been changed.
Setting up a new user account (Windows XP)
Setting up a new user account (Windows XP) Setting up a new user account (Windows XP)
Setting up a new user account (Windows XP)
The Wi-Fi Radio requires a user account to be set up on each PC that you wish to browse. By default most
PCs have at least one user account associated with it. The user name and password (optional) needs to be
the same on each PC as the Internet Radio only stores one user name and one password.
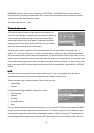
For windows XP this can be set up as follows:
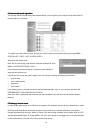
1. From the start menu, select Control Panel > User accounts.
2. From this screen click ‘ Add …’ , and enter the new user name and the Domain/Workgroup setting
noted above. Select the type of user (restricted) and then select finish.
3. Select the user just created, select ‘ Reset Password …’ and enter a password for this user.
4. Note the User name and Password.
NOTE:
NOTE: NOTE:
NOTE:
For Windows Vista: Users have to turn on the Guest account via manage user accounts in the control panel,
then add access to either ‘ Everyone’ or ‘ Guest’ on the shared drive. You could create a new account for
the internet radio, with a password, if you are concerned about security. The Guest account has no password
by default, so Jupiter 6 will connect to it from its factory default settings.
Configuring a shared drive
Configuring a shared drive Configuring a shared drive
Configuring a shared drive
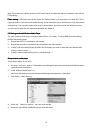
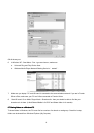
From the Start menu select My Computer or Windows Explorer and navigate to the directory you wish to
share. Right click on the folder and select Sharing and Security. Configure the shared drive as read-only, and
ensure that the user created above has read access to the share.
2.8 Sharing folders on non
2.8 Sharing folders on non2.8 Sharing folders on non
2.8 Sharing folders on non-
--
-Windows computers
Windows computers Windows computers
Windows computers
It is beyond the scope of this manual to describe how to share folders on all computer systems. Please refer to
your operating system documentation to find out how to share folders on non-Windows computer systems. If
you configure shared folders with user name and password security, note these values.
2.9 Setting the rad
2.9 Setting the rad2.9 Setting the rad
2.9 Setting the radio to work with shared folders
io to work with shared folders io to work with shared folders
io to work with shared folders
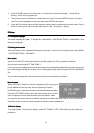
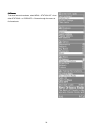
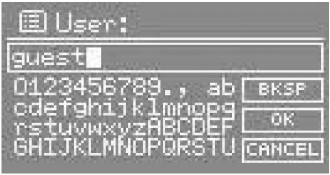
To set up the radio to playback audio stored on password-protected
shared network drives, you need to enter a user name and password.
To do this, from Music player mode, select MENU > PC SETUP >