


29 En
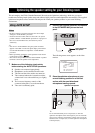
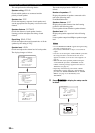
Optimizing the speaker setting for your listening room
PREPARATION
English
4 Press
D
l / h to select the desired setting
for “EXTRA SP ASSIGN” and then press
D
n.
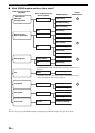
Extra speaker assignment
EXTRA SP ASSIGN
Selects the function of the speakers connected to the
EXTRA SP terminals.
Choices: FRONT B, PRESENCE, NONE
• When you use the alternative front speaker
system (see page 38)
Select “FRONT B”.
• When you use the presence speakers (see
page 12)
Select “PRESENCE” to set the function of the
speakers to the presence speakers.
• When you do not use the EXTRA SP
terminals
Select “NONE” to deactivate the EXTRA SP
terminals.
If you select “ON” in “BI-AMP” (see page 92), you cannot
select “PRESENCE” in “EXTRA SP ASSIGN”.
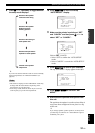
5 Press
D
l / h to select “SETUP”.
Choices: AUTO, RELOAD, UNDO, DEFAULT
• Select “AUTO” to automatically run the entire
“AUTO SETUP” procedure.
• Select “RELOAD” to reload the last “AUTO
SETUP” settings and override the previous
settings.
• Select “UNDO” to undo the last “AUTO SETUP”
settings and restore the previous settings.
• Select “DEFAULT” to reset the “AUTO SETUP”
parameters to the initial factory settings.
• “RELOAD” or “UNDO” is available only when you have
previously run “AUTO SETUP” and confirmed the results.
• “RELOAD” or “UNDO” is not available when you change
the setting of “BI-AMP” in the advanced setup (see
page 92) or “EXTRA SP ASSIGN” in “SOUND MENU”
(see page 72).
6 Press
D
l / h to select the desired setting of
“EQ” and then press
D
n.
Parametric equalizer type EQ
Parametric equalizer adjusts the level of the specified
frequency bands. This unit automatically selects the
crucial frequency bands for the listening room and
adjusts the level of the selected frequency bands to
create a cohesive sound field in the room. You can
select the type of the parametric equalizer adjustment
from the following choices.
Choices: NATURAL, FLAT, FRONT
• Select “NATURAL” to average out the frequency
response of all speakers with higher frequencies
being less emphasized. Recommended if the FLAT
setting sounds a little harsh.
• Select “FLAT” to average the frequency response
of all speakers. Recommended if all of your
speakers are of similar quality.
• Select “FRONT” to adjust the frequency response
of each speaker in accordance with the sound of
your front speakers. Recommended if your front
speakers are of much higher quality than your other
speakers.
7 Press
D
n to select “START” and then press
D
ENTER to start the setup procedure.
This unit starts the auto setup procedure. Loud test
tones are output from each speaker during the auto
setup procedure. Once all items are set, the
“AUTO:RESULT” display appears in the OSD.
• During the auto setup procedure, do not perform any
operation on this unit.
• We recommend getting out of the room while this unit is in
the auto setup procedure. It takes approximately 3 minutes
for this unit to complete the auto setup procedure.
Note
Notes
Notes