Wolf Cinema Owner's Manual
2-2
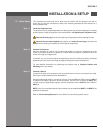
Connect the Power Cord
The North American-rated power cord is provided with each projector. Ensure that
you are using a power cord, socket and power plug that meets the appropriate local rating
standards.
Plug the power cord to the AC receptacle located on the right hand side of the projector and the
3-pronged end into a grounded AC outlet. The input voltage to the projector must be capable of
100 – 240 VAC in 1000W models and 200-240VAC in 1200W models. (See also Section 6 –
Specications for complete details on all power requirements.)
Use the approved North American-rated power cord supplied with the projector. If you are
connecting to an area outside of North America make sure you are using an appropriately rated
power cord.
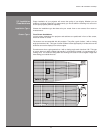
Turn the Projector ON
Press the
POWER button on either the remote or built-in keypad to turn the projector on.
Wait a few minutes to allow the projector to warm up. The LED status window displays an active
pattern of segments to indicate the projector is changing its state from powered down to powered
up. The message “On” appears in the display when the projector has completed its initialization
and is ready for use.
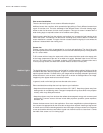
Select a Source
Press one of the input keys on the remote or built-in keypad to select and display the image for
the source you connected in Step 3.
Adjust Image
Adjust the more common Picture Adjustments, such as Brightness, Contrast, Gamma, Focus,
Zoom etc. using the direct keys on the IR remote.
You can also access the menu system and adjust these and other Picture Adjustments by
pressing
Menu
on the remote.
Step 4 >
Step 5 >
Step 6 >
Step 7 >
Section2►InstallationandSetup


