Removal and Replacement
6–12
WFM 90 and WFM 91 Service Manual
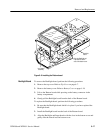
3. Remove the display padding from the side of the LCD display module.
4. Clean any remaining glue residue from the side of the LCD display module.
Refer to Cleaning on page 6–3.
To replace the LCD display padding, perform the following procedure:
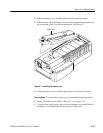
1. Peel the protective cover from the LCD display padding.
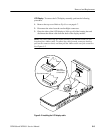
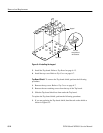
2. Align the padding with the top surface of the LCD display module and press
the padding onto the side of the display. See Figure 6–3.
3. Install the LCD display module. Refer to LCD Display on page 6–9.
4. Install the top cover. Refer to Top Cover on page 6–7.
Backlight. To remove the backlight from the LCD display module, perform the
following procedure:
1. Remove the top cover. Refer to Top Cover on page 6–7.
2. Remove the LCD display module. Refer to LCD Display on page 6–9.
3. Remove the display padding from the side of the LCD display module where
the backlight is installed.
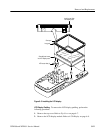
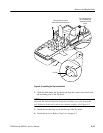
4. Remove the two outside retaining screws on the backlight assembly with the
Philips screwdriver. Do not remove the center screw.
5. Gently pull the backlight out of the LCD display module.
To replace the backlight, perform the following procedure:
1. Install the backlight assembly into the side of the LCD display module.
CAUTION. To avoid breaking the backlight, do not force the backlight assembly
into the LCD display module.
2. Install the two retaining screws into the backlight assembly.
3. Install the display padding onto the side of the LCD display module. Refer
to LCD Display Padding on page 6–11. A new display pad is supplied with
the replacement backlight assembly.
4. Install the LCD display module. Refer to LCD Display on page 6–9.
5. Install the top cover. Refer to Top Cover on page 6–7.


