


5 – Recording CDs—Dubbing from tape to disc
TASCAM CC-222MKII Owner’s Manual 27
Playing back tracks
Although an unfinalized disc cannot be played back
on an ordinary CD player, the CC-222MKII can play
back tracks that have been recorded.
Use the MULTI DIAL control or the SKIP keys to
select a track for playback.
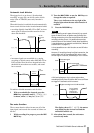
Time display while recording
While a recordable disc is being played back, the
four time display modes available in normal play-
back as described in , “Time display modes”:
TOTAL
,
TOTAL REMAIN
, track
REMAIN
and elapsed track time.
However, during recording there are fewer options
available (obviously, the unit cannot see into the
future and know how much time remains of the track
which is being currently recorded!). While recording,
until recording has taken place for at least 4 seconds,
the time display mode cannot be changed.
When in record or record ready mode, repeated
presses of the
DISPLAY key cycle between display-
ing the remaining time left for recording on the disc
(
TOTAL REMAIN
) and the elapsed time of the track cur-
rently being recorded (no indicator lit).
When playback is stopped at the start of a recordable
disc, there are only two options available:
TOTAL
(the
total time recorded so far on the disc) and
TOTAL
REMAIN
(the total time available on the disc for further
recording).
Manual track division
It is possible to divide the recording into tracks “on
the fly” while recording.
While recording is taking place, press the
RECORD
key. The current track number is incremented by one.
For details of automatic track division while record-
ing, see “Automatic track division” on page 31.
NOTE
According to the “Red Book” (the specification for
audio CDs), a track cannot be less than four seconds in
length, and there can be a maximum of 99 tracks on an
audio CD. Bear these limitations in mind when adding
track divisions.
Full disc
If recording a long program, when there is no space
remaining on the disc for recording, as shown by the
time display (see “Time display while recording” on
page 27), the display shows
Disc Full!! for
a few seconds (and may show
PMA Writing
after this).
If the disc is a CD-RW, the final track can be erased,
if required (see “Erasing tracks” on page 33) and the
disc then finalized. If the disc is a CD-R, it must be
finalized prior to use (see “Finalizing” on page 33).
Dubbing from tape to disc
When dubbing from tape to disc, follow the instruc-
tions here.
1 Load the tape with the side that will be
recorded first to be played first. Set the
Dolby, etc. as well as the reverse mode.
2 Load a recordable disc.
3 Use the
MENU key to set the dubbing volume
to
THRU to bypass the input level control
(see “Bypassing the INPUT level for dub-
bing” on page 18).
NOTE
Note that while dubbing with auto track enabled, the
start trigger level (see “Synchronized recording” on
page 29) is set to –30 dB.
4 Press the DUB 1 key.
The CD goes into record ready. The tape
rewinds to the start of the tape and starts
playing back. The CD recorder starts record-
ing.
5 When the available recording time on the
disc is finished, or the tape has stopped play-
ing according to the reverse mode setting,