


21
MZ-N1
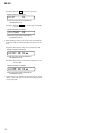
38) Select manual mode of the test mode, and set item number
873 (see page 14).
39) Adjust with the [VOLUME +] key (adjusted value up) or [VOL-
UME --] key (adjusted value down) so that the adjusted value
becomes BB.
40) Press the X key to write the adjusted value.
41) Select manual mode of the test mode, and set item number
874 (see page 14).
42) Adjust with the [VOLUME +] key (adjusted value up) or [VOL-
UME --] key (adjusted value down) so that the adjusted value
becomes 05.
43) Press the X key to write the adjusted value.
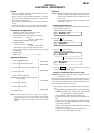
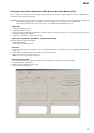
• Change of NV adjusted values (version 1.100)
Caution: Change the NV adjustment values according to the mi-
crocomputer version.
In this set, some adjusted values were set in the manual mode at
the shipment, but these will be cleared when the NV is reset.
Therefore, modify the NV adjusted values through the following
procedure immediately after the NV was reset.
1. Item numbers in which the NV adjusted values are to be modi-
fied
– Change ABCD gain [Hpit] initial value (item number 336)
Caution: The ABCD gain [Hpit] initial value must be
changed before the overall adjustment.
– Change CLV drive voltage limiter (item numbers 865, 866)
– Change x2 CLV speed gain, +6dB compared to conventional
(item numbers 867, 868)
– Change x2 CLV phase gain, +3dB compared to conventional
(item numbers 871, 872)
– Change x2/x1 switching temperature threshold value
(+10°C t +5°C) (item numbers 873, 874)
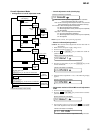
2. NV adjusted values modifying procedure
1) Select manual mode of the test mode, and set item number
336 (see page 14).
2) Adjust with the
[VOLUME +] key (adjusted value up) or [VOL-
UME --] key (adjusted value down) so that the adjusted value
becomes 08.
3) Press the X key to write the adjusted value.
4) Select manual mode of the test mode, and set item number
865 (see page 14).
5) Adjust with the [VOLUME +] key (adjusted value up) or [VOL-
UME --] key (adjusted value down) so that the adjusted value
becomes 2C.
6) Press the X key to write the adjusted value.
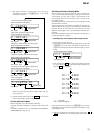
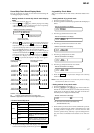
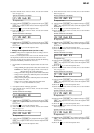
Remote commander LCD display
**
: Adjusted value
V6 num **
873
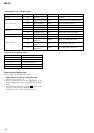
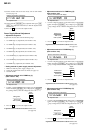
Remote commander LCD display
**
: Adjusted value
V6 dat **
874
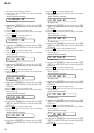
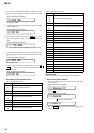
7) Select manual mode of the test mode, and set item number
866 (see page 14).
8) Adjust with the [VOLUME +] key (adjusted value up) or [VOL-
UME --] key (adjusted value down) so that the adjusted value
becomes B9.
9) Press the X key to write the adjusted value.
10) Select manual mode of the test mode, and set item number
867 (see page 14).
11) Adjust with the [VOLUME +] key (adjusted value up) or [VOL-
UME --] key (adjusted value down) so that the adjusted value
becomes C9.
12) Press the X key to write the adjusted value.
13) Select manual mode of the test mode, and set item number
868 (see page 14).
14) Adjust with the [VOLUME +] key (adjusted value up) or [VOL-
UME --] key (adjusted value down) so that the adjusted value
becomes 80.
15) Press the
X key to write the adjusted value.
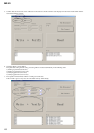
16) Select manual mode of the test mode, and set item number
871 (see page 14).
17) Adjust with the [VOLUME +] key (adjusted value up) or [VOL-
UME --] key (adjusted value down) so that the adjusted value
becomes CA.
18) Press the X key to write the adjusted value.
19) Select manual mode of the test mode, and set item number
872 (see page 14).
20) Adjust with the [VOLUME +] key (adjusted value up) or [VOL-
UME --] key (adjusted value down) so that the adjusted value
becomes 2D.
21) Press the X key to write the adjusted value.
22) Select manual mode of the test mode, and set item number
873 (see page 14).
23) Adjust with the [VOLUME +] key (adjusted value up) or [VOL-
UME --] key (adjusted value down) so that the adjusted value
becomes BB.
24) Press the X key to write the adjusted value.
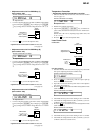
Remote commander LCD display
**
: Adjusted value
AbcdGn **
336
Remote commander LCD display
**
: Adjusted value
V3 num **
865
Remote commander LCD display
**
: Adjusted value
V3 dat **
866
Remote commander LCD display
**
: Adjusted value
V4 num **
867
Remote commander LCD display
**
: Adjusted value
V4 dat **
868
Remote commander LCD display
**
: Adjusted value
V5 num **
871
Remote commander LCD display
**
: Adjusted value
V5 dat **
872
Remote commander LCD display
**
: Adjusted value
V6 num **
873