


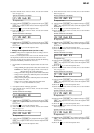
20
MZ-N1
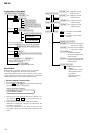
2. NV adjusted values modifying procedure
1) Select manual mode of the test mode, and set item number
336 (see page 14).
2) Adjust with the [VOLUME +] key (adjusted value up) or [VOL-
UME --] key (adjusted value down) so that the adjusted value
becomes 8.
3) Press the X key to write the adjusted value.
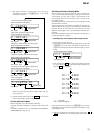
4) Select manual mode of the test mode, and set item number
149 (see page 14).
5) Press the > key to set item number 151.
6) Adjust with the [VOLUME +] key (adjusted value up) or [VOL-
UME --] key (adjusted value down) so that the adjusted value
becomes 07.
7) Press the X key to write the adjusted value.
8) Select manual mode of the test mode, and set item number
861 (see page 14).
9) Adjust with the [VOLUME +] key (adjusted value up) or [VOL-
UME --] key (adjusted value down) so that the adjusted value
becomes 79.
10) Press the X key to write the adjusted value.
11) Select manual mode of the test mode, and set item number
862 (see page 14).
12) Adjust with the [VOLUME +] key (adjusted value up) or [VOL-
UME --] key (adjusted value down) so that the adjusted value
becomes 00.
13) Press the X key to write the adjusted value.
14) Select manual mode of the test mode, and set item number
863 (see page 14).
15) Adjust with the [VOLUME +] key (adjusted value up) or [VOL-
UME --] key (adjusted value down) so that the adjusted value
becomes EA.
16) Press the X key to write the adjusted value.
17) Select manual mode of the test mode, and set item number
864 (see page 14).
18) Adjust with the [VOLUME +] key (adjusted value up) or [VOL-
UME --] key (adjusted value down) so that the adjusted value
becomes 01.
19) Press the
X key to write the adjusted value.
20) Select manual mode of the test mode, and set item number
865 (see page 14).
21) Adjust with the [VOLUME +] key (adjusted value up) or [VOL-
UME --] key (adjusted value down) so that the adjusted value
becomes 2C.
22) Press the X key to write the adjusted value.
23) Select manual mode of the test mode, and set item number
866 (see page 14).
24) Adjust with the [VOLUME +] key (adjusted value up) or [VOL-
UME --] key (adjusted value down) so that the adjusted value
becomes B9.
25) Press the X key key to write the adjusted value.
26) Select manual mode of the test mode, and set item number
867 (see page 14).
27) Adjust with the [VOLUME +] key (adjusted value up) or [VOL-
UME --] key (adjusted value down) so that the adjusted value
becomes C9.
28) Press the
X key to write the adjusted value.
29) Select manual mode of the test mode, and set item number
868 (see page 14).
30) Adjust with the [VOLUME +] key (adjusted value up) or [VOL-
UME --] key (adjusted value down) so that the adjusted value
becomes 80.
31) Press the X key to write the adjusted value.
32) Select manual mode of the test mode, and set item number
871 (see page 14).
33) Adjust with the [VOLUME +] key (adjusted value up) or [VOL-
UME --] key (adjusted value down) so that the adjusted value
becomes CA.
34) Press the X key to write the adjusted value.
35) Select manual mode of the test mode, and set item number
872 (see page 14).
36) Adjust with the [VOLUME +] key (adjusted value up) or [VOL-
UME --] key (adjusted value down) so that the adjusted value
becomes 2D.
37) Press the X key to write the adjusted value.
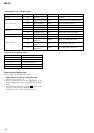
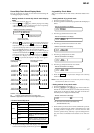
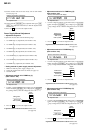
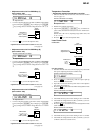
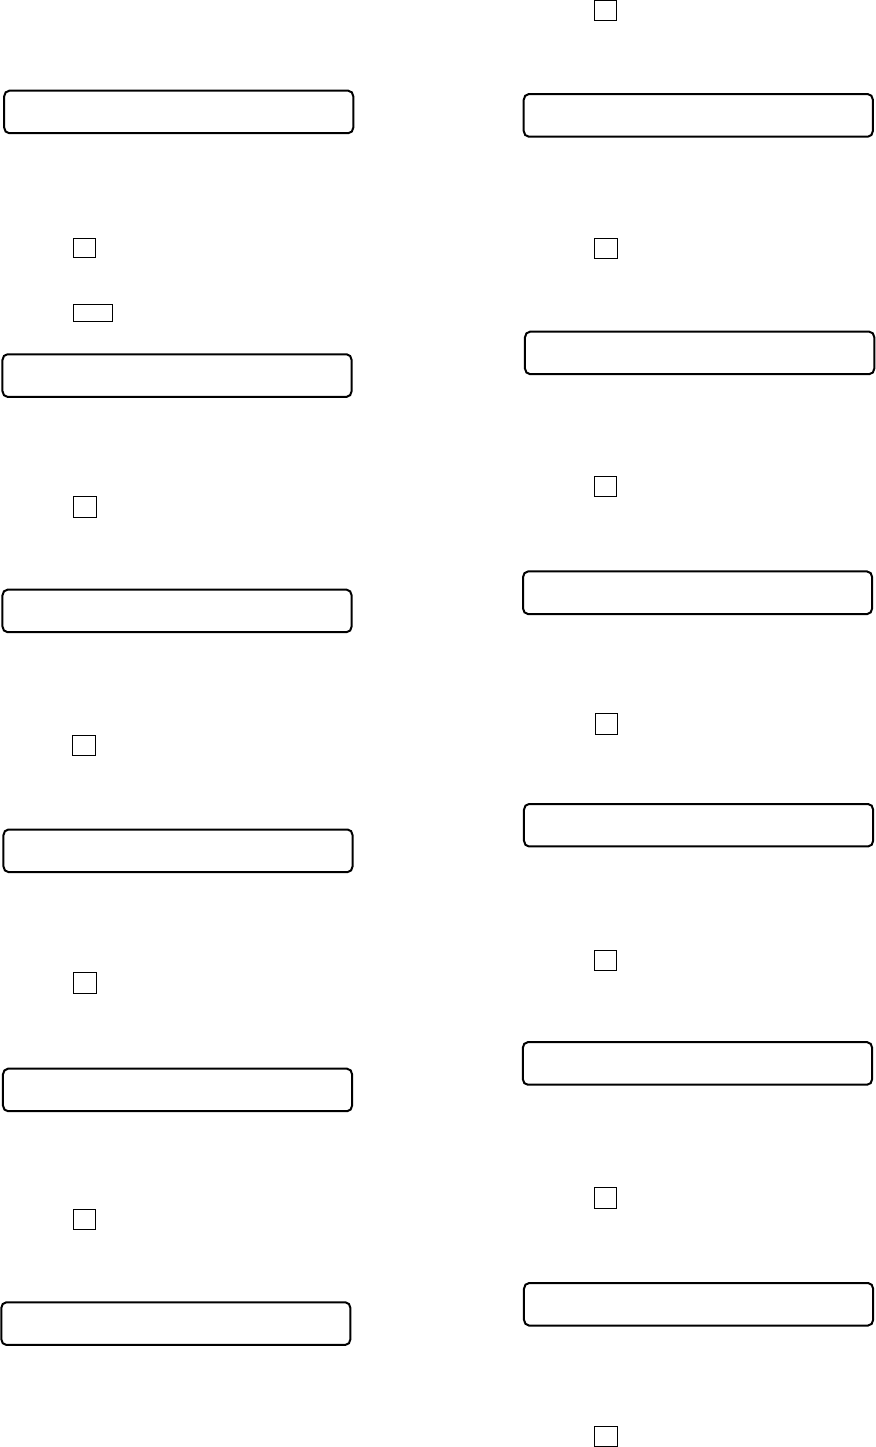
Remote commander LCD display
**
: Adjusted value
V1 dat **
862
Remote commander LCD display
**
: Adjusted value
V2 num **
863
Remote commander LCD display
**
: Adjusted value
V3 dat **
864
Remote commander LCD display
**
: Adjusted value
V3 num **
865
Remote commander LCD display
**
: Adjusted value
V3 dat **
866
Remote commander LCD display
**
: Adjusted value
V4 num **
867
Remote commander LCD display
**
: Adjusted value
V4 dat **
868
Remote commander LCD display
**
: Adjusted value
V5 num **
871
Remote commander LCD display
**
: Adjusted value
V5 dat **
872
Remote commander LCD display
**
: Adjusted value
AbcdGn **
336
Remote commander LCD display
**
: Adjusted value
Dfct 1 **
151
Remote commander LCD display
**
: Adjusted value
V1 num **
861