9
Getting Started
Tip
You can place the components as described below. In
this case, place the components first, then connect the
components.
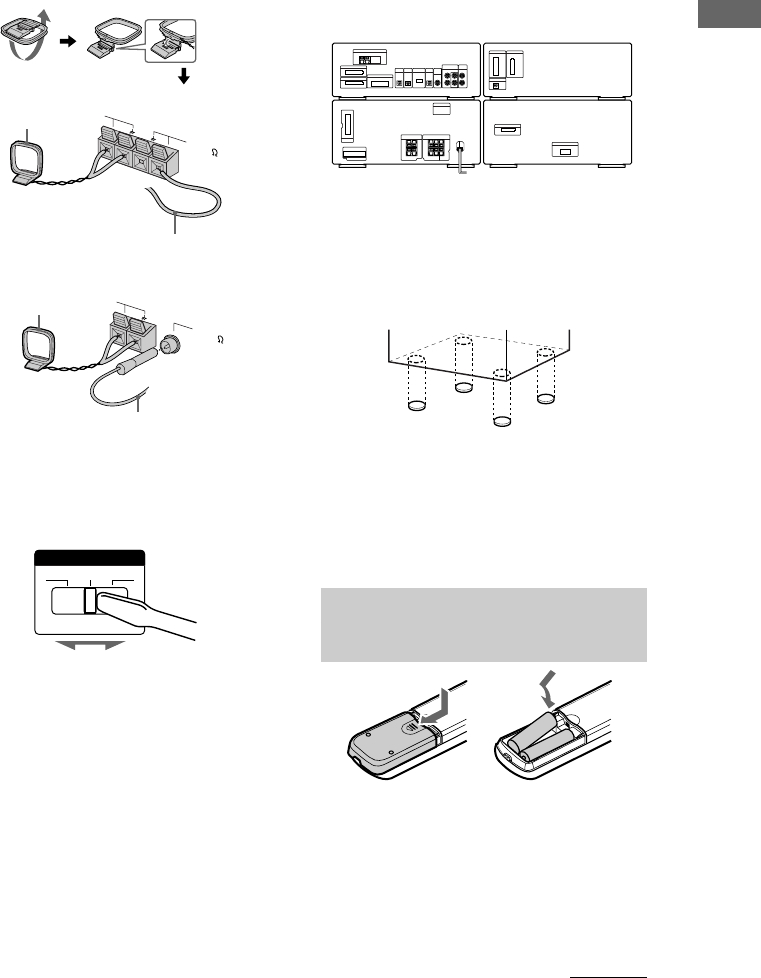
To attack the center and rear
speaker pads
Attach the supplied center and rear speaker
pads to the bottom of the speakers to stabilize
the speakers and prevent them from slipping.
Notes
• Keep the speaker cords away from the antennas to
prevent noise.
• Do not place the rear speakers on top of a TV. This
may cause color distortion in the TV screen.
• Be sure to connect both left and right rear speakers.
Otherwise, the sound will not be heard.
Inserting two size AA (R6)
batteries into the remote
Tip
When the remote no longer operates the system,
replace both batteries with new ones.
Note
If you do not use the remote for a long period of time,
remove the batteries to avoid possible damage from
battery leakage.
FM75
AM
COAXIAL
6 Connect the FM/AM antennas.
Set up the AM loop antenna, then connect
it.
Jack type A
Jack type B
7 For models with a voltage selector, set
VOLTAGE SELECTOR to the position of
your local power line voltage.
8 Connect the power cord to a wall outlet.
The demonstration appears in the display.
When you press ?/1, the system turns on
and the demonstration automatically ends.
If the supplied adaptor on the plug does not
fit your wall outlet, detach it from the plug
(only for models equipped with an adaptor).
]
}
]
}
FM75
AM
Extend the FM lead
antenna horizontally.
AM loop antenna
Extend the FM lead
antenna horizontally.
AM loop antenna
A/V amplifier
Cassette deck
Tuner CD player
VOLTAGE SELECTOR
230-240V
220V 120V
continued


