


Tape – Playback/Tape – Recording
17
US
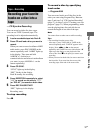
You can record a whole disc into a tape.
You can use TYPE I (normal) tape. The
recording level is adjusted automatically.
1 Load a recordable tape into Deck B.
2 Press CD and load a disc you want to
record.
When you want to record an album of MP3
audio tracks, press PLAY MODE on the
remote repeatedly until “ALBM” lights up
in the display. Then turn and hold
ALBUM +/– clockwise or
counterclockwise and release it at the album
you want (or press ALBUM +/– on the
remote repeatedly).
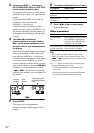
3 Press CD SYNC.
“SYNC” lights up in the display.
“REC” flashes in the display.
Deck B standby for recording.
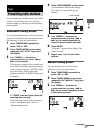
4 Press DIRECTION repeatedly to select
“g” to record on one side or “j”
(or “RELAY”) to record on both sides.
5 Press REC PAUSE/START.
“REC” lights up in the display.
Recording starts.
To stop recording
Press x.
To record a disc by specifying
track order
— Program Edit
You can record tracks on all the discs in the
order you want using Program Play. Between
steps 2 and step 3 of “CD Synchro Recording”
(page 17), do steps 2 to 6 of “Creating your own
program” (page 11). When programming, make
sure the playing times for each side do not
exceed the length of one side of the tape.
Note
You cannot listen to other sources while recording.
Tips
• For recording from the reverse side:
After step 1, press TAPE A/B (or TAPE on the
remote) repeatedly until “TAPE B” appears in the
display. Press nN (or N on the remote)
repeatedly until TAPE B reverse side indicator “b”
lights up in the display to start playback of the
reverse side. Press x at the point you want to start
recording.
• When you record on both sides, be sure to start from
the front side. If you start from the reverse side,
recording stops at the end of the reverse side.
Tape – Recording
Recording your favorite
tracks on a disc into a
tape
— CD Synchro Recording