


1-35
DFS-700/700P
Chapter 3 Basic Operation
3-42
Chapter 3 Basic Operation
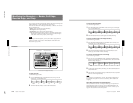
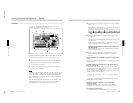
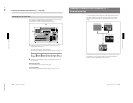
Adjusting the hue range for chroma keying (the “angle” setting)
If there are fluctuations in the background color in the foreground image, it
may not be immediately possible to key the background image into the
whole of the desired background. In this case, you can correct this by
increasing the range of hues (the “angle” setting) used for chroma keying.
(This means using a wider-angled sector of the hue circle.)
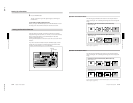
Angle setting (Example: using a blue background color)
•Increasing the angle increases the range of hues replaced by the
background image, including shades of cyan and magenta.
•Decreasing the angle decreases the range of hues replaced by the
background image, restricting it to closely-matching blues.
Note
If the foreground image includes a color close to the “background” color in
a position not intended to be replaced by the background image, then if
you make the hue range too wide this part will also be filled by the
background image (key fill).
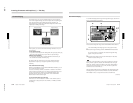
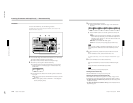
Eliminating bleeding of colors into the edge of the inserted image (color cancel function)
In a chroma key composite image, on the boundary of the inserted image,
the “background” keying color in the foreground image (usually blue)
tends to bleed into the boundary with the background image. In this case,
by replacing the keying color in the composite image by another color (for
example gray), the boundary is made to stand out less. This function is
called “color cancel”.
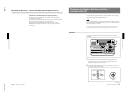
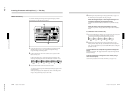
To use the color cancel function, use the following procedure.
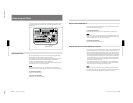
1
In the TITLE section of the menu control section, press the CRK
button, turning it on, and display page 2 of the chroma key menu.
The following example appears when the CRK button in column 1 is
lit.
T1CRK
2/3
COLCAN
ON
Sat
0-100
Hue
0-99
Densty
0-100
FILL
VIDEO
PAGE F1 F2 F3 F4 F5
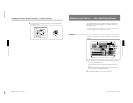
2
In the effect transition section, press the TITLE button, turning it on,
then press the CUT button.
A composite of the foreground and background images appears in the
program monitor.
3
Press the F1(COLCAN) button, setting the parameter to “ON”.
Inserting Characters and Graphics (1) — Title Key
Chapter 3 Basic Operation
Chapter 3 Basic Operation
3-43
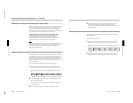
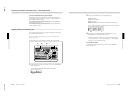
4
Watching the composite image on the program monitor, turn the
F3(Hue) and F2(Sat) knobs, until the boundary between the
background image and foreground image provides a natural match of
hue and saturation.
Creating a composite image with a semi-transparent foreground image (density function)
You can make the inserted image semi-transparent, and insert it into the
background image.
Use the following procedure.
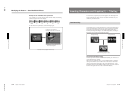
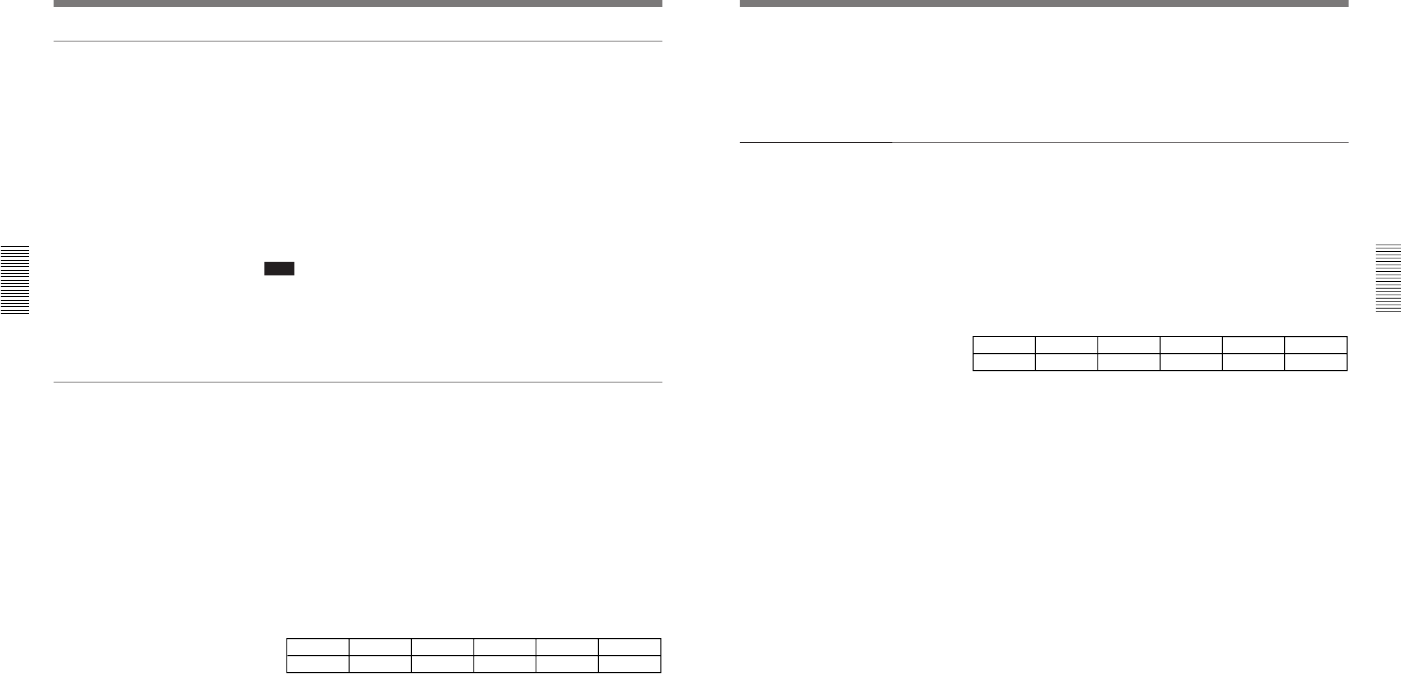
1
In the TITLE section of the menu control section, press the CRK
button, turning it on, to display page 2 of the chroma key menu.
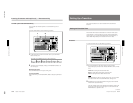
The following example appears when the CRK button in column 1 is
lit.
T1CRK
2/3
COLCAN
ON
Sat
0-100
Hue
0-99
Densty
0-100
FILL
VIDEO
PAGE F1 F2 F3 F4 F5
2
Watching the composite image on the program monitor, turn the
F5(Densty) knob, to adjust the transparency of the inserted image.