


1-32
DFS-700/700P
Chapter 3 Basic Operation
3-36
Chapter 3 Basic Operation
Inserting Characters and Graphics (1) — Title Key
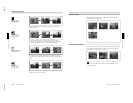
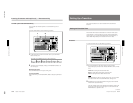
Chroma Keying
In chroma keying, a key signal is created based on a specific reference
color in the foreground image, and used to replace the corresponding parts
of the foreground image by the background image. Normally, the
foreground image is created with a plain blue background, which is then
replaced by the background image.
In this system, you can use either of the following methods to carry out
chroma keying.
•Auto chroma keying
You point the cursor at part of the background, thus specifying the keying
color. This is the quick and easy way to make a composite image.
•Manual chroma keying
You specify the keying color by manual adjustment. This allows you
finer control than with auto chroma keying.
By starting with auto chroma keying, then using manual chroma key
adjustments as required, you can get the optimum composite image
efficiently.
Two-channel chroma keying
With the optional BKDF-711 2nd Channel DME Board installed, you can
use a second chroma key channel.
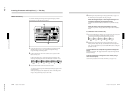
To use two chroma key channels, set both title 1 and title 2 in the TITLE
section of the menu control section. To select the foreground image used
for the second chroma key channel, press the FRGD 2 button in the
delegation section, turning it on, then with one of the AUXILIARY
buttons select the desired video signal.
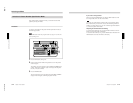
To use a normal effect for a title key
In this case, use one of the buttons in column 1 of the TITLE section to
recall the title 1 setting menu (T1LUM, T1CRK, or T1MSK), and make
the settings.
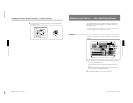
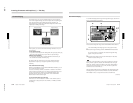
Background image
Foreground image
Composite image formed by chroma
keying (program output)
Chapter 3 Basic Operation
Chapter 3 Basic Operation
3-37
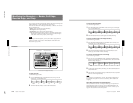
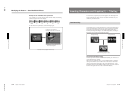
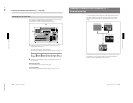
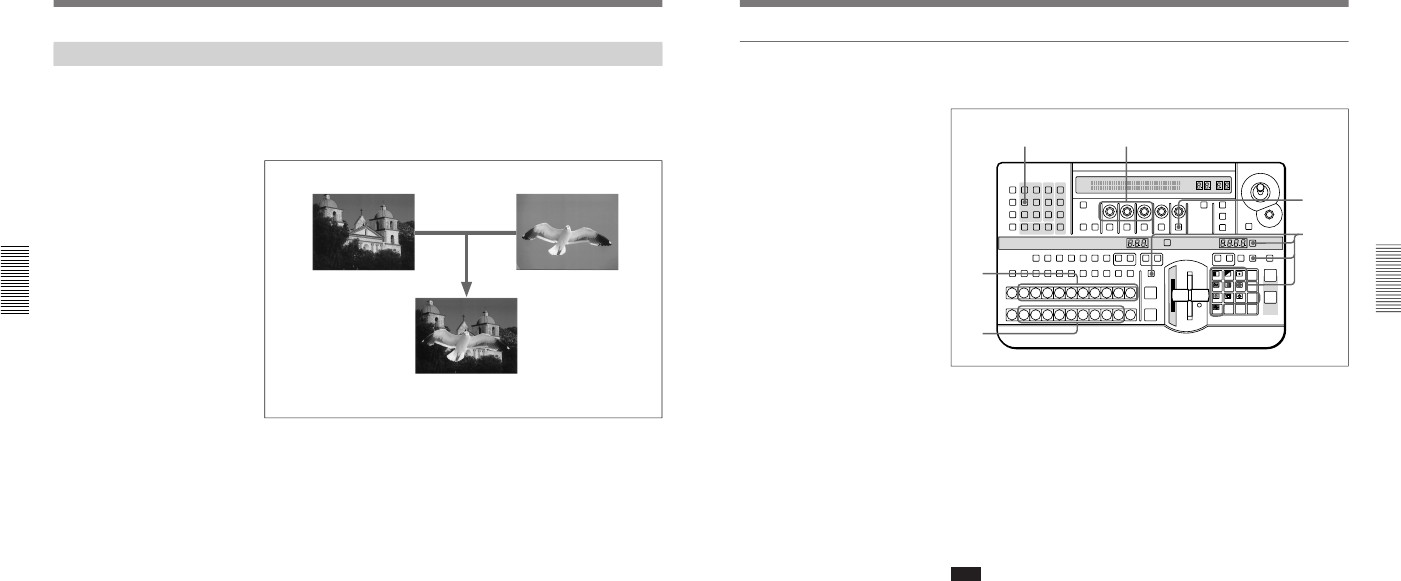
Auto chroma keying
To combine the background image and foreground image by auto chroma
keying, use the following procedure.
1
Select the background image with the BACKGROUND bus buttons.
The selected background image appears on the program monitor.
2
Select the foreground image with the FOREGROUND bus buttons.
If a preview monitor is connected, the selected foreground image
appears in the preview monitor.
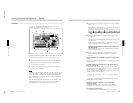
3
Select the effect pattern, and press the TITLE button in the effect
transition section, turning it on.
Note
Depending on the effect pattern, it may not be possible to use chroma
keying. If such a pattern is selected, the TITLE button does not light.
Check the “TITLE” column of the table in the section “Effect Pattern
Variant Forms and Decorations” (page A-22), and select a pattern for
which this shows a check mark (√).
When the TITLE button lights, the N/R button also automatically lights,
indicating that the system is in N/R (normal/reverse) mode. While the
TITLE button is lit, it is not possible to switch out of N/R mode.
LAST X
INS
RST
TITLE
12
EDITOR LUM LUM LUM
DSK EDGE
TRAIL
SHADOW
GPI CRK CRK BORDERBEVELD
EDGE
SET UP MASK MASK MASK SOFT
SHIFT CCR LIGHTING BORDERMATTES
LOCATION
LEARNEDIT
RECALL
HOLD
INPUT
INITIAL
PATTERN
ADJ
PAGE
F1 F2 F3 F4 F5
USER PGM
STATUS EDIT
SNAP SHOT
SET
PATTERN NUMBER
EFFECT
DSK
FTB
SET
TRANS RATE
789
456
123
0
DOWN UP
ENTER
FADE
TO
BLACK
P IN P
DSK
DEL
N/R REV DSK PVWDIRECT
RECALL
DIRECT
PATTERN
CCR TITLE 1
SOURCE
TITLE 2
SOURCE
DSK
FILL
SUPER BGFRGD 2MEMORYFRAME FREEZ MIX EFFECT
BACKGROUND
BLACK MEMORY INT
VIDEO
TITLE
12345678
CUT
AUTO
TRANS
AUXILIARY
BLACK
MEMORY
INT
VIDEO
12345678
FOREGROUND
BLACK
MEMORY
INT
VIDEO
12345678
PATTERN/KEY PAD
3
5,7
64
1
2
(continued)