


13
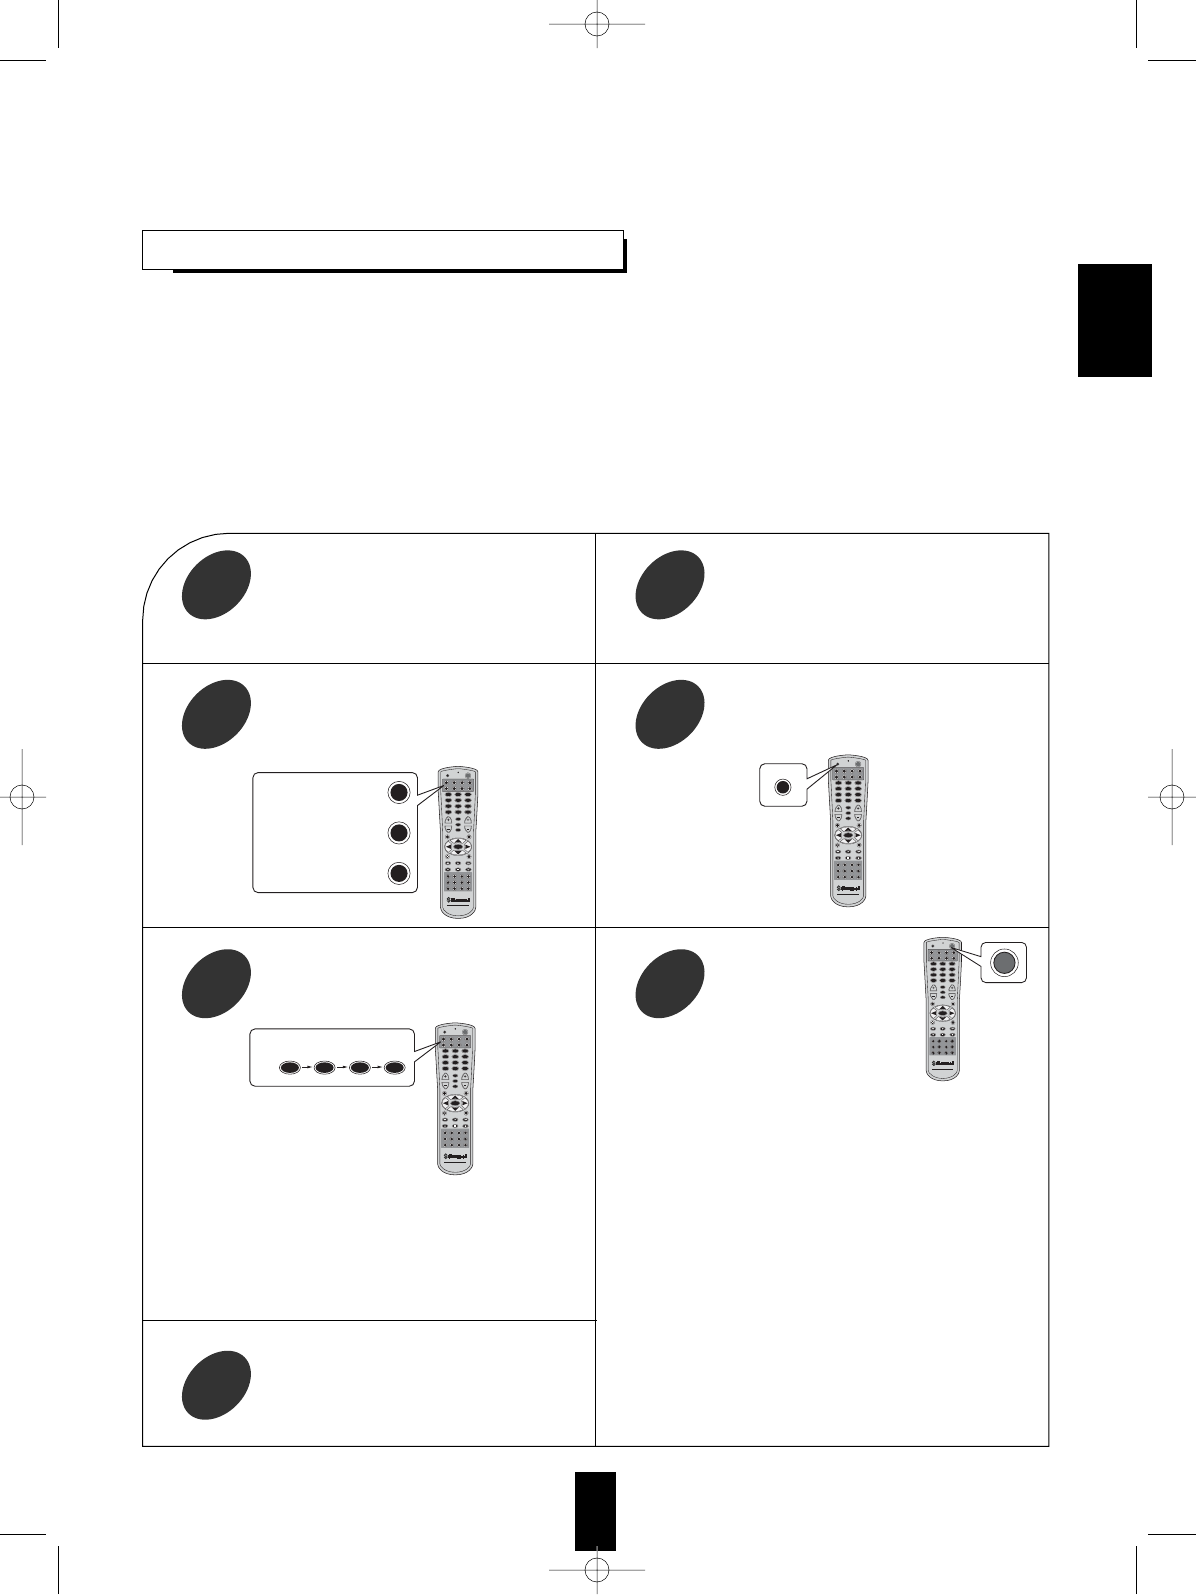
ENTERING A SETUP CODE
Find the setup codes according to the type
and the brand name of your component,
referring to “MANUFACTURER’S
CODES” in the operating manual of this
remote control.
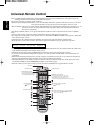
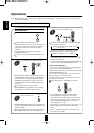
2
Turn on the component you want to
control.
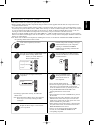
1
Press and hold down the SETUP button
until the LED flickers twice, then release
the SETUP button.
4
Press the corresponding COMPONENT button.
Example) When entering “0005” in the
memory of “AUX” button for
Sherwood MD recorder.
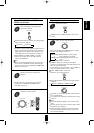
3
Press the POWER button,
aiming the remote control
at the remote sensor on
the component.
6
Enter the first four-digit code for your
component.
5
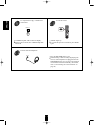
Repeat the above steps 1 to 6 for each of
your components.
7
• This remote control can control up to eight different components.
• Before operating audio and video components using the remote control supplied with this unit, the setup code for each
component must be entered.
• For system remote control operation, because “0001” is stored previously in the memory of the component button “AUD”
as its factory setup code for this receiver, “0004” in the memory of “AUX” for Sherwood tape deck, “1068” in the memory
of “CD” for Sherwood CD player and “0633” in the memory of “DVD” for Sherwood DVD player such as V-756, etc.,
entering its code for each Sherwood component is not necessary except in case that its code does not work.
However, for Sherwood MD recorder such as MD-7900R, etc., “0005” should be stored in the memory of “AUX” button
and for some Sherwood DVD player such as VD-4106, etc., “0591” as a setup code for DVD player should be stored in the
memory of “DVD” button.
Note: These codes for Sherwood components, including this receiver, are not listed in “MANUFACTURER’S CODES” in
the operating manual of this remote control.
• If entering is performed correctly, the LED will
flicker twice.
Note: If the LED did not flicker twice, then repeat the
above steps 3 to 5 and try entering the same
code again.
• Your component will be turned off.
• If it does not respond, repeat the above steps 2 to 5, trying
each code for your component until you find one that
works. If it still does not work, try searching for the code
using “SEARCHING FOR YOUR CODE” in the
operating manual of this remote control.
Notes:
• If the components do not have a POWER button, press the
PLAY button.
• Although each setup code is designed to work with many
different modes, certain codes may not work with some
models.(Also, certain codes may only operate some of the
functions available on a given model.)
• When operating a Sherwood CD player or tape deck using
the system remote control, aim the remote control at the
REMOTE SENSOR on this receiver.
However, in case of Sherwood DVD player and MD
recorder, aim it at the REMOTE SENSOR on the
corresponding component.
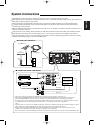
S
E
T
U
P
AUD
SAT
VOL
VID 4
S
E
T
U
P
P.SCAN
VOL
SLEEP
CH LEVL
HOME THEATER MASTER
RNC-30
PWR
ENTER
PHONO CD TUNER
TAPE MON
T2 MONVID SEL VID 2 VID 3
VID 4 AUX ROOM 2SYS DISP
AUD CD DVD AUX
TV VCR CBLSAT
1 2 3
4 5 6
7 8 9
MUTE
0
CH SEL
T.TONE
D.TIME D.ADJ
STEREOAUTO
6.1CH INDSP MODE
OSD
AUD
AUX
CBL
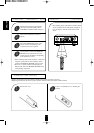
For receiver, amplifier :
For tape deck, MD recorder
:
For cable :
....... .......
S
E
T
U
P
AUD
SAT
VOL
VID 4
S
E
T
U
P
P.SCAN
VOL
SLEEP
CH LEVL
HOME THEATER MASTER
RNC-30
PWR
ENTER
PHONO CD TUNER
TAPE MON
T2 MONVID SEL VID 2 VID 3
VID 4 AUX ROOM 2SYS DISP
AUD CD DVD AUX
TV VCR CBLSAT
1 2 3
4 5 6
7 8 9
MUTE
0
CH SEL
T.TONE
D.TIME D.ADJ
STEREOAUTO
6.1CH INDSP MODE
OSD
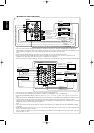
S
E
T
U
P
S
E
T
U
P
AUD
SAT
VOL
VID 4
S
E
T
U
P
P.SCAN
VOL
SLEEP
CH LEVL
HOME THEATER MASTER
RNC-30
PWR
ENTER
PHONO CD TUNER
TAPE MON
T2 MONVID SEL VID 2 VID 3
VID 4 AUX ROOM 2SYS DISP
AUD CD DVD AUX
TV VCR CBLSAT
1 2 3
4 5 6
7 8 9
MUTE
0
CH SEL
T.TONE
D.TIME D.ADJ
STEREOAUTO
6.1CH INDSP MODE
OSD
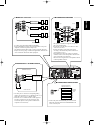
For "0005":
0 0 0 5
S
E
T
U
P
AUD
SAT
VOL
VID 4
S
E
T
U
P
P.SCAN
VOL
SLEEP
CH LEVL
HOME THEATER MASTER
RNC-30
PWR
ENTER
PHONO CD TUNER
TAPE MON
T2 MONVID SEL VID 2 VID 3
VID 4 AUX ROOM 2SYS DISP
AUD CD DVD AUX
TV VCR CBLSAT
1 2 3
4 5 6
7 8 9
MUTE
0
CH SEL
T.TONE
D.TIME D.ADJ
STEREOAUTO
6.1CH IN C.MODEDSP MODE
OSD
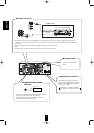
PWR
ENGLISH