


ENGLISH
Universal Remote Control
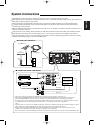
10
S
E
T
U
P
P.SCAN
VOL
SLEEP
CH LEVEL
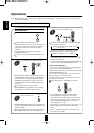
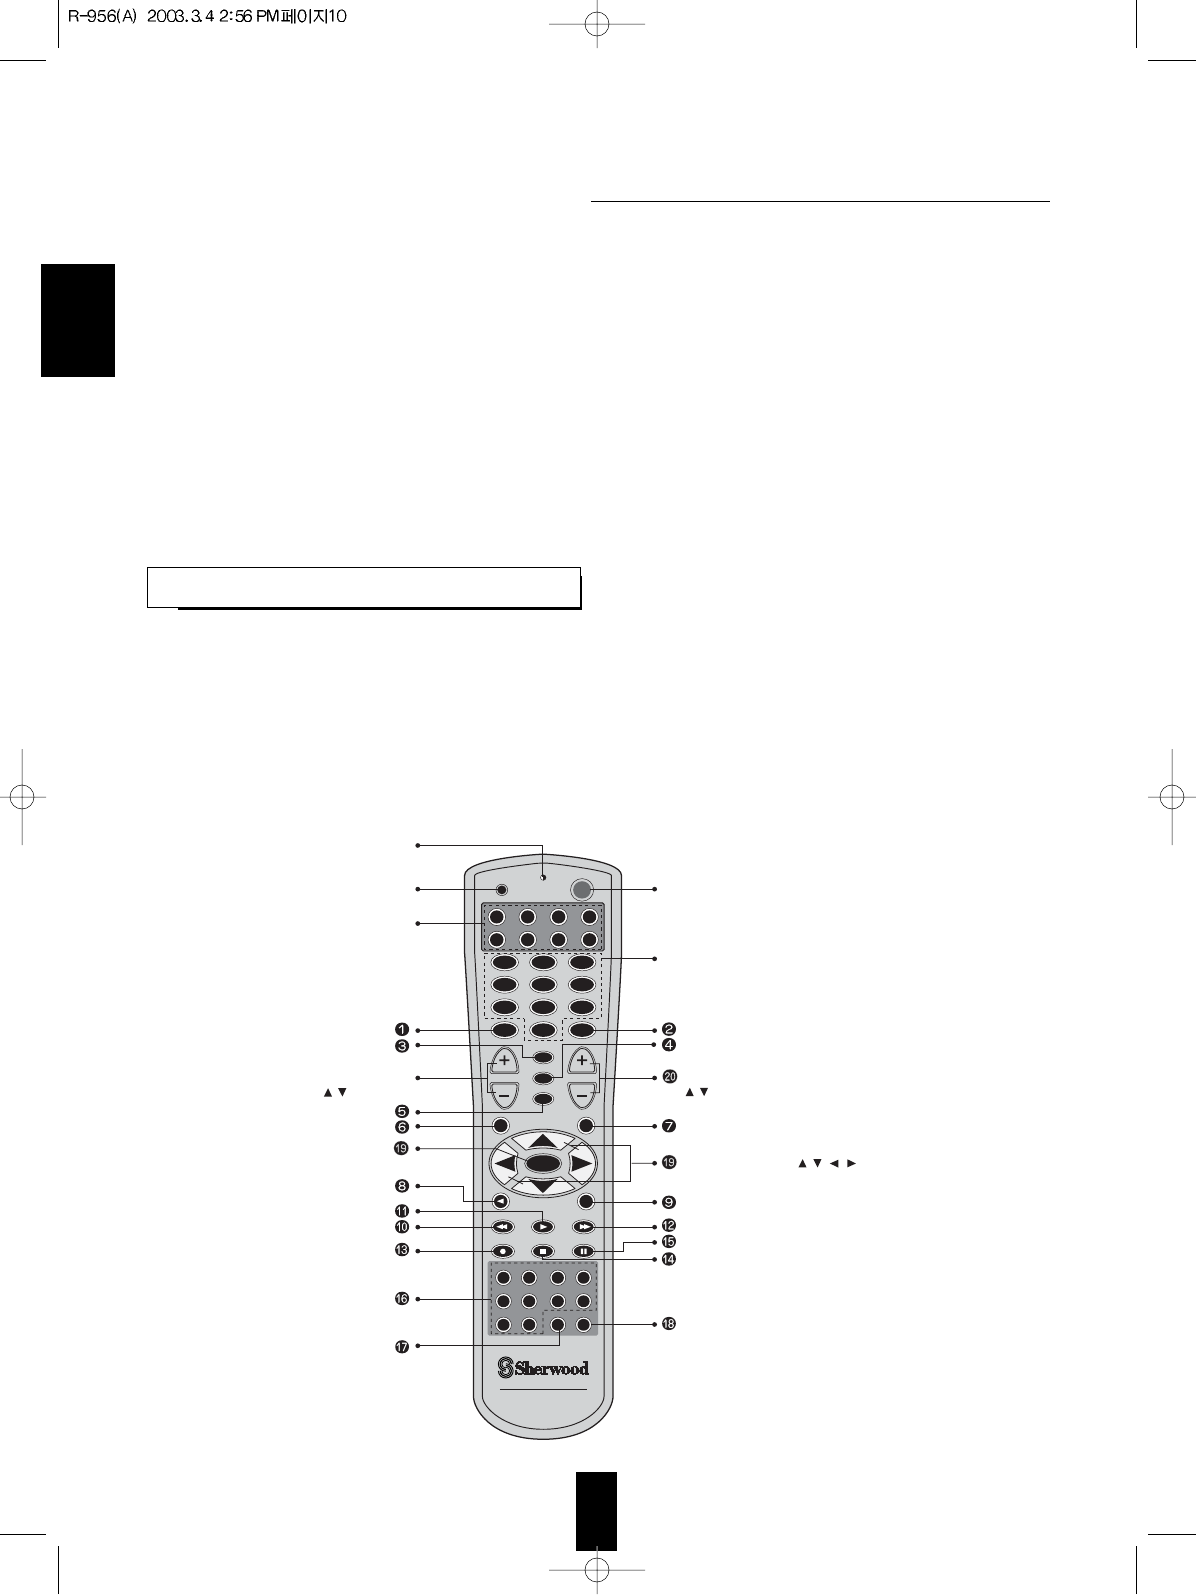
HOME THEATER MASTER
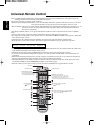
RNC-30
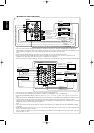
LED LAMP
SETUP BUTTON
VOLUME UP/DOWN
( / ) BUTTONS
ENTER BUTTON
COMPONENT BUTTONS
• To operate the desired component
with this remotecontrol, first select the
corresponding COMPONENT button.
POWER BUTTON
CHANNEL LEVEL UP/DOWN
( / ) BUTTONS
CURSOR CONTROL( , , , ) BUTTONS
• For moving an arrow with the CURSOR CONTROL
buttons in the OSD mode.
NUMERIC(1~0) BUTTONS
• For selecting preset stations in tuner mode.
• For selecting a track or a disc in CD mode, etc.
• When selecting a disc, select disc No. (1~5)
within 2 sec. after pressing DISC(marked "P.SCAN") button.
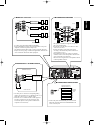
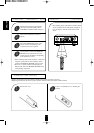
PWR
ENTER
PHONO CD TUNER
TAPE MON
T2 MON VID SEL VID 2 VID 3
VID 4 AUX ROOM 2 SYS DISP
AUD CD DVD AUX
TV VCR CBLSAT
1 2 3
4 5 6
7 8 9
MUTE
0
CH SEL
T.TONE
D.TIME D.ADJ
STEREOAUTO
6.1CH INDSP MODE
OSD
• This section explains the basic functions for the Sherwood and the OSD modes. For the non-Sherwood mode, please refer
to the operating manual that came with the remote control.
• All Sherwood components bearing the DIGI LINK (II or III) logo can be used with this remote control.
• To control associated Sherwood Digi LInk components, you must first make the DIGI LINK connections between the
components.
• With the Sherwood Digi Link III system, pressing a transport control button such as PLAY, on a Sherwood CD player or
tape deck will automatically engage that input on the receiver and then PLAY will start.
• The numbered buttons on the remote control have different functions in different modes. For details, please refer to the
“FUNCTION TABLE for the NUMBERED BUTTONS” on the following page.
• Each time a button on the remote control is pressed, the buttons will illuminate for approximately 5 seconds.
Note: For additional Universal Remote Control programming instructions and manufacturer’s codes, please refer to the
operating manual enclosed with this Universal Remote Control.
This remote control has 3 operating modes as follows;
• OSD (On-Screen Display) Mode: Allows you to see information about basic operation of this unit on your TV or monitor
and to operate this unit by moving an arow(cursor) that appears on the TV screen.
• Sherwood Mode: Allows you to operate this unit and other Sherwood components like cassettte decks, CD players, etc. via
the remote control. (To operate other Sherwood components, please make the Digi Link connections
between the components.)
• Non-Sherwood Mode: Allows you to operate other brands of audio and video components that are remote compatible.
Notes:
• The setup code for each component must be entered before the remote will operate the component.
• For setup codes (manufacturer’s codes), please refer to the “MANUFACTURER’S CODES” in the operator’s manual that
came with the remote control.
• The buttons may have different functions depending upon the chosen component and the operating mode.
• Please be sure to set the remote control to the correct component mode before trying to operate any component.
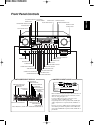
DIGI LINK SYSTEM REMOTE