


E-5
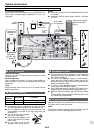
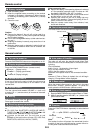
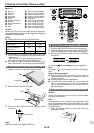
■ Battery installation
1
Open the battery cover.
2 Insert the supplied battery according to the terminal
indicated in the battery compartment. When inserting
or removing the battery, push it towards the (–) battery
terminals.
3 Close the cover.
Caution:
● Remove the battery if the unit will not be used for a
long period of time. This will prevent potential damage
due to battery leakage.
● Do not use rechargeable battery (nickel-cadmium bat-
tery, etc.).
● Installing the battery incorrectly may cause the unit to
malfunction.
● Batteries (battery pack or batteries installed) shall not
be exposed to excessive heat such as sunshine, re
or the like.
Notes concerning use:
● Replace the battery if the operating distance is reduced
or if the operation becomes erratic. Purchase an “AA”
size battery (UM/SUM-3, R6, HP-7 or similar).
● Periodically clean the transmitter on the remote control
and the sensor on the unit with a soft cloth.
● Exposing the sensor on the unit to strong light may
interfere with operation. Change the lighting or the di-
rection of the unit if this occurs.
● Keep the remote control away from moisture, heat,
shock and vibrations.
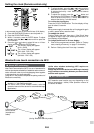
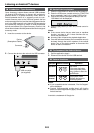
■ Test of the remote control
The remote control can be used within the range shown below:
Remote sensor
0.2 m - 6 m
(8” - 20’ )
Remote control
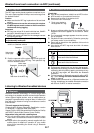
■ To turn the power on
Press the ON/STAND-BY button to turn the power on or off.
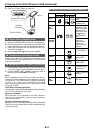
■ Display brightness control
Press the DEMO/DIMMER button (remote control).
Dimmer 1
Dimmer 2
Dimmer off
(Display is dim).
(Display is bright).
(Display gets dimmer).
■ Volume auto fade-in
If you turn off and on the main unit with the volume set to
27 or higher, the volume starts at 16 and fades in to the
last set level.
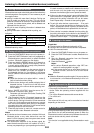
■ Volume control
Turn the volume knob towards VOLUME +/– (main unit)
or press VOL +/– (remote control) to increase or decrease
the volume.
■ Muting
To mute the volume, press the button (remote control).
Press again to restore the volume.
■ Direct key power on function
When you press any of the following buttons, the unit turns
on.
● CD, USB, iPod, BLUETOOTH, AUDIO/LINE (INPUT),
TUNER, iPod
/ , CD/USB / , BLUETOOTH / on the
remote control: Selected function is activated.
● / button on the main unit: The unit turns on and
playback of the last function will start (CD, USB, iPod,
BLUETOOTH, AUDIO IN, LINE IN, TUNER)
■ Auto power off function
The main unit will enter the stand-by mode (when iPad,
iPod or iPhone is not connected) after 15 minutes of inactiv-
ity during:
iPod: Not docked.
Audio / Line In : No detection of input signal.
CD: In the stop mode or no disc.
USB: In the stop mode or no media.
Bluetooth: In the pause mode on not connected condition.
Note:
However, if iPod or iPhone is docked, the unit will begin
charging. “Charge Mode” will be displayed.
■ X-Bass control
When the power is rst turned on, the unit is in the extra
bass mode. “X-BASS” indicator appears. To cancel this
mode, press the X-BASS button (remote control).
■ Bass or Treble control
1
Press the BASS/TREBLE button to select “Bass” or “Treble”.
2 Within 5 seconds, press the VOLUME (+ or –) button to ad-
just the bass or treble.
- 5 ↔ - 4
........
↔ + 4 ↔ + 5
- 5
↔
- 4
........
↔ +
4
↔ +
5
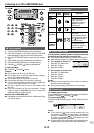
■ Function
Press the FUNCTION button repeatedly to select desired
function.
CD FM MONOFM STEREO
USB
Line In
Audio In
iPod
Bluetooth
Note:
The backup function will protect the memorised function
mode for a few hours should there be a power failure or
the AC power lead becomes disconnected.
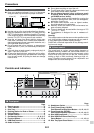
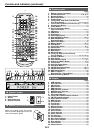
General control