


9
1
7
6
5
4
3
2
1
9
2011 January 27
HT-SB600
E-19
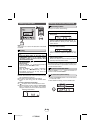
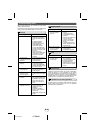
By setting the unit to the correct time, you can use it not
only as a clock but also for timer.
In this example, the clock is set for the 12-hour (AM 12:00)
display.
To confirm the time display:
Press the CLOCK button. The time display will appear for
about 5 seconds.
Note:
“ADJUST” will appear or time will be displayed if the
CLOCK button is pressed when the AC power supply is
restored after a power failure or unplugging the unit. If
incorrect, readjust the clock as follows.
To readjust the clock:
Perform “Setting the clock” from step 1. If “ADJUST” does
not appear, step 2 (for selecting the 12-hour or 24-hour
display) will be skipped.
To change the 12-hour or 24-hour display:
1. Clear all the programmed contents. [Refer to “Factory
reset, clearing all memory” on page 22 for details.]
2. Perform “Setting the clock” from step 1 onwards.
You can use the unit as an alarm clock by setting the timer.
Before setting timer:
1. Set the unit to the correct time (page 19).
If it is not set, you cannot use the timer function.
2. Prepare the sound source for playback.
3. Store radio stations (page 18).
Caution:
This unit cannot set the timer of other equipment.
To perform the timer playback using other equipment, you
should also set the timer on the equipment separately.
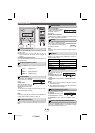
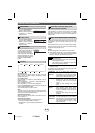
1 Press the CLOCK button. If clock is not set
“ADJUST” will blink. Within 5 seconds, press the
ENTER button.
2 Press the or button to select 12-hour or
24-hour display and then press the ENTER button.
3 Press the or
button to adjust the
hour and then press the
ENTER button.
● Press the or button once to advance the time
by 1 hour. Hold it down to advance continuously.
● When the 12-hour display is selected, “AM” will
change automatically to “PM”.
4 Press the
or
button
to adjust the minutes
and then press the
ENTER button.
● Press the or button once to advance the time by
1 minute. Hold it down to advance continuously (5
minutes interval).
● The hour will not advance even if minutes advance
from “59” to “00”.
● The clock starts from “0” second (seconds are not
displayed).
● The time display disappears after approx. 5 seconds.
Setting the clock (Remote Control only)
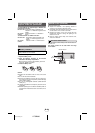
“AM 12:00”
“AM 0:00
”
“0:00”
The 12-hour display will appea
r
(AM 12:00 - PM 11:59)
The 12-hour display will appea
r
(AM 0:00 - PM 11:59)
The 24-hour display will appear
(0:00 - 23:59)
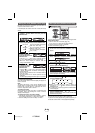
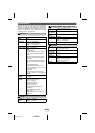
1 Turn the power on and press the TIMER button.
Set the unit to the correct time if “STANDBY” does not
appear.
2 Within 10 seconds, press the or button to
select “TIMER SET”, and press the ENTER button.
3 Press the or button to adjust the hour and
then press the ENTER button.
4 Press the or button to adjust the minutes
and then press the ENTER button.
The start time is set and the finish time (1 hour later)
will be displayed automatically.
5 Set the time to finish as in steps 3 and 4.
6 Switch input with the or buttons, and then
press the ENTER button.
● When you select the tuner, select a station by
pressing the or button, and then press the
ENTER button.
● If a station has not been programmed, “NOPRESET”
will be displayed.
7 Adjust the volume with the or button and
press the ENTER button.
Settings are displayed in order, and the unit will enter
the timer stand-by mode.
Timer operation (Remote Control only)
Setting the timer
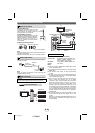
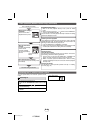
VOLVOL
TV
SUBWOOFER LEVEL
PRESET
PRESET
CENTER LEVEL
HDMI 3 TV ARCHDMI 2 DIGITAL 1
DIGITAL 2
HDMI 1
LINE 2 LINE 1TUNER