


Installation
16 Lightstyle™ Series LS-100d Installation/Operation Manual
PRE
L
IMINAR
Y
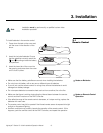
Rear Projection The LS-100d cannot be used in rear-projection applications.
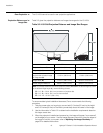
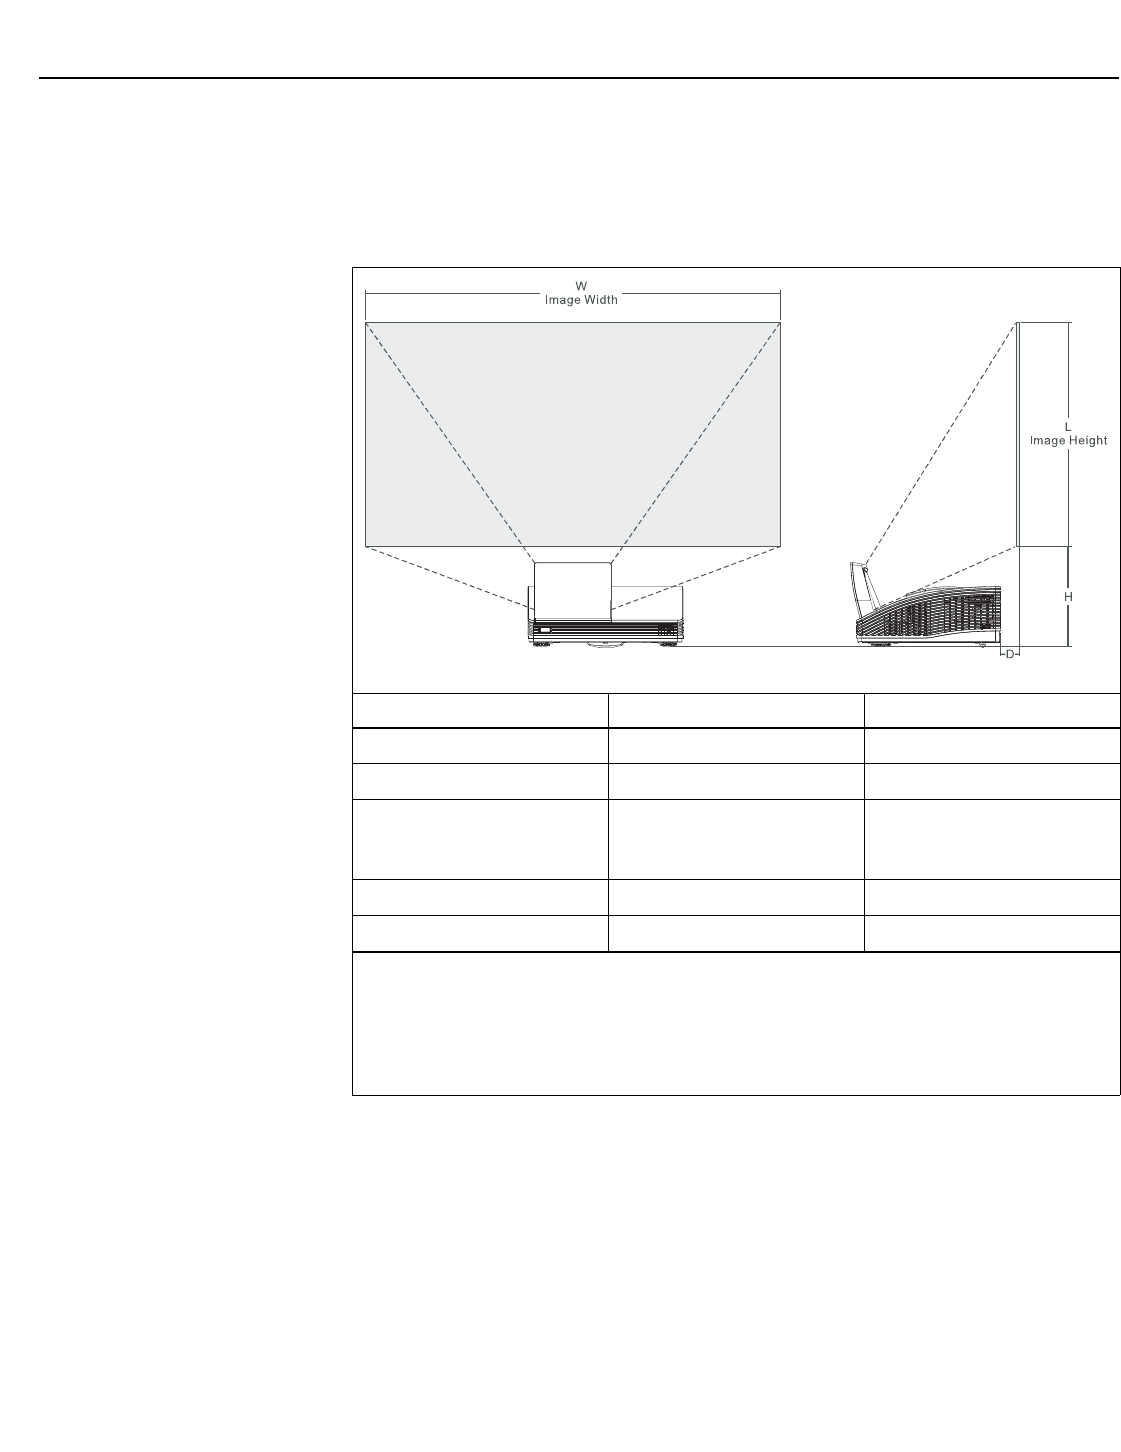
Projection Distance and
Image Size
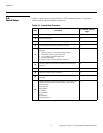
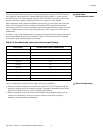
Table 3-2 gives the projection distance and image size ranges for the LS-100d.
To accommodate typical installation tolerances, Runco recommends the following
procedure:
1. Take the screen size you're going to use and add 2.0 inches (50 mm) to the height
and 3.56 inches (89 mm) to the width symmetrically about the center of the image.
2. Use the information in Table 3-2 to determine the installation requirements based on
this larger screen size.
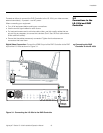
3. When the projector is installed and powered on, the image will appear "over-scanned"
on the edges of your screen. Use the Image Alignment controls to bring the edges of
the image in line with your screen; refer to Adjusting the Image Geometry on
page 32 for detailed instructions.
➤
➤
Table 3-2. LS-100d Projection Distance and Image Size Ranges
Minimum Maximum
Projection Distance (D)
0.28 in. (7.2 mm) 1.87 in. (47.6 mm)
Image Height (L)
43.44 in. (1103.3 mm) 48.56 in. (1233.5 mm)
Distance from bottom of
projector feet to bottom edge
of image area (H)
15.55in. (395.0mm) 17.08in. (434.0mm)
Image Width (W)
77.22 in. (1961.4 mm) 86.33 in. (2193.0 mm)
Screen Diagonal Measure
88.50 in. (2247.9 mm) 99.00 in. (2514.6 mm)
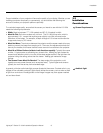
Note: To precisely determine the correct projector location (H and D in the above diagram), based
on the desired image height (L), use the following formula:
H = 0.3 * L + 2.54 in. (64.5 mm) to bottom of projector feet
H = 0.3 * L + 2.00 in. (50.7 mm) to mount bosses
D = 0.31 * L - 13.19 in. (335.1 mm)