7
Before You Install
Automotive audio equipment installations can be challenging at times, even to the most
experienced of installation technicians. If you are not condent working with electrical
wiring, removing and reinstalling interior panels, carpeting, dashboards or other compo-
nents of your vehicle, please call our toll-free help line 1-800-445-1797 and our in-house
technical service team will answer your installation questions. Contact the vehicle's
manufacturer for vehicle specic instructions, or consider having the VRVD630 profes-
sionally installed.
IMPORTANT:
Remove the two transport screws from the top of the
unit before installing.
• Before nal installation of the unit, connect the wiring temporarily,
making sure the unit and the system work properly.
• Use only the parts included with unit to ensure proper installation.
The use of unauthorized parts can cause malfunctions.
• Consult with your vehicle’s nearest dealership if installation re-
quires the drilling of holes or other modications of the vehicle.
•
Install the unit where it does not get in the driver’s way and cannot in-
jure the passenger if there is a sudden stop, like an emergency stop.
• The laser will be damaged if it overheats, so don’t install the unit
anywhere hot--for instance, near a heater outlet.
• If installation angle exceeds 30 from horizontal, the unit might not
give its optimum performance.
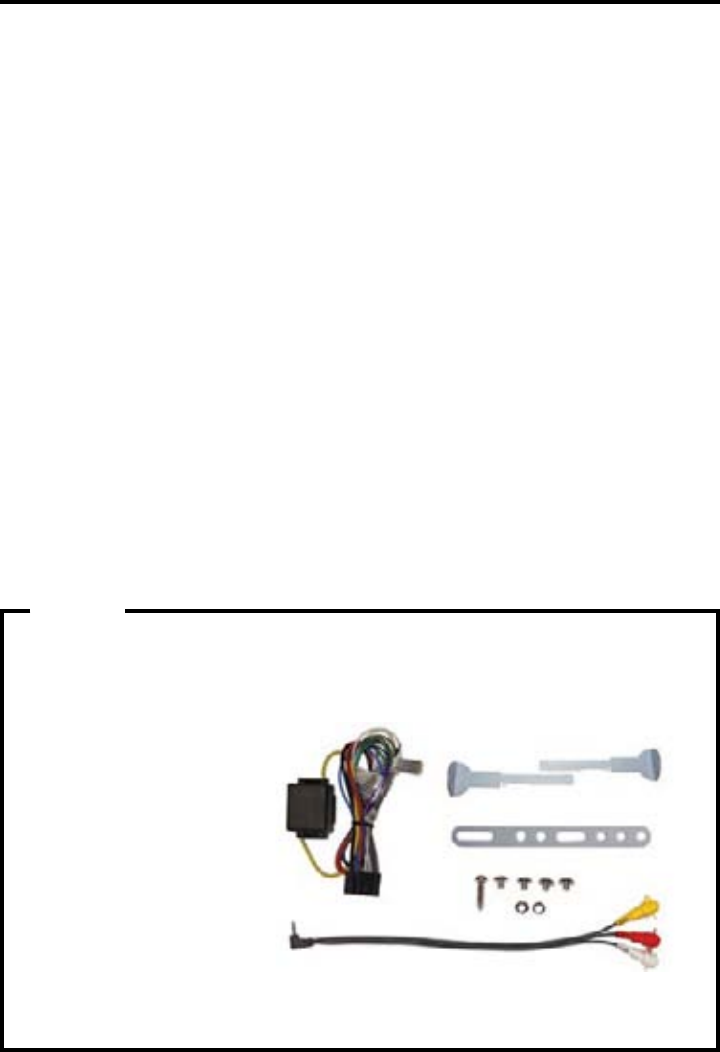
PARTS
Check All Included Parts Before You Start
Open the VRVD630 box and remove all parts, then check all parts and compare them to
the parts list. For replacement parts contact VR3 Customer Service at customerservice@
vr-3.com or call 1-800-445-1797.
2 - Keys
1 - Wiring Harness
1 - Lock Washer
4 - Screws
1 - Sheet Metal Screw
1 - Hex Nut
1 - Metal Support Strap
1 -
1/8" to RCA Audio/Video Cable
NOT SHOWN
1 - Remote Control
1 - Mounting Sleeve
1 - Faceplate Case
1 - Trim Bezel


