


The system and the other setup
11
90
En
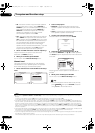
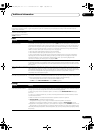
Power ON Level Setup
The volume can be set so that it is always set to the same
level when the receiver’s power is turned on.
1 Select ‘
Power ON Level Setup
’ from the
Other
Setup
menu.
2 Select the
Power ON Level
setting you want.
• LAST – When the power is turned on, the volume is
set to the same level as when the power was last
turned off.
•“---” – When the power is turned on, the volume is set
to minimum level.
• –80.0dB to +12.0dB – Specify the volume to be set
when the power is tur ned, in steps of 0.5 dB.
It is not possible to set a volume level greater than the
value specified at Volume Limit Setup.
3 When you’re finished, press
RETURN
.
You will return to the Other Setup menu.
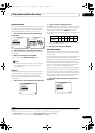
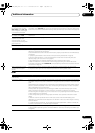
Volume Limit Setup
Use this function to limit the maximum volume. The
volume cannot be increased above the level set here,
even by operating MASTER VOLUME button (or the dial
on the front panel).
1 Select ‘
Volume Limit Setup
’ from the
Other Setup
menu.
2 Select the Volume Limit setting you want.
• OFF – The maximum volume is not limited.
• –20.0dB/–10.0dB/0.0dB – The maximum volume is
limited to the value set her e.
3 When you’re finished, press
RETURN
.
You will return to the Other Setup menu.
Remote Control Mode Setup
• Default setting: 1
This sets this receiver’s remote control mode to prevent
erroneous operation when multiple units of the receiver
are being used.
1
1 Select ‘
Remote Control Mode Setup
’ from the
Other Setup
menu.
2 Select the
Remote Control Mode
setting you want.
3 Select “
OK
” to change the remote control mode.
4 Follow the instructions on the screen to change the
remote control’s setting.
See Operating multiple receivers on page 67.
5 When you’re finished, press
RETURN
.
You will return to the Other Setup menu.
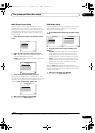
Flicker Reduction Setup
• Default setting: 4
The GUI screen’s resolution can be increased. If you feel
the GUI screen is hard to see, try changing this setting.
Note that the resolution in this setting only affects the
GUI screen; it has no influence on the video output.
1 Select ‘
Flicker Reduction Setup
’ from the
Other
Setup
menu.
2 Select the Flicker Reduction setting you want.
3 When you’re finished, press
RETURN
.
You will return to the Other Setup menu.
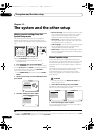
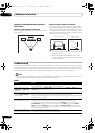
4d.Other Setup
A/V RECEIVER
Exit Return
3. ZONE Audio Setup
4. Power ON Level Setup
5. Volume Limit Setup
6.
Remote Control Mode Setup
7.
Flicker Reduction Setup
2. Multi Ch In Setup
1. KURO LINK Setup
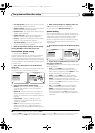
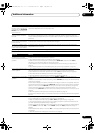
4d4.Power ON Level Setup
A/V RECEIVER
Exit Finish
Power ON Level : LAST
4d.Other Setup
A/V RECEIVER
Exit Return
3. ZONE Audio Setup
4. Power ON Level Setup
5. Volume Limit Setup
6.
Remote Control Mode Setup
7.
Flicker Reduction Setup
2. Multi Ch In Setup
1. KURO LINK Setup
4d5.Volume Limit Setup
A/V RECEIVER
Exit Finish
Volume Limit : OFF
Note
1 If you change this receiver’s setting, also change the setting on the remote control.
4d.Other Setup
A/V RECEIVER
Exit Return
3. ZONE Audio Setup
4. Power ON Level Setup
5. Volume Limit Setup
6.
Remote Control Mode Setup
7.
Flicker Reduction Setup
2. Multi Ch In Setup
1. KURO LINK Setup
4d6.Remote Control Mode Setup
A/V RECEIVER
Exit Cancel
Remote Control Mode : 1
OK
4d.Other Setup
A/V RECEIVER
Exit Return
3. ZONE Audio Setup
4. Power ON Level Setup
5. Volume Limit Setup
6.
Remote Control Mode Setup
7.
Flicker Reduction Setup
2. Multi Ch In Setup
1. KURO LINK Setup
4d7.Flicker Reduction Setup
A/V RECEIVER
Exit Finish
Flicker Reduction : 4
VSX-LX52_SVYXJ.book 90 ページ 2009年2月26日 木曜日 午後4時31分