


The system and the other setup
11
88
En
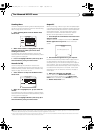
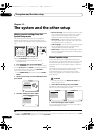
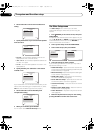
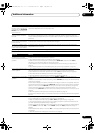
2 Select either
ON
or
OFF
for
THX Loudness Plus
setting.
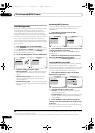
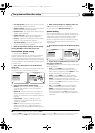
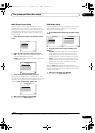
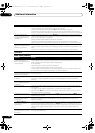
3 Specify the distance of your surround back speakers
from each other.
• 0–0.3 m – Surround back speakers within 30 cm
apart (best for THX surround sound).
• >0.3– 1.2 m – Surround back speakers between 30
cm and 1.2 m apart.
• 1.2 m< – Surround back speakers more than 1.2 m
apart (default).
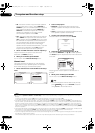
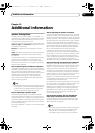
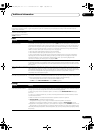
4 Specify whether your subwoofer is THX Select2
certified or not.
If your subwoofer isn’t THX Select2 certified, but you still
want to switch boundary gain compensation on, select
YES here, but the effect might not work properly.
5 Select either
ON
or
OFF
for Boundary Gain
Compensation setting.
6 When you’re finished, press
RETURN
.
You will return to the Manual SP Setup menu.
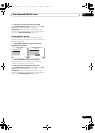
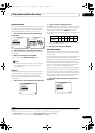
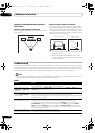
The Other Setup menu
The Other Setup menu is where you can make
customized settings to reflect how you are using the
receiver.
1 Press on the remote control, then press
HOME MENU
.
A Graphical User Interface (GUI) screen appears on your
TV. Use /// and ENTER to navigate through the
screens and select menu items. Press RETURN to
confirm and exit the current menu.
2 Select ‘
System Setup
’ from the
HOME MENU
.
3 Select ‘
Other Setup
’, then press
ENTER
.
4 Select the setting you want to adjust.
If you are doing this for the first time, you may want to
adjust these settings in order:
• KURO LINK Setup – Synchronizes this receiver with
your Pioneer component supporting KURO LINK (see
KURO LINK Setup on page 58).
• Multi Ch In Setup –
Specifies the optional settings for
a multi-channel input
(page 89)
.
• ZONE Audio Setup – Specifies the volume setting
for a MULTI-ZONE setup (page 89).
• Power ON Level Setup – Specifies the volume level
set when the power is turned on (page 90).
• Volume Limit Setup – Limits the maximum volume
(page 90).
• Remote Control Mode Setup – Sets this receiver’s
remote control mode (page 90).
• Flicker Reduction – Adjusts the way the GUI screen
looks (page 90).
5 Make the adjustments necessary for each setting,
pressing
RETURN
to confirm after each screen.
A/V RECEIVER
Exit Finish
Loudness Plus : ON
SB SP Position : 1.2 m<
BGC : OFF
THX Select2 SW : YES
4a6.THX Audio Setting
A/V RECEIVER
Exit Finish
4a6.THX Audio Setting
Loudness Plus : ON
SB SP Position : 1.2 m<
BGC : OFF
THX Select2 SW : YES
A/V RECEIVER
Exit Finish
4a6.THX Audio Setting
Loudness Plus : ON
SB SP Position : 1.2 m<
BGC : OFF
THX Select2 SW : YES
Loudness Plus : ON
SB SP Position : 1.2 m<
BGC : OFF
THX Select2 SW : YES
A/V RECEIVER
Exit Finish
4a6.THX Audio Setting
RECEIVER
A/V RECEIVER
Exit Return
a.Manual SP Setup
b. Input Setup
c. OSD Language
d. Other Setup
4.SystemSetup
2. Multi Ch In Setup
3. ZONE Audio Setup
4. Power ON Level Setup
5. Volume Limit Setup
6.
Remote Control Mode Setup
7.
Flicker Reduction Setup
1. KURO LINK Setup
4d.Other Setup
A/V RECEIVER
Exit Return
VSX-LX52_SVYXJ.book 88 ページ 2009年2月26日 木曜日 午後4時31分