


The System Setup menu
07
46
En
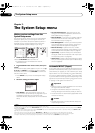
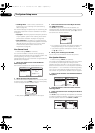
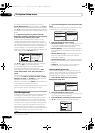
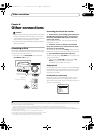
This appears according to the setting you chose in
Reverb Measurement (step 3 on page 45). Use / to
select the channel and the frequency you want to check.
Use / to go back and forth between the two. Note that
the markers on the vertical axis indicate decibels in 2 dB
steps.
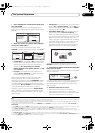
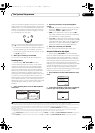
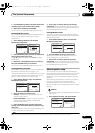
5If ‘
Advanced EQ Setup
’ is selected, enter the
desired time setting for calibration. Press
to proceed
to the next screen, and then select
START
.
Based on the reverb measurement above, you can
choose the time period that will be used for the final
frequency adjustment and calibration. Even though you
can make this setting without reverb measurement, it is
best to use the measurement results as a reference for
your time setting. For an optimal system calibration
based on the direct sound coming from the speakers, we
recommend using the 30~50ms setting.
Use / to select the channel, frequency, and time
setting. Use / to switch between them.
You can switch between your connected speakers
(excluding the subwoofer), and display the
measurements for the following frequencies: 63Hz,
125Hz, 250Hz, 500Hz, 1kHz, 2kHz, 4kHz, 8kHz and
16kHz.
Select the setting from the following time periods (in
milliseconds): 0~20ms, 10~30ms, 20~40ms, 30~50ms,
40~60ms, 50~70ms and 60~80ms. This setting will be
applied to all channels during calibration.
When you’re finished, select START. It will take about 2
to 4 minutes for the calibration to finish.
After the Acoustic Calibration Equalization is set, you are
given the option to check the settings on-screen.
Data Management
This system allows you to store up to six MCACC presets,
allowing you to calibrate your system for different
listening positions (or frequency adjustments for the
same listening position).
1
This is useful for alternate
settings to match the kind of source you’re listening to
and where you’re sitting (for example, watching movies
from a sofa, or playing a video game close to the TV).
From this menu you can check your current settings,
copy from one preset to another, name presets for easier
identification and clear any ones you don’t need.
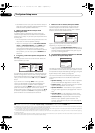
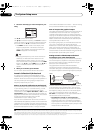
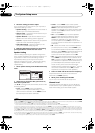
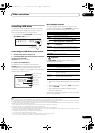
1 Select ‘
Data Management
’ from the System Setup
menu.
See Making receiver settings from the System Setup menu
on page 38 if you’re not already at this screen.
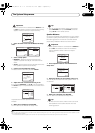
2 Select the setting you want to adjust.
• MCACC Data Check – Checks the settings for any of
your MCACC presets using the on-screen display
(see Checking MCACC preset data below).
• Memory Rename – Names your MCACC presets for
easy identification (see Renaming MCACC presets on
page 47).
• MCACC Memory Copy – Copies settings from one
MCACC preset to another (see Copying MCACC
preset data on page 47).
• MCACC Memory Clear – Clears any MCACC presets
that you don’t want (see Clearing MCACC presets on
page 47).
• Output PC – See Connecting a PC for Advanced
MCACC output on page 62 for more on this.
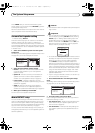
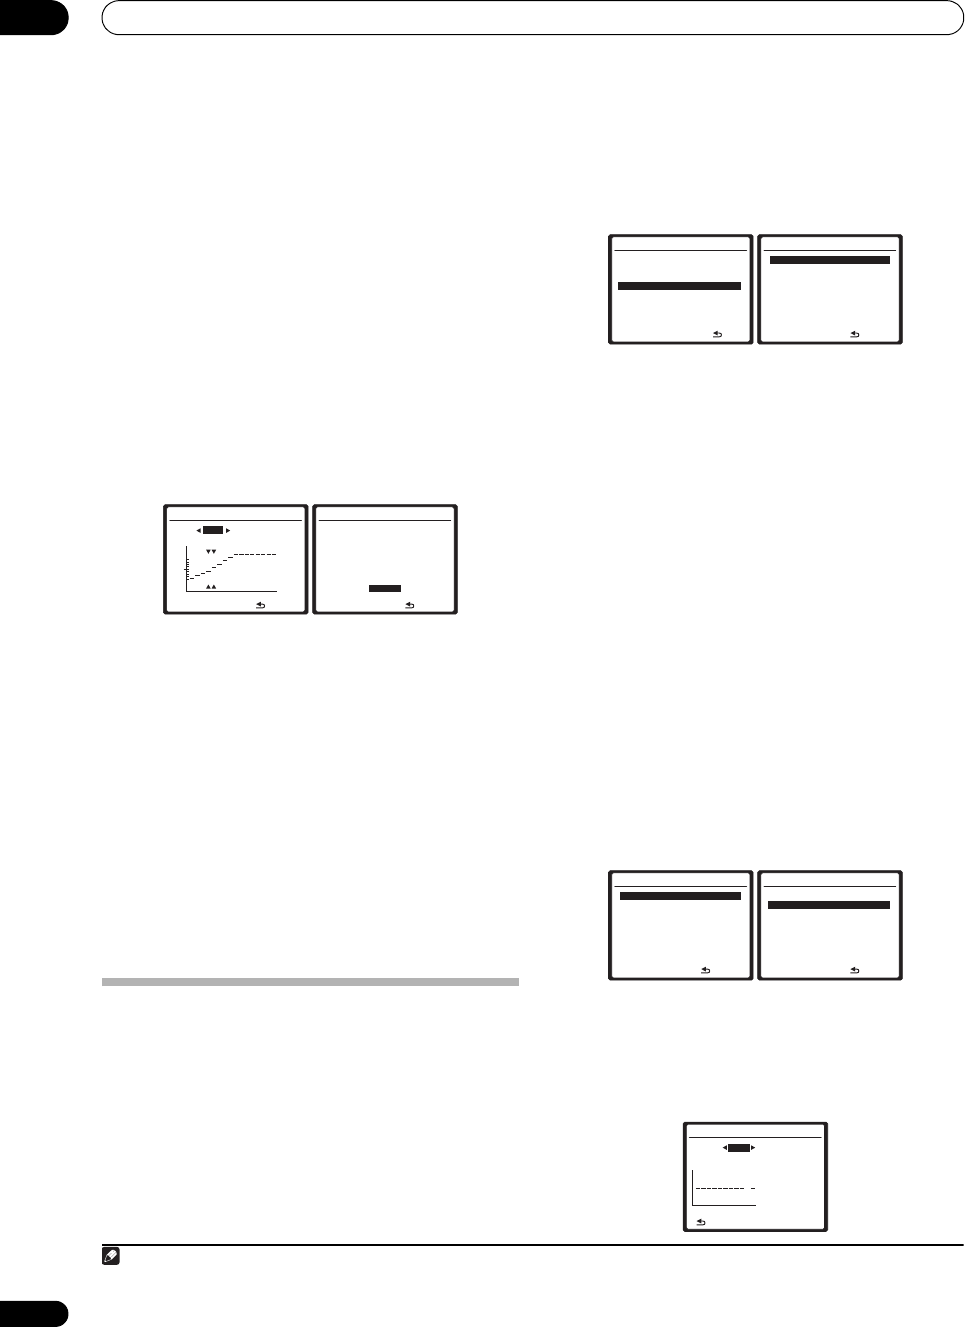
Checking MCACC preset data
After you have completed Automatically setting up for
surround sound (Auto MCACC) on page 9 or Automatic
MCACC (Expert) on page 38, you can check your
calibrated settings using the on-screen display.
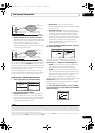
1 Select ‘
MCACC Data Check
’ from the Data
Management setup menu.
2 Select the setting you want to check.
• It is useful to do this while a source is playing so you
can compare the different settings.
3 Select the MCACC preset that you want to check.
Use / if necessary to switch speakers/settings.
Note
1 This can be done in Automatically setting up for surround sound (Auto MCACC) on page 9 or Automatic MCACC (Expert) on page 38, either of which you
should have already completed.
3e3.Adv. EQ Setup (1/2)
Ch L Fq [ 125Hz ]
L Tm [ 30-50ms ]
:Cancel
0 80 160ms
dB
3e3.Adv. EQ Setup (2/2)
MCACC : M1.MEMORY 1
EQ Type [ SYMMETRY ]
Stand Wave Multi - Point
[ YES ]
Place the mic at your
2nd reference point.
[ START ]
ENTER:Start
:Cancel
System Setup MENU
:Exit
1 . Auto MCACC
2 . Surround Back System
3 . Manual MCACC
4 . Data Management
5 . Manual SP Setup
6 . Input Setup
7 . Other Setup
4.Data Management
:Return
a . MCACC Data Check
b . Memory Rename
c . MCACC Memory Copy
d . MCACC Memory Clear
e . Output PC
4.Data Management
:Return
a . MCACC Data Check
b . Memory Rename
c . MCACC Memory Copy
d . MCACC Memory Clear
e . Output PC
4a.MCACC Data Check
:Return
1 . Speaker Setting
2 . Channel Level
3 . Speaker Distance
4 . Standing Wave
5 . Acoustic Cal EQ
ENTER:Next
4a5.EQ Data Check
63
125
250
500
1k
2k
4k
8k
16k
TRM
dB
MCACC M1 63Hz 0.0
Ch [SBL] 125Hz 0.0
250Hz 0.0
500Hz 0.0
1kHz 0.0
2kHz 0.0
4kHz 0.0
8kHz 0.0
16kHz 0.0
:Return
TRIM 0.0
VSX-LX51_HY.book 46 ページ 2008年4月16日 水曜日 午後4時39分