Speaker Setup Guide
01
5
En
English
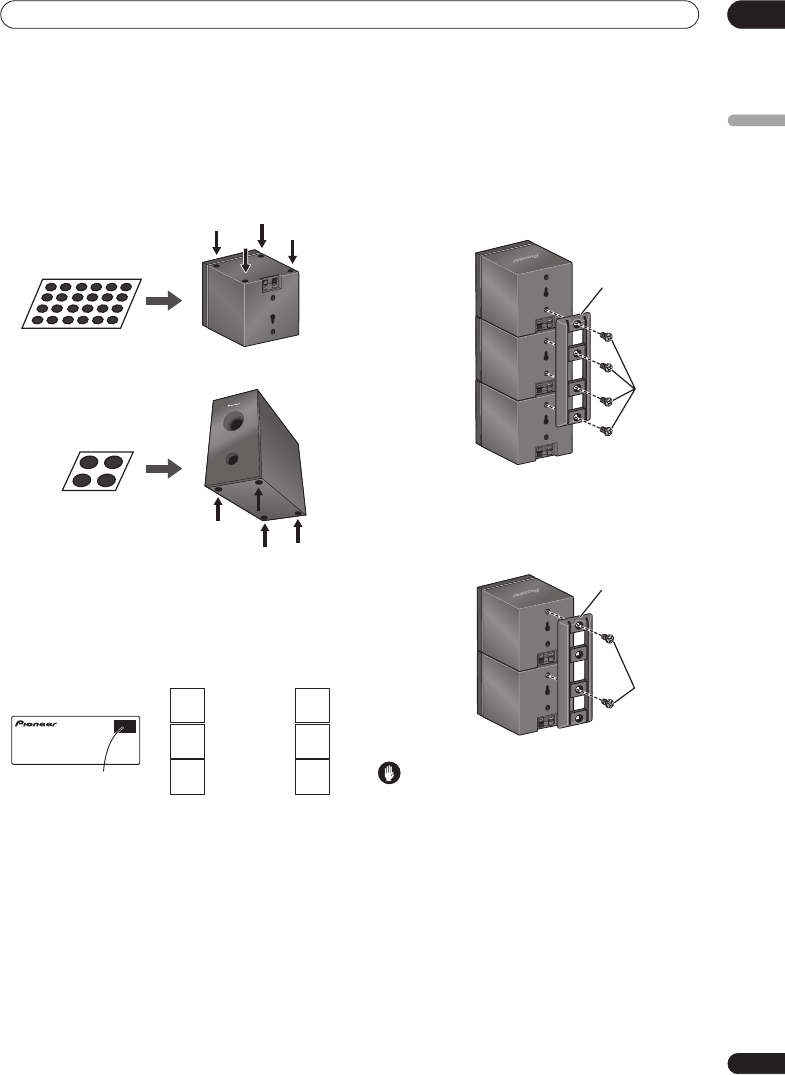
1 Attach the smaller non-skid pads to the base of
each of the front, center and surround speakers. The
four large non-skid pads are for the receiver
subwoofer (as shown).
Use the adhesive side of the pads to attach them to the
base (flat surface) of each speaker.
2 Stack the speakers and fix with the brackets.
Each speaker is provided with a color-coded indicator on
the model label on the rear side to assist identification.
Refer to the color indicators and install the speakers
correctly.
As shown in the illustration, stack the speakers from the
bottom up in the order front speaker, center speaker,
surround speaker. Align the bracket with the respective
upper screw hole on the back of the front speaker, the
two screw holes on the center speaker, and the bottom
screw hole on the surround speaker, and fasten the
screws securely.
When placing the center speakers independently, stack
the front speaker on the bottom and the surround
speaker on top, then align the 1st and 3rd screw holes
from the top of the bracket with the upper screw holes on
the back of the speakers, and fasten the two securely.
Caution
• Do not attempt to carry the speakers when they are
connected with the bracket. Doing so may cause
damage to the bracket or worsen damage to the
bracket and speakers in the event they are dropped.
3 Connect the speaker system.
Refer to
Connecting up
to connect the speakers properly.
After connecting everything, place the speakers as
shown in the diagram above for optimal surround sound.
After placing the speakers, run the Auto MCACC setup
(page 15) to complete your surround sound setup.
Front, Center and Surround speakers
Non-skid pads
(small) x 24
Receiver subwoofer
Non-skid pads
(large) x 4
Front speaker
Color indicator
Model label
Center speaker
Surround speaker
Left
Blue
White
Green
Gray
Red
Green
Right
Surround speaker
Bracket
Screw
Center speaker
Front speaker
Bracket
Screw
Surround speaker
Front speaker
HTP-330.book 5ページ 2007年3月27日 火曜日 午後6時8分


