


17
LTC 2600 Series Section 3 Operation
3.1Guide to Multiplexer Operation
Operating the LTC 2600 Series Video Multiplexer requires a general knowledge of basic and combined operating
modes as described in this section. Basic operating modes are: LIVE (Display), RECORD, and PLAYBACK. Duplex
multiplexer models provide combinations of the basic modes (e.g. simultaneous recording plus playback).
When operating access is a concern, the multiplexer's security lockout feature can be enabled. Three levels of
access are provided as described at the end of this section.
3.2 Live (Display)
Live camera pictures can be displayed on monitors A and B.
Monitor A is the main functional monitor and can be displayed in FULL , QUAD , MULTI . All alarm, action,
and video loss warnings are displayed on this monitor.
Monitor B Under normal operating modes, Monitor B will display the selected camera in full screen or sequencing
only. When an alarm or action input is detected, the corresponding camera picture with the flashing Alarm/Action
indicator will be displayed on Monitor B for the programmed dwell time. When multiple alarms or actions occur,
camera pictures will be sequenced on Monitor B at the two second dwell time.
For LTC 2672 and LTC 2682 series (System4 Duplex) Only: Multiscreen display modes can be displayed on
both Monitors (A and B).All alarm action and video loss warnings are displayed on both monitors.The alarm/action
callup will occur only when monitor B is in full screen mode.
Displaying Live Camera Pictures
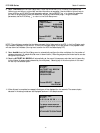
Full Screen Display: Shows one camera, full screen on one monitor. Press the FULL SCREEN key on the
front panel, and then press the appropriate camera number key for the camera you wish to be displayed.
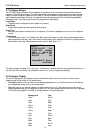
Quad Screen Display: Divides the screen into four separate areas. Press the QUAD key once to enable the
feature. Press the key repeatedly to toggle through different viewing configurations. Pressing
ALT, then SEQ will sequence through all quad screens.
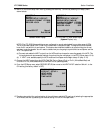
Multiscreen Display: Enabling this feature shows different multiscreen configuration.
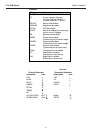
6 channel: 5+1
9 channel: 4+3, 3X3
16 channel: 4+3, 8+2, 12+1, 3X3, and 4X4
Press the MULTI key repeatedly to toggle through the different selections. (When the MULTI key is pressed
and the multiplexer is already in the multiscreen mode, the screen display advances to the next type of multiscreen
display.)
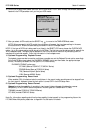
Cameo Mode: When in MULTI or QUAD modes, the screen area where a camera is displayed is called a
CAMEO. Note that the numbered front panel keys can refer to either cameras or cameos. Press the CAMEO key
to toggle the operation of these keys to the cameo function. (The CAMEO LED is illuminated when the
multiplexer is in the CAMEO mode.) Press the CAMEO key again to revert to the camera function.
Cameras can be assigned to any selected cameo and can be changed as often as required. This can be done by one
of the following:
• Assigning all cameras: Press the ALT key .The ALT LED will flash, then press the SELECT key . The
first cameo will be selected and show a flashing camera title. By pressing the desired camera key, that camera
will be assigned to the cameo, and the next cameo is automatically selected (shown by the flashing camera
titles). Again press the selected camera key, this is assigned and the process repeated until all cameos have been
assigned a camera. Press the ALT key to exit.
• Individual assignments: In the MULTI or QUAD mode, the Camera keys are assigned as Cameo keys
automatically. Select relevant cameo key, 1 to 16. The relevant cameo is selected. Press the CAMEO key .
The cameo keys revert back to selecting cameras. Press camera key to assign the selected camera to cameo.
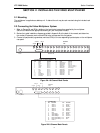
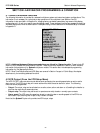
SECTION 3: OPERATING THE LTC 2600 SERIES VIDEO
MULTIPLEXER