12 EN
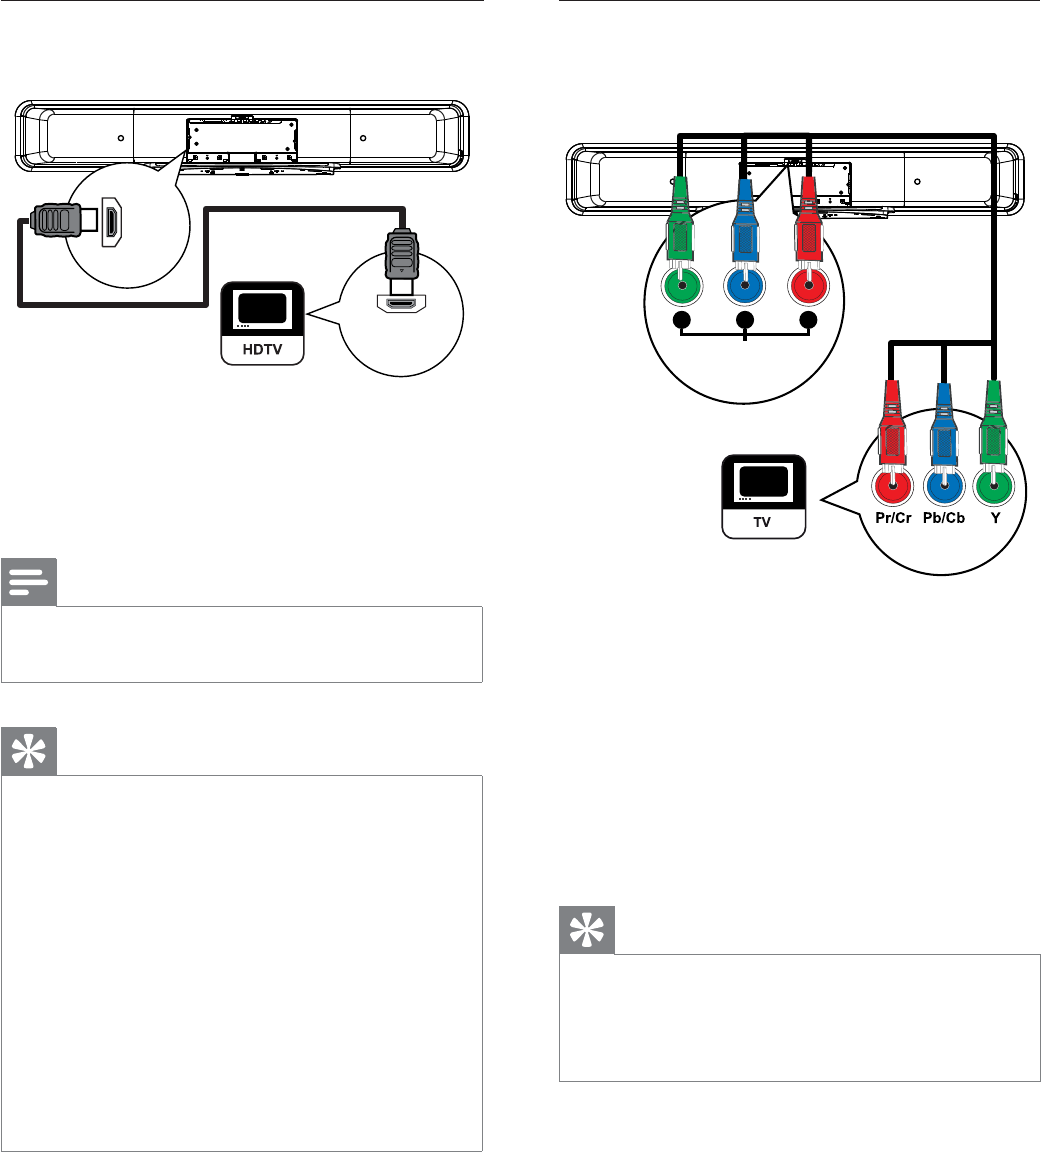
Option 1: Connect to HDMI socket
HDMI IN
HDMI
OUT
1 Connect a HDMI cable (supplied) from the
HDMI OUT on this unit to the HDMI IN
socket on your TV.
Note
The HDMI connector is only compatible with HDMI •
compliant TVs and DVI-TVs.
Tips
To optimise the video output, see chapter ‘Adjust •
settings’ > [ Video Setup ] > [ Advanced Picture ]
for details.
This unit is HDMI CEC compatible. It enables
•
connected TV/device to control each other over
HDMI, see chapter ‘Activate EasyLink control’ for
details.
Use a HDMI/DVI adaptor in case your TV has only
•
a DVI connection. An extra audio connection is
needed to complete this connection.
To route the audio from your TV to this DVD Home
•
Theatre unit, connect an audio cable from the audio
input on this unit to the audio output on your TV.
This type of connections provide best picture quality.
•
Option 2: Connect to component
video socket
COMPONENT
VIDEO OUT
PrPbY
1 Connect the component video cables (not
supplied) from the Y P
B PR sockets on this
unit to the component video input sockets
on your TV.
If a progressive scan TV is used, you •
may turn on the progressive scan mode
(see chapter ‘Turn on Progressive Scan’
for details).
Tips
The component video input socket on your TV may •
be labelled as Y Pb/Cb Pr/Cr or YUV.
This type of connections provide good picture
•
quality.
1_hts8141_98_eng 4_final_with dock.indd 12 7/30/2009 4:44:54 PM


