24
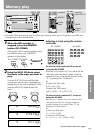
Recording
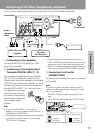
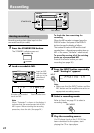
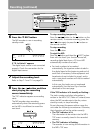
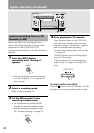
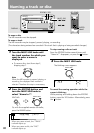
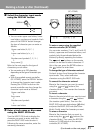
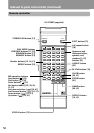
1 Press the STANDBY/ON button.
The STANDBY indicator goes out.
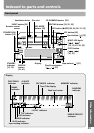
2 Load a recordable MD.
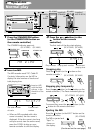
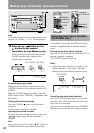
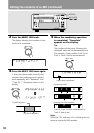
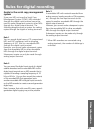
To check the time remaining for
recording
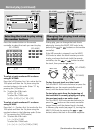
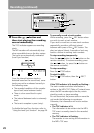
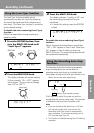
When the MD recorder is stopped, press the
DISPLAY button. Each press of the DISPLAY
button changes the display as follows:
The number of tracks on MD and the total
recorded time → Remaining recording time on
MD → Disc name (“No Name” when not set)
To record by erasing all of the existing
tracks on a prerecorded MD
Erase all the tracks before you start
recording (see page 36).
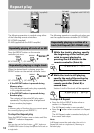
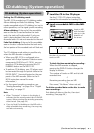
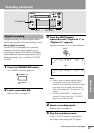
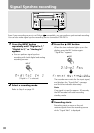
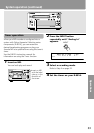
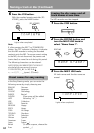
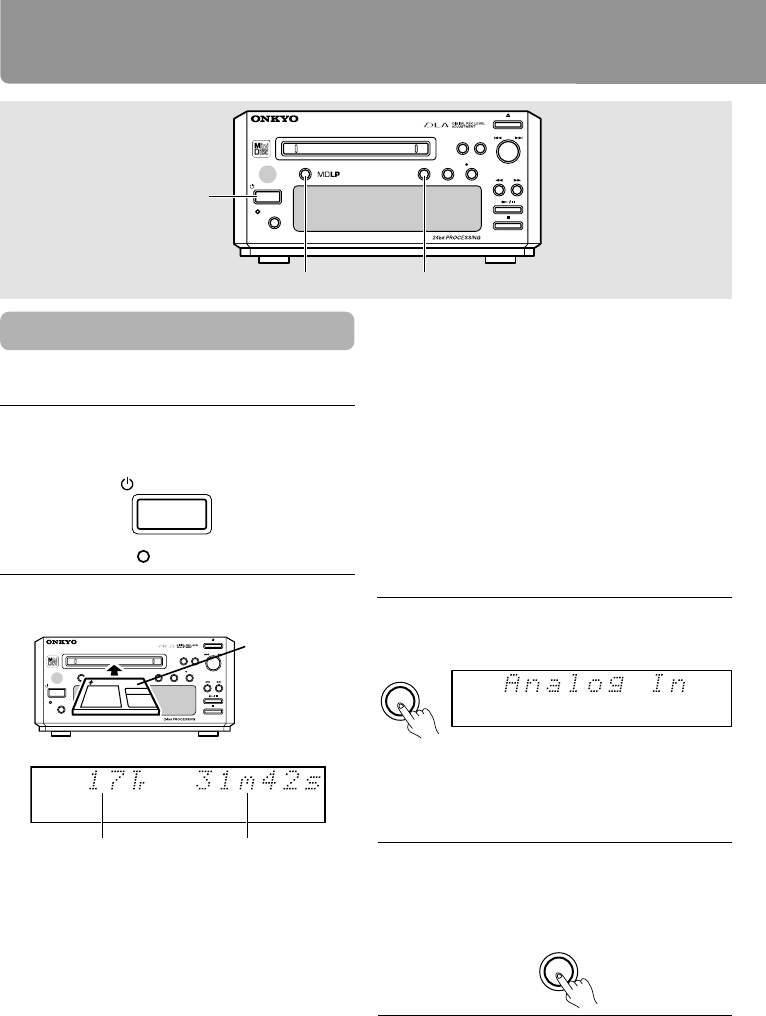
3
Press the INPUT button repeatedly
until “Analog In” appears.
Note
When “Protected” is shown in the display, it
indicates that the record-protect tab of the
MD is open. Before starting the recording
procedure, close the tab. (See page 34.)
Total recorded time
Number of recorded
tracks on MD
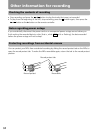
Analog recording
Recording analog data (data input via the
connected audio pin cable)
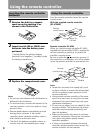
STANDBY
/
ON
STANDBY
MINIDISC
RECORDER
DISC LOADIING MECHANISM
DISPLAY
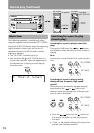
MD
-
101
A
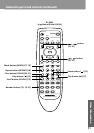
STANDBY
/
ON
STANDBY
CD
DUBBING
PUSH TO
ENTER
MULTI JOG
EDIT
/
NO YES
REC
REC MODEINPUT
STANDBY/ON
REC MODE
INPUT
MINIDISC
RECORDER
DISC LOADIING MECHANISM
DISPLAY
MD
-
101A
STANDBY
/
ON
STANDBY
CD
DUBBING
PUSH TO
ENTER
MULTI JOG
EDIT
/
NOYES
REC
REC MODEINPUT
INPUT
ANALOG IN
Note
• Make sure that the INPUT button and the
REC button on the amplifier are set to an
appropriate recording source.
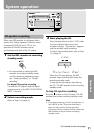
4 Select a recording mode.
Refer to Step 4 on page 22 to select a
recording mode.
5 Play the recording source.
If a CD player (such as the C-701A) has
been connected to the system, start
playing the CD or tape player.
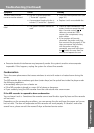
Insert an MD
with the label
side up, in the
direction of
the arrow.