45
En
IntelliVolume
■IntelliVolume
`–12dB to 0dB
to +12dB in 1 dB steps.
With IntelliVolume, you can set the input level for each
input selector individually. This is useful if one of your
source components is louder or quieter than the others.
Use / to set the level.
If a component is noticeably louder than the others, use
to reduce its input level. If it’s noticeably quieter, use to
increase its input level.
Note
• IntelliVolume does not apply for Zone 2.
A/V Sync
■A/V Sync
`0ms
to 200ms in 10 ms steps.
When using your DVD player’s progressive scanning
function, you may find that the picture and sound are out
of sync. With the A/V Sync setting, you can correct this
by applying a delay to the audio signal.
To view the TV picture while setting the delay, press
ENTER.
To return to the previous screen, press RETURN.
If HDMI Lip Sync is enabled (➔ 49) and your TV or dis-
play supports HDMI Lip Sync, the displayed delay time
will be the summation of the A/V Sync delay time and the
HDMI Lip Sync delay time. The HDMI Lip Sync delay
time is displayed underneath in parentheses.
Note
• A/V Sync is disabled when the Direct listening mode is used
with an analog input source.
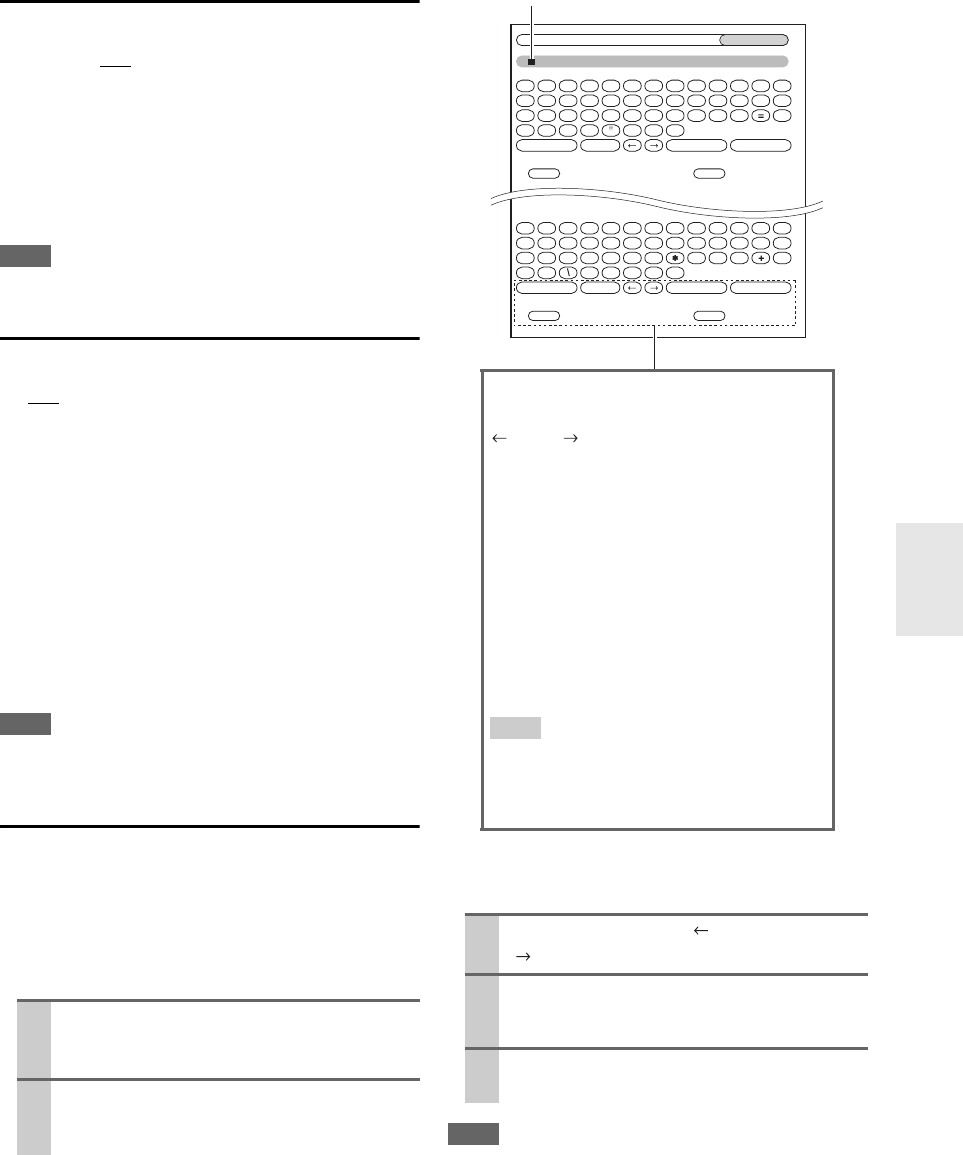
Name Edit
You can enter a custom name for each individual input
selector and radio preset for easy identification. When
entered, the custom name will appear on the display.
The custom name is edited using the character input
screen.
■Name
To correct a character:
Note
• To name a radio preset, use TUNER to select AM or FM, and
then select the preset (➔ 45).
To restore a custom name to the default, erase the custom
name by entering an empty white space for each letter.
1
Use / / / to select a character, and then
press ENTER.
Repeat this step to enter up to 10 characters.
2
When you’ve finished, to store a name, be sure
to use // / to select “OK”, and then press
ENTER. Otherwise it will not be saved.
1
Use / // to select “ ”(Left) or
“ ”(Right), and then press ENTER.
2
Press ENTER several times to select the incor-
rect character (The cursor moves one letter
each time ENTER is pressed).
3
Use / // to select the correct character,
and then press ENTER.
BD/DVD
Shift All Erase
Shift All Erase
4 - 4. Name Edit
Name
abcdefghijklm
nopqrstuvwxyz
1234567890
–`
Space
Back SpaceShift OK
{}|: <>
?
ABCDEFGHIJKLM
NOPQRSTUVWXYZ
;
’,
./
[]
Space
Back SpaceShift OK
!
@
#$%
^&
()_ ~
+10 CLR
+10 CLR
Name input area
Shift
*1
:
Switches the displayed character.
(Left)/ (Right):
Selected when the cursor is moved within
the Name input area.
Space:
Enters a space character.
Back Space
*2
:
“Back Space” moves the cursor backward
one character space. In addition, “Back
Space” deletes the character to the left of
the cursor.
OK:
Selects when the entry is complete.
Tip
*1
You can also be performed on the remote con-
troller by using +10.
*2
Press CLR on the remote controller, you can
delete all characters in the input.


