


16
Enjoying Audio Sources—Continued
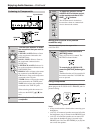
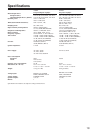
Setting the PURE DIRECT Function
(A-9355)
The [PURE DIRECT] button turns the
PURE DIRECT function on and off.
When the PURE DIRECT function is
off, the tone controls can be used to
adjust the sound, and the PURE DIRECT indicator goes
off.
When the PURE DIRECT function is on, the tone con-
trols are bypassed, so you can enjoy a pure sound. The
PURE DIRECT indicator lights up.
Setting the DIRECT Function (A-9155)
The [DIRECT] button turns the
DIRECT function on and off.
When the DIRECT function is off, the
tone controls can be used to adjust the
sound, and the DIRECT indicator goes off.
When the DIRECT function is on, the tone controls are
bypassed, so you can enjoy a pure sound. The DIRECT
indicator lights up.
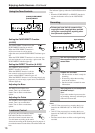
Adjusting the Bass
The BASS control adjusts bass
sounds. Turn it up to make them
louder. Turn it down to make them
quieter.
Adjusting the Treble
The TREBLE control adjusts treble
sounds. Turn it up to make them
louder. Turn it down to make them
quieter.
By pressing the [LOUDNESS] button,
both treble and bass are reinforced
when the volume is turned down low.
Use this button according to the music
source and according to the listening area. Its purpose is
to enrich the natural sound effects of both the treble and
bass.
The indicator lights up when the LOUDNESS function
is on.
• When the PURE DIRECT (or DIRECT) function is
on, turn the function off to use the LOUDNESS
effect.
Notes:
• (A-9355) You can record on a recorder that’s con-
nected to the LINE/MD OUT or TAPE OUT L/R
jacks.
• (A-9155) You can record on a recorder that’s con-
nected to the TAPE OUT L/R or LINE/DOCK OUT
L/R jacks.
• The tone controls have no effect on the signal being
recorded.
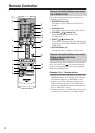
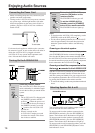
Using the Tone Controls
Loudness Control
TREBLE
BASS
(A-9355) PURE DIRECT
(A-9155) DIRECT
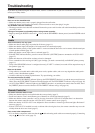
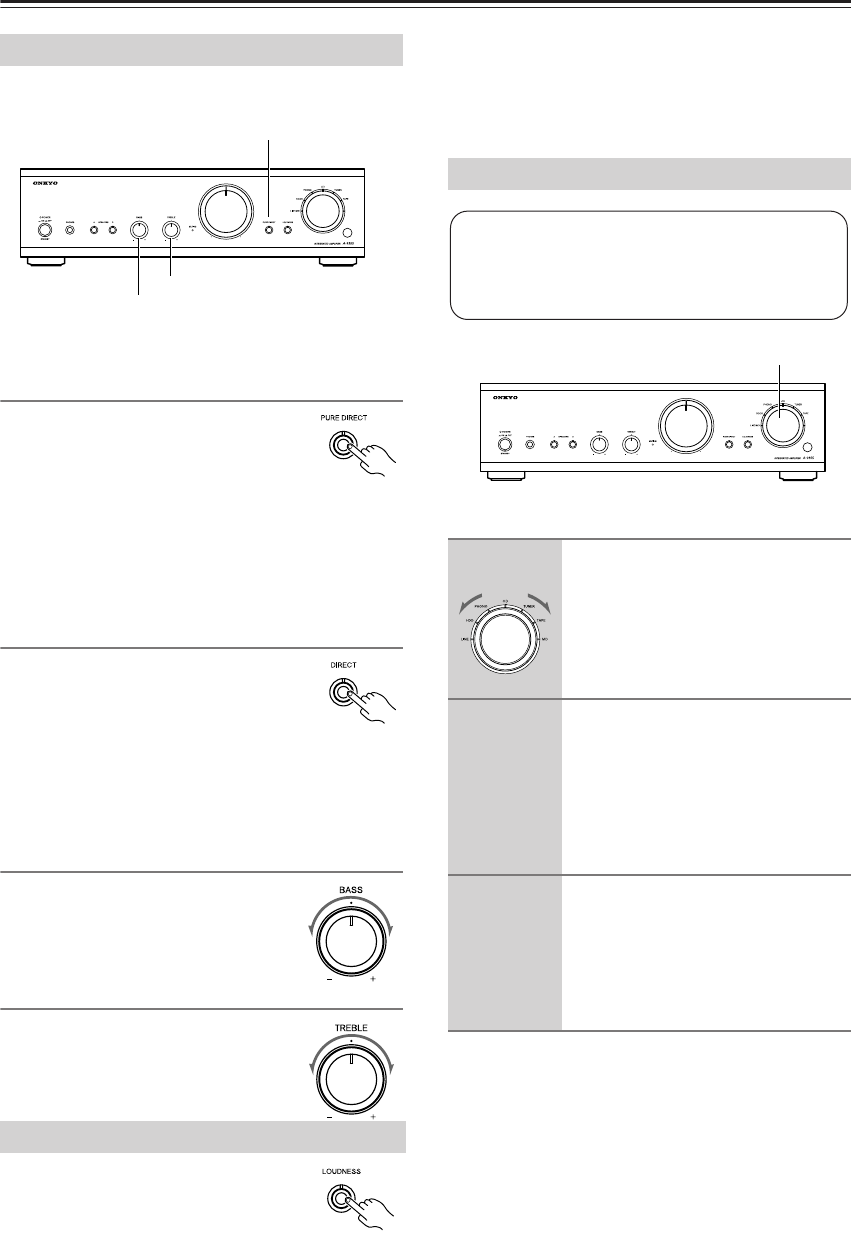
Recording
1
Use the input selector to select
the component that you want to
record from.
2
Prepare the recorder:
• Set the recorder so that it’s ready for
recording.
• If necessary, adjust the recording
level on the recorder.
• See the recorder’s manual for more
information.
3
Start playback on the component
selected in step 1.
Note:
If you select another input source dur-
ing recording, the newly selected input
source will be recorded.
Unless you have the full consent of the
copyright holder, copyright laws prohibit
using your recordings for anything other
than personal enjoyment!
Input selector