19
BASIC OPERATION (CONTINUED)
ADDING A DIRECTORY ENTRY
The directory can store up to 100 name/telephone numbers which you may enter
either through the phone as described below or via your computer using a USB
cable (not included) and the included CD software (see page 30 for instructions).
SAVING CALLER ID INFORMATION
TO THE DIRECTORY
You can save the CID name/number
automatically into the directory by selecting the
call using the CID JOG control. When the call
info appears on the display, scroll to “2.SAV”
using the CID JOG control and press the CID
JOG control or simply press the “2” button. Use
the CID JOG control and Key buttons to
change the name (if desired) or just press the
CID JOG control to confirm, and then again to
confirm/change the number. You will hear a
confirmation beep, and “SAVE”’ will appear on
the display.
Press the MENU button; the Menu will
appear in the display.
12/14
17
10:25
AM
17
1.MEMORY
2.SET UP
3.RINGER
4.VOLUME
1
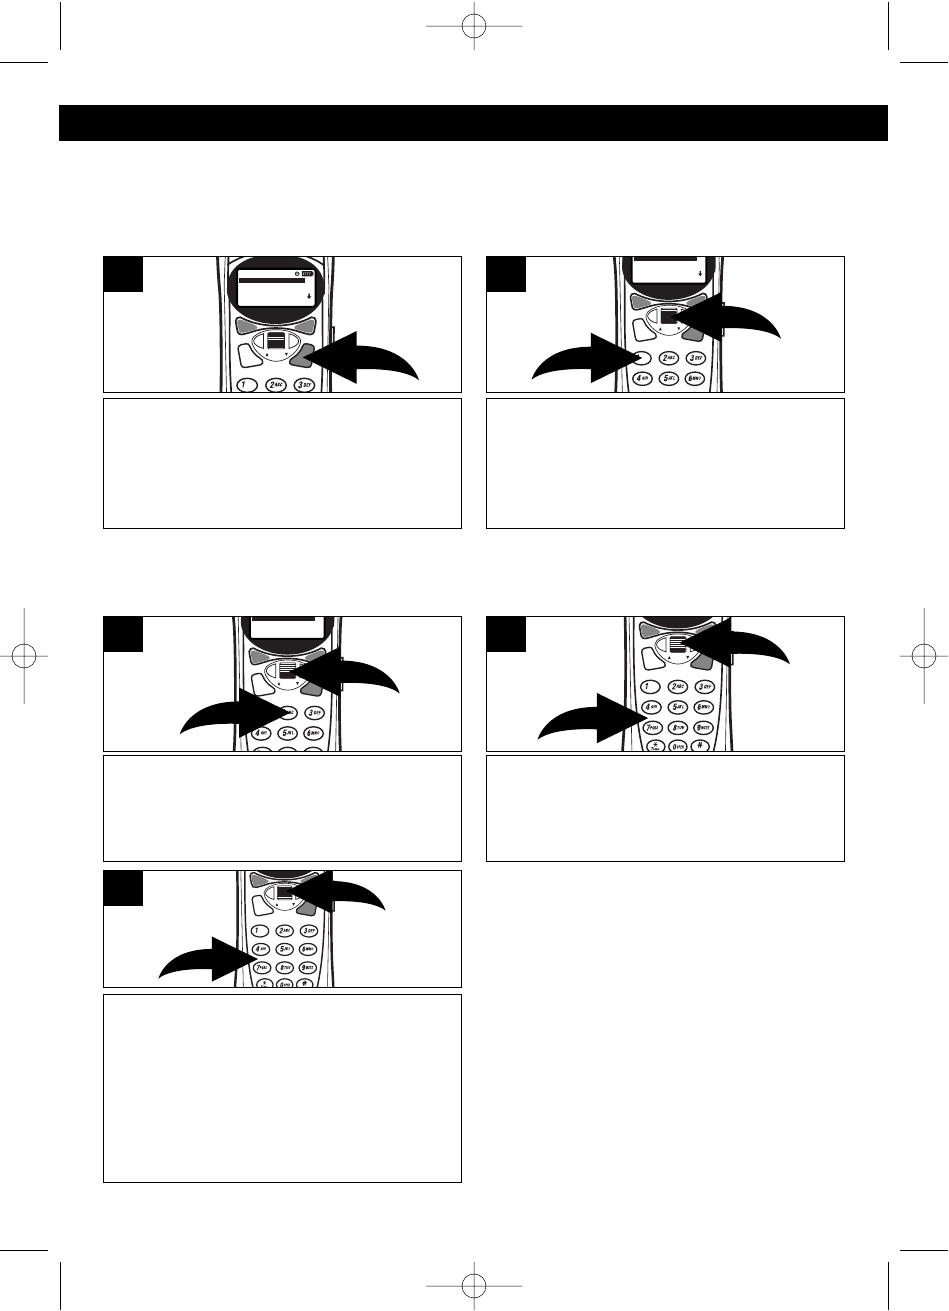
Using the CID JOG control ❶, scroll
down to select “1. MEMORY” and press
the CID JOG control ❶, or simply press
the “1” button ❷; the MEMORY Menu will
appear in the display.
1
2
1.MEMORY
2.SET UP
3.RINGER
4.VOLUME
2
Using the CID JOG control ❶, scroll
down to select “2. ADD NEW ENTRY”
and press the CID JOG control ❶, or
simply press the “2” button ❷.
1
2
2. ADD NEW ENTRY
3
Using the Key buttons (0-9, *, #) ❶,
enter the name as described on page
20, then press the CID JOG control ❷.
2
1
4
Using the Key buttons (0-9) ❶, enter the
7, 10 or 11 digit telephone number as
desired, then press the CID JOG control
❷.; “SAVED” will appear in the display.
NOTE: The area code may, or may not
be included when dialed, depending on
the area code setting, see page 10.
2
1
5
OR
Press the CID JOG control, then scroll down to select “2. MEMORY” . Press the
CID JOG control, or simply press the “2” button.
MCD4300BT.2002.O/M.QXD 4/19/02 9:57 AM Page 19
