User Guide 17ProFire 2626
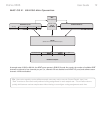
It is important to note that any changes made to the DSP Mixer will only affect what is audible from the mixer’s
outputs—the DSP Mixer does not affect the signals that are sent to the audio application for recording. For example,
if you are recording a vocalist and he/she tells you to turn up the vocal track so they can hear themselves better, you
can increase the vocalist’s microphone channel in the DSP Mixer. This will make the vocal part louder in the vocalist’s
headphones, but it will still be recorded into the audio application at the volume determined by the front panel Gain
Adjustment Knob (4).
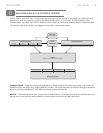
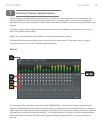
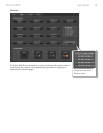
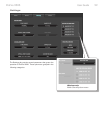
The DSP Mixer is set up like a standard mixing console: There are 18 input channels, each with its own volume fader, pan
and aux send knobs, solo ( ), and mute ( ) buttons, as well as a master output section with its own pair of faders,
and mute buttons.
A pair of channels can be linked together by clicking the link icon ( )
between the two channels. Linking channels allows you to adjust mute, solo,
aux, and fader settings simultaneously by modifying parameters on either one
of the linked channels.
The DSP mixer features multi-segment meters to show input channel levels
(directly above each channel) and main mixer output levels (at the top right of the mixer). The peak hold indication time as
well as pre/post fader metering operation can be set from the Settings tab of the Control Panel. Finally, the clip indicators
can be reset by clicking on the meter itself.
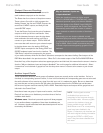
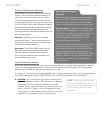
The signal source for each of the DSP Mixer’s 18 input channels can be selected from 52 possible signal streams
(26 input streams and 26 software return streams). Click the downward arrow (
) and make a selection from the
drop-down menu that appears. If an exclamation point ( ) is displayed in place of a downward arrow, the currently
selected stream is disabled because of S/MUX operation or by user preference. Grayed out and italicized drop-down
selections are also disabled and will not stream audio
if selected. To resolve this issue, select another input
source that is not deactivated, reduce the sample rate
of the interface, or increase the number of active input
ports or software returns if possible (the reduction of
input ports and software returns is covered in detail in
the “Why are channels disabled?” text box on the next
page.
As stated earlier, setting or adjusting the DSP Mixer
will not affect the signal that is recorded into the audio
application. For example, you’ll still be able to record
a channel while its corresponding DSP Mixer channel
is muted. You won’t hear the part through the DSP
mixer as it is being recorded, but it will still record into
your audio application and play back properly.
Useful Tips and Shortcuts:
• The input channel numbers (listed along the bottom
of the mixer) can be renamed by clicking on them. For
example, if a bass guitar is routed to input channel 8, you
can click the “8” at the bottom and rename the channel to
“Bass.” Note that changing a channel name only affects
the labeling in the DSP Mixer and does not affect the
way that input appears in your computer’s audio software.
• By alt-clicking (option-click for Mac users) the mute,
solo, or link buttons, you can quickly mute, solo, or link
all of the DSP Mixer’s 18 input channels at once. This is
also a handy feature in situations where you have muted/
soloed/linked multiple channels and need to quickly
unmute/unsolo/unlink them. Note that the mute buttons
for the input channels (just above the faders) and the
mute buttons for the aux sends (on the right side of the
mixer) operate independently of each other.
• A fader or aux send knob can be set to unity gain by
either double-clicking or alt-clicking it (option-click for
Mac users).
NOTE: Linking two channels will
not have any effect on their pan
or channel input selection. These
settings are always made on a
per-channel basis.


