


4
ENGLISH
BASIC
CONNECTIONS
BASIC OPERATION
ADVANCED
CONNECTIONS
SETUP
ADVANCED
OPERATION
TROUBLESHOOTING
OTHERS
NAMES AND
FUNCTIONS
NAMES AND
FUNCTIONS
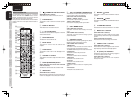
t PURE DIRECT button and
indicator
When this button is pressed once, “SOURCE
DIRECT” appears on the FL display. If pressed
again, “PURE DIRECT” appears. After 2 seconds,
the FL display indication goes out, and then the video
output signal stops.
In the source/pure direct mode, the tone control
circuitry and bass management are bypassed.
Notes:
• The surround mode is automatically switched to
AUTO when the pure direct/source direct function
is turned on.
• Additionally, speaker configurations are fixed
automatically as follows.
Front SPKR = LARGE
Center SPKR = LARGE
Surround SPKR = LARGE
Surround Back SPKR = LARGE
Sub woofer = YES
y DISPLAY button
Press this button to change the FL display mode.
(See page 26)
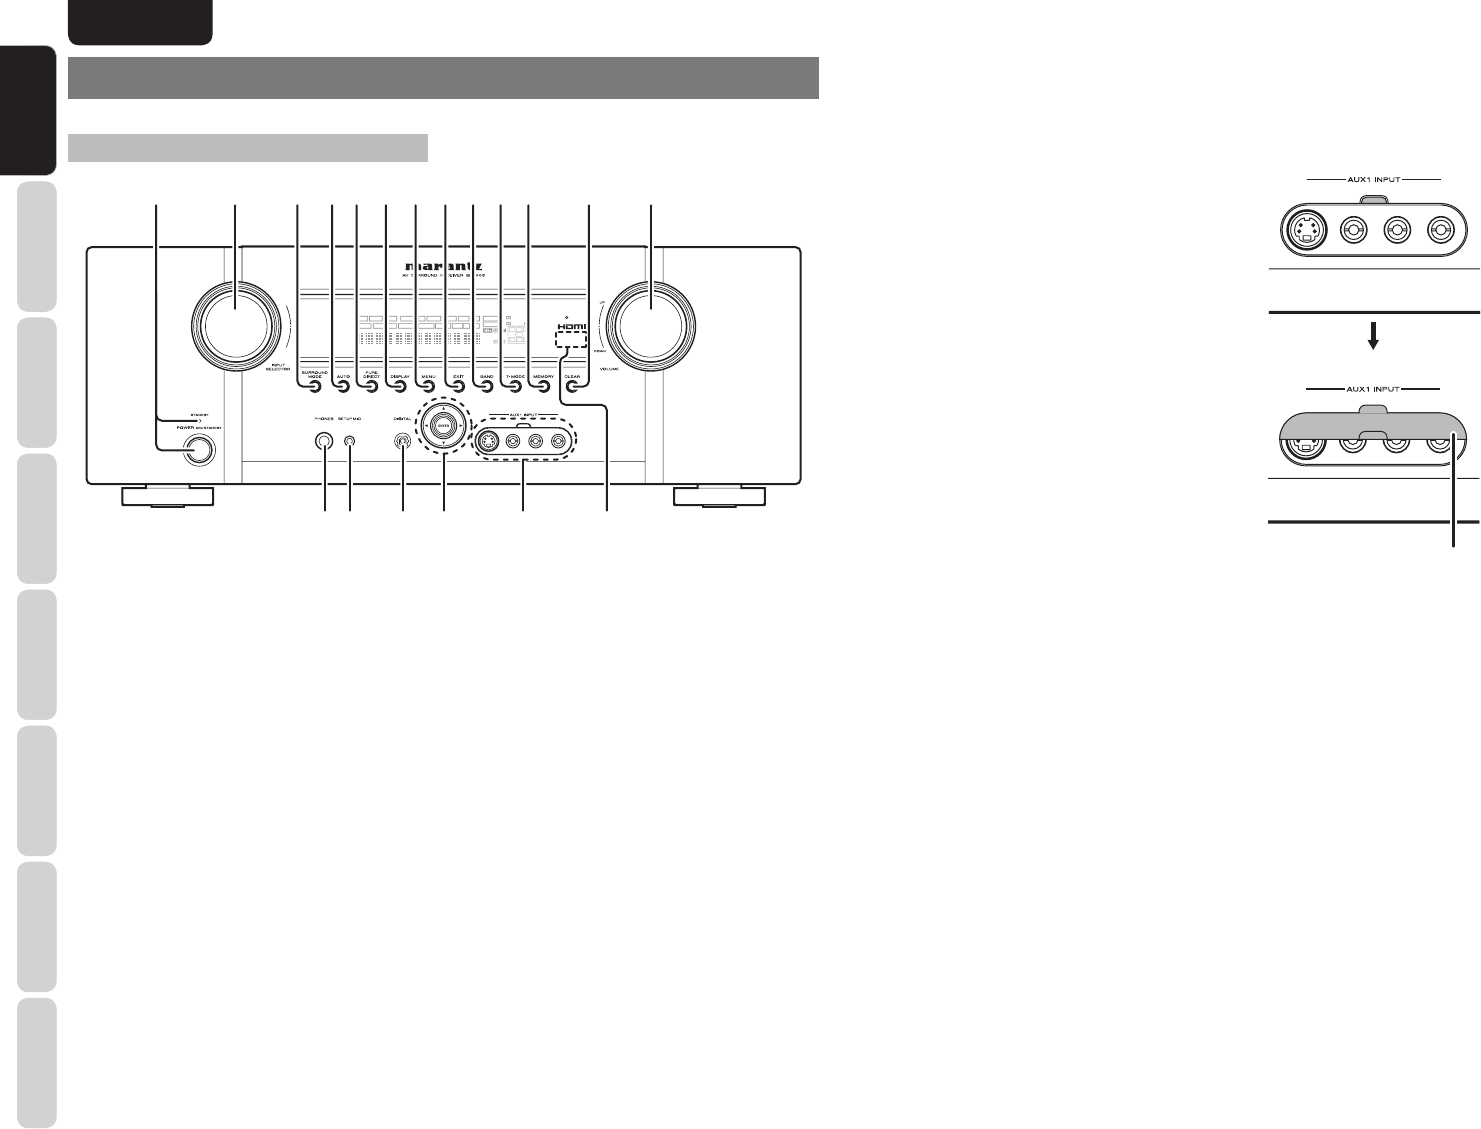
q POWER switch and STANDBY
indicator
When this switch is pressed once, the unit turns ON
and the display illuminates. When pressed again, the
unit turns OFF and the STANDBY indicator will be
illuminated.
w INPUT SELECTOR knob
(AUDIO/ VIDEO)
This knob is used to select the input sources. (See
page 15)
e SURROUND MODE button
Press this button to select the surround mode.
r AUTO (Auto surround) button
Press this button to select the AUTO mode from the
surround modes. When this mode is selected, the unit
determines the surround mode corresponding to a
digital input signal automatically.
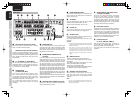
NAMES AND FUNCTIONS
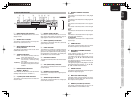
FRONT PANEL
DISP MULTI AUTO TUNED ST V
–
OFF NIGHT PEAK ANALOG
DIGITAL
ATT
SLEEP
SURR
AUTO
DIRECT DISC 6.1 MTX 6.1 SPKRB EQ
DIGITAL
SURROUND
AAC
PCM
L
C
R
SL S SR
LFE
q w !3e t y !0 !1r u i o !2
!4
!5!6!7!8!9
u MENU button
Press this button to enter the SETUP MAIN MENU.
i EXIT button
Press this button to exit from the SETUP MAIN
MENU.
o BAND button
Press this button to switch between FM and AM in
the TUNER mode.
!0 T-MODE button
Press this button to select the auto stereo mode or
mono mode when the FM band is selected.
“AUTO” indicator will be illuminated in the display.
(See page 16)
!1 MEMORY button
Press this button to enter the tuner preset memory
numbers or station names. (See page 30)
!2 CLEAR button
Press this button to cancel the station-memory
setting mode or preset scan tuning. (See page 31)
!3 VOLUME control knob
This knob is used to adjust the overall sound level.
Turning the control clockwise increases the sound
level. (See page 15)
!4 INFRARED receiving sensor area
This area receives infrared signals for the remote
control.
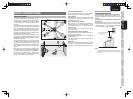
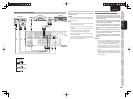
!5 AUX1 INPUT jacks
These auxiliary video/audio input jacks accept the
connections of a camcorder, portable DVD, game
etc. These jacks are protected by the jack cover when
these are not using.
Open and close the cover
using the tab.
Front AUX jack cover
!6 Cursor (1, 2, 3, 4) / ENTER button
Press these buttons to operate the SETUP MAIN
MENU and TUNER function.
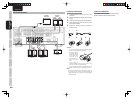
!7 DIGITAL INPUT (Front)
This is the optical digital audio input terminal.
The inputs accept digital audio signals from a DMP,
GAME, or other digital source component.
!8 SETUP MIC jack
Automatically measure speaker characteristics using
the included microphone (MC-10). (See page 23)
!9
HEADPHONE jack for stereo
headphones
This jack may be used to listen to the unit’s output
through a pair of headphones. Be certain that the
headphones have a standard 1 / 4” stereo phono
plug.