


18
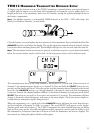
at usable levels – and the transmitter’s EQ response models will help the process.
Try to maintain a constant distance and relationship between the user’s mouth and the microphone. In
live theatre this is often done by placing a small mic in the hairline toward the front side of the head or
right above the ear. With mic placement on the collar or shoulder area, changes in level can occur as the
user’s head turns; experiment with the location of the mic to minimize this effect. Mic placement in the
center of the chest can help with the level changes, but is farther from the voice and quite shielded from
the direct energy of the voice, so typically provides a hollow midrange or “chest” sound to the voice.
Directional (cardioid) lavalier microphones can help isolate the voice of the user from the background
noise that may be picked up by an omnidirectional mic. They are more sensitive to the movements of
the user’s head, with more change in level when speaking toward or away from the front of the mic. In
addition, they are more prone than omni mics to handling and cable noise, so the user needs to be more
careful about movement. The lavalier EQ models in the TBP12 beltpack provide a high-pass filter (low-
end rolloff) to help reduce this extraneous noise.
When appropriate, a headset microphone can solve most of these problems of level, compromised
frequency response, feedback potential, handling noise, and pickup of background sounds. A number of
low-profile models are available. To minimize breath noise and pops from certain consonants, use the
mic’s wind filter and position the mic element toward the corner of the mouth.
In a situation where the audio is recorded or broadcast rather than live, or the user has a significant
distance between his/her location and the speaker system, substantial equalization changes and a more
natural sound are easier to achieve.
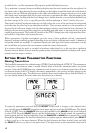
setting otheR tRansmitteR functions
Naming Transmitters
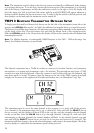
The handheld transmitter has a default name of [THH12] and the beltpack of [TBP12]. The transmitters
can be given a six-character name to readily identify them on both the transmitter and its associated
receiver. Using the [NAME] function, transmitters can be given a six-character name that will show
on the main screen of the LCD display; the name is transmitted to the receiver and also appears on the
receiver’s main display page. The character set includes letters and numbers (plus a dash and blank), so
you can identify them by the user’s name or by their function, as desired.
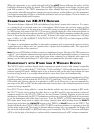
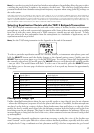
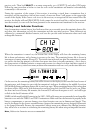
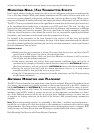
To name the transmitter, press and hold the SELECT button until it changes to the channel select
page. Quickly press the
SELECT button four more times until you reach the [NAME] page. The default
position is [OFF]. Press the
ON/MUTE button on the handheld or the VALUE button on the beltpack
to select [ON]. Press the
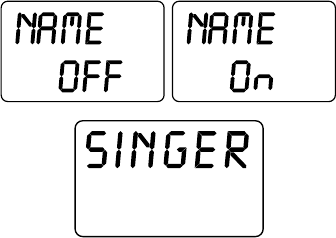
SELECT button, and the default name (or if already named, the transmitter’s
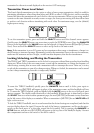
name) appears with the first letter flashing. Press the
ON/MUTE or VALUE button repeatedly to scroll
through the alphanumeric list until the desired letter or number appears; when reached, press
SELECT
to keep it and go to the next character. When the final character has been reached, press and hold
the
SELECT button to go back to the main screen. The name shows on the transmitter screen and is