


11
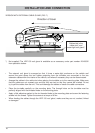
• Choose an installation position on the roof that is as horizontal as possible or only slightly
sloping, depending on the location of the vehicle, since roof inclinations greater than 5° may lead
to problems when searching for the satellite.
• To ensure secure adhesion, the height difference of the roof curve may not be more than 1 cm
over a length of 2 m, as otherwise the gap between the roof and the mounting plate would be too
great to be fi lled by the adhesive sealant.
• As the vehicle is constantly subjected to vibration loads during travel, the roof below the antenna unit
is also subject to signifi cant loads. Please note given the nature and capacity of your vehicle roof
(see also operating manual for the vehicle) that the weight of the antenna unit is approx. 9.7 kg.
In case of doubt, consult a qualifi ed dealer or your vehicle’s manufacturer.
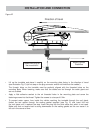
• The roof gland provides a watertight seal through which the two connecting cables (coax cable
and power supply cable) are fed into the interior of the vehicle directly underneath the turntable.
If you prefer a different method of laying the cables, they can be run from the rear of the turntable
via the channel provided in the mounting plate. The cables must then be run along the roof of
the vehicle in a protective cable duct (not supplied).
Note: Do not cut the cables short, as otherwise the proper functioning of the unit can no longer be
guaranteed.
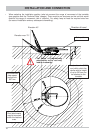
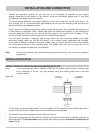
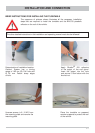
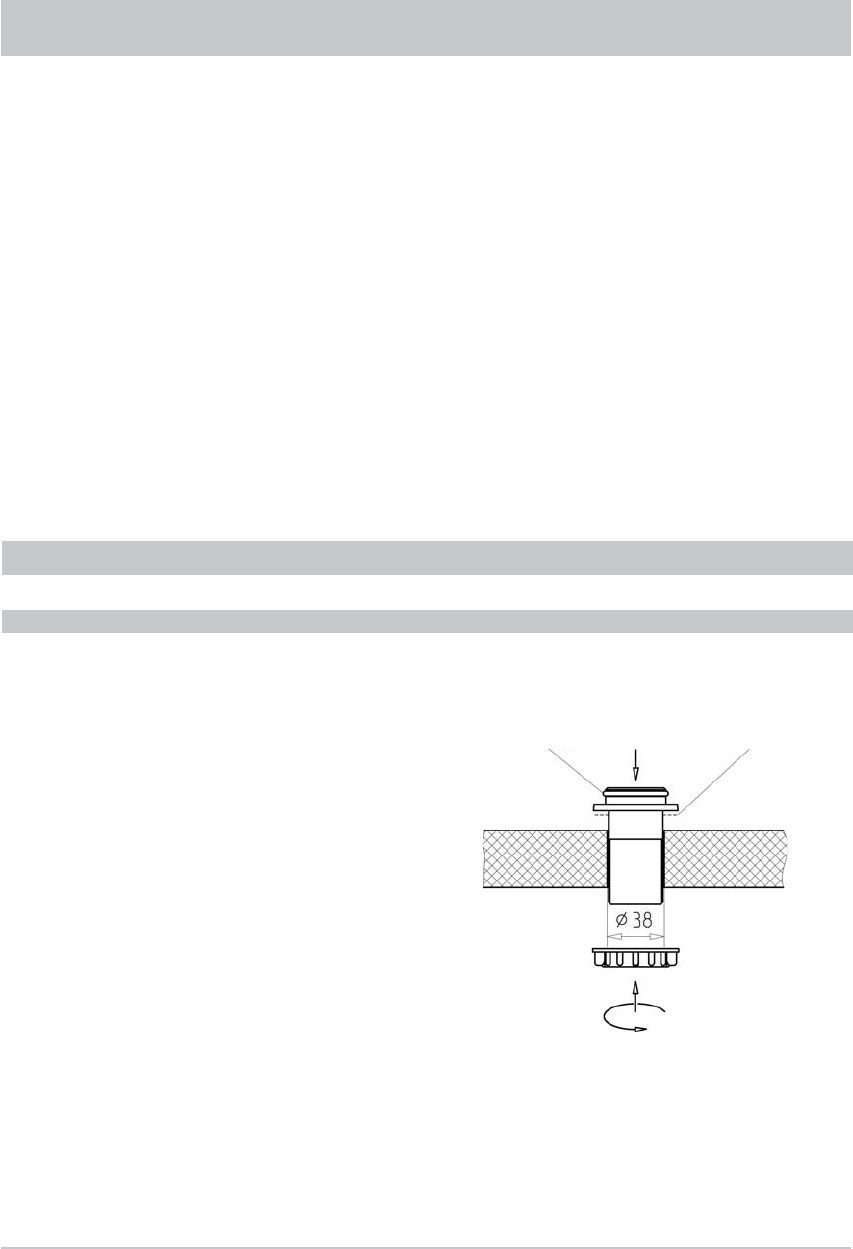
• In the centre of the intended position of the turntable, drill the opening for the cable gland with a
circular cutter (Ø: 38 mm). Deburr the hole with a round fi le or emery paper.
• Provisionally insert the roof gland into the drilled hole (Fig. A).
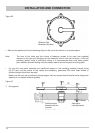
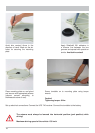
• Place the mounting plate on the roof of the vehicle, such that the centre hole is positioned centrally to
the cable gland. The arrow symbol must be visible from above and point forwards in the direction of
travel (Fig. B).
Figure: A
Note: If you had previously used a Kathrein HDM140/141 fl exible satellite mast or another mast
with a diameter of 34 mm, you can continue using the existing gland hole in the roof
(if space allows).
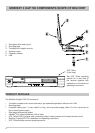
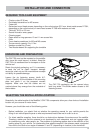
INSTALLATION STEPS
INSTALLATION OF CABLE GLAND AND MOUNTING PLATE
INSTALLATION AND CONNECTION
O Ring
Adhesive