19
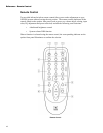
When using the remote control with a networked system, always aim it at the LEFT
speaker.
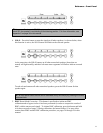
1. ON – Duplicates the function of the front panel POWER control.
2. RMC – Press to bypass RMC settings. (The front panel RMC buttons will light.) Press
again to reactivate RMC settings.
The remote control cannot be used to initiate the RMC calibration process.
3. BRIGHTNESS – Press this button and then use the remote control Volume (+/-)
button to increase or decrease the brightness of the speaker front panel controls and meter
display.
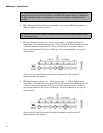
4. SUBWOOFER controls – These controls have no function with LSR4328P and LSR4326
monitors; they are used to access various features of the LSR4312SP
subwoofer.
5. SOLO controls – Solos the selected speaker.
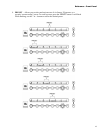
6. EQ controls –
a. EQ ON – Duplicates the function of the front panel EQ control.
b. HF - Duplicates the function of the front panel HF control.
c. LF - Duplicates the function of the front panel LF control.
d. PRESET - Duplicates the function of the front panel PRESET control.
After pressing any of the EQ controls on the remote control, be sure to press the
Volume (+/-) control afterwards in order to make any required changes.
7. INPUT - Press this button and then use the remote control Volume (+/-) button to change
the input source.
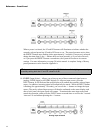
8. DIM – When pressed, attenuates the volume of the entire system by 12 steps
(equivalent to 12 dB when volume is set to full).
9. VOLUME +/ - Has two functions:
a. When none of the above buttons is pressed, increases and decreases overall
system volume.
b. In conjunction with the button functions described above, increments or
decrements the value of the currently selected function.
Reference - Remote Control


