


6
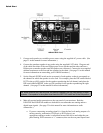
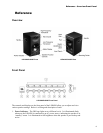
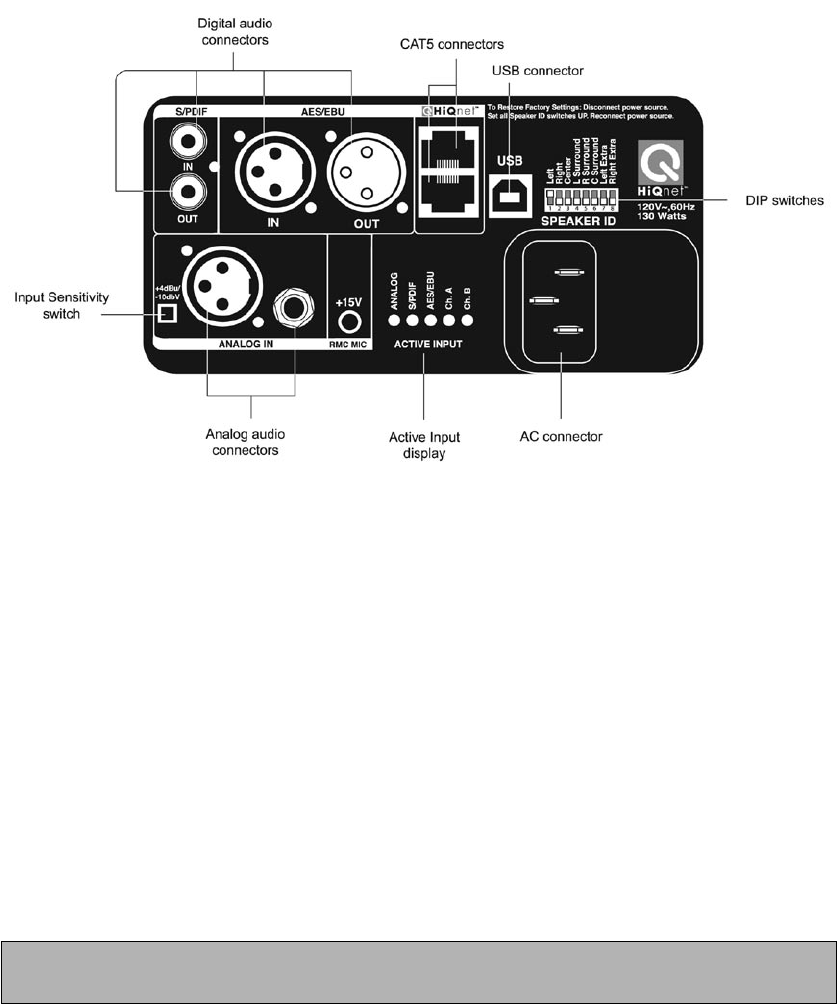
LSR4300 Rear Panel
3. Connect each speaker to a suitable power source using the supplied AC power cable. (See
page 23 in this manual for more information.)
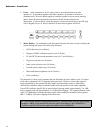
4. Connect the speakers together in any order using the supplied CAT5 cable. Plug one end
of the cable into either of the two HiQnet ports on one speaker and the other end into a
HiQnet port on another speaker until all speakers are connected. Connect the two supplied
ethernet terminators to the first and last speakers in the chain. (See page 21 in this manual
for more information on networking your LSR4300 monitors.)
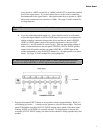
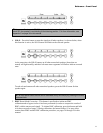
5. Set the Network ID DIP switch on the rear panel of each speaker so that it corresponds to
the channel for which the speaker is to be used. For example, place the DIP switch labeled
LEFT in the up (ON) position for the speaker reproducing the left channel, and place the
DIP switch labeled RIGHT in the up (ON) position for the speaker reproducing the right
channel. (See page 22 in this manual for more information.)
Make sure that one, and only one, DIP switch is placed in the up (ON) position for each
speaker. One speaker in the system must have the LEFT DIP switch set to the ON position.
6. Make all required audio connections to the rear panel of your monitors. Both the
LSR4328P and LSR4326P models are both able to accommodate one analog and two
digital input signals. (See page 23 in this manual for more information on audio
connections.)
a. If you are connecting an analog signal (i.e. from the line level analog outputs of a
mixing console, workstation, CD player, or DVD player), use
appropriate cabling to make a connection between the device and either the rear
panel Analog XLR connector or ¼″ connector, then set the rear panel Input Sensi-
Quick Start