


68
Advanced Playback
—Continued
This section explains how to set the picture’s aspect ratio.
Notes:
• The aspect ratio cannot be changed during playback.
• When the RDV-1.1 is set to Standby, the aspect ratio
reverts to the TV Shape setting (see page 73).
The Picture Control menu provides quick access to the
Interlaced, Progressive, and AV Synchronization setup
memories.
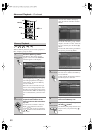
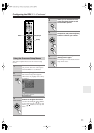
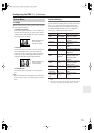
Setting the Picture’s Aspect Ratio
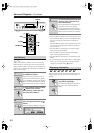
Press the remote controller’s
[Aspect] button repeatedly to
select an aspect ratio.
Choose an aspect ratio to suit your TV
and how you want to see the picture
onscreen.
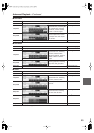
4:3 Letter box:
Choose this option if
you have a 4:3 aspect ratio TV. When
you watch widescreen video sources,
the entire picture will be visible but
there will be black bars at the top and
bottom of the screen.
4:3 Normal:
Choose this option if you
have a 4:3 aspect ratio TV and want to
use the full height of the screen when
watching widescreen video sources.
The picture will be cropped on both
sides. This option won’t work with
discs that don’t support pan and scan.
16:9 Widescreen:
Choose this option if
you have a 16:9 widescreen TV.
+
10 0
Clear
123
456
789
Input
I
+
-
Enter
S
e
t
u
p
R
e
t
u
r
n
L4
L2L1
V OffV In
Aspect
A
-
B
Repeat
Rsltn
Angle
Subtitle
Audio
L3
T
o
p
M
e
n
u
M
e
n
u
VOL
+
-
V3
TV
InputDMS
DVD Amp VCR
DVD
V1 V2
LM RD
Zoom
CH
L Mode
Learning
Search Memory Dimmer
Amp Input
Display
Audio
Sel
Zoom
On
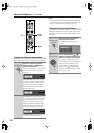
Picture Control
Random
Step/Slow
Muting
AngleSubtitleAudio
AspectA
-
BRepeat
On Standby
T
V
T
V CH
T
V VOL
RC
-
561DV
Last Memory
Resolution
Mode
Amp Input
Rec
Open
/
Close
Video Input Video Off
Picture
Control
Aspect
Aspect
Aspect
Remote controller
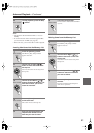
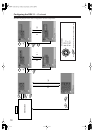
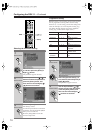
Using the Picture Control Menu
1
Press the remote controller’s
[Picture Control] button.
The Picture Control menu appears
onscreen.
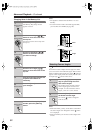
2
Use the Up and Down [ ]/[ ]
buttons to select Interlaced, Pro-
gressive, or AV Synchronization.
If you want to edit the settings of the
current setup memory, select Interlaced
Setting, Progressive Setting, or AV
Synchronization, and then press the
[Enter] or Right [ ] button. Editing
works the same as for the Picture setup
menu (see page 73).
Picture Control
Remote controller
Enter
Remote controller