6
Unpacking and Placement
Unpacking the Nº31.5 Unpack your Nº31.5 Reference CD Transport and remove all accessories from the
carton. Included with your new Mark Levinson transport is a pair of knit, white
gloves designed to assist you in the initial unpacking and placement of your new
purchase. Please accept them as a token of our appreciation for having purchased
one of our products.
Important! Keep all packing materials for future transport of your Nº31.5.
Shipping your new component in anything other than its
purpose-designed packing material may result in damage
that is not covered by the warranty.
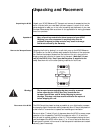
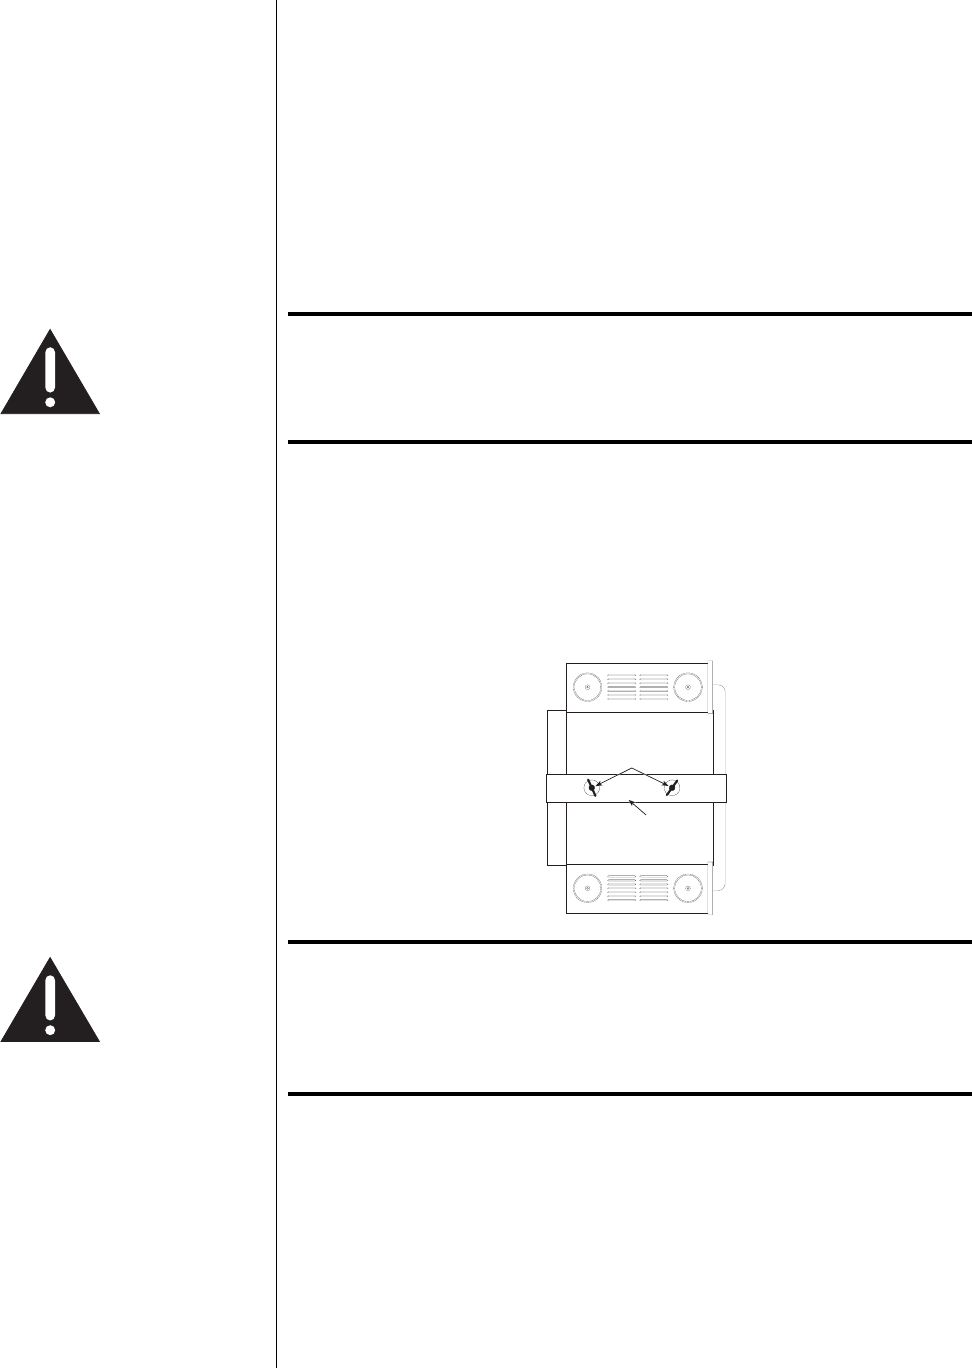
Remove the Transport Screws Protecting the finish by placing it on a soft cloth, prop up the Nº31.5 Reference
CD Transport on its side to provide ready access to the bottom of the center sec-
tion. Remove the transport screws from the bottom of the unit, along with the
shipping strap that holds the lid closed during transport. (Note that it is nor-
mal for the Nº31.5 lid to “float” open before power is supplied to the
unit.) Save them with all the other packing materials for future use.
Remove these
screws and washers
Shipping Strap
(holds lid closed,
protects finish)
Warning! The transport screws and shipping strap must be removed
before operating the Nº31.5, since they immobilize the
transport mechanism and lid during shipping to prevent
damage. This strap and these screws must also be replaced
before shipping the unit.
Placement of the Nº31.5 The Nº31.5 should be placed as close as possible to your digital audio processor,
thus keeping digital interconnect cabling reasonably short. It should be placed on
a shelf where it is convenient to operate and receives good ventilation.
Be sure to allow 7 inches (18 cm) of clearance above the Nº31.5 to ensure proper
operation of the lid assembly. The Nº31.5 must also be within 3° of level from
front to back for optimal operation of the lid. (This translates to having the front
and back edges of the Nº31.5 within about
1
⁄2" or 1.2 cm of level with each other.)
Drawings are included in this manual to facilitate special installations and custom
cabinetry (see Dimensions).


