


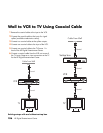


Connecting Video Equipment 109
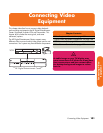
Connecting Video
Equipment
Video Camera Connection
Refer to the HP support Web site for detailed information
on advanced video setup. Go to
http://www.hp.com/
support and select your model number. See “HP Web
Site Support” on page 171.
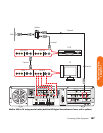
Connecting a Digital Video Camcorder
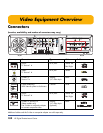
Connectors:
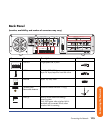
Use the 4-pin FireWire (IEEE 1394) connector on the front
or 6-pin FireWire (IEEE 1394) connector on the back
panel of the HP Digital Entertainment Center to connect a
digital video camera. This connector is bi-directional.
Some cameras use a USB connector. See the
documentation that came with your digital video camera.
See “USB Device Connection” on page 121.
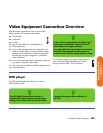
Equipment:
Most digital video cameras use either a 4-pin to 4-pin or
a 4-pin to 6-pin FireWire (IEEE 1394) video camera
transfer cable. A 4-pin to 4-pin FireWire (IEEE 1394)
cable to use the 4-pin FireWire (IEEE 1394) connector on
the HP Digital Entertainment Center front panel is sold
separately.
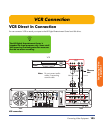
Procedure:
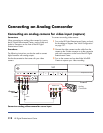
The following instructions apply only to digital video
cameras. See “Connecting an Analog Camcorder” on
page 112 for analog video cameras.
If a Digital Video Device Auto Play window appears
when you connect your camera, click Cancel.
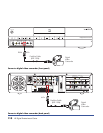
To connect a digital video camera:
1 Turn on the HP Digital Entertainment Center, and wait
for the desktop to appear. See “Initial Configuration”
on page 127.
2 Turn on the digital video camera.
3 Connect the video camera transfer cable from the
camera to a FireWire (IEEE 1394) connector on
the front (4-pin) or back (6-pin) of the HP Digital
Entertainment Center.
4 A Found New Hardware message appears. Wait
two or three minutes for the system to make the
necessary settings for the new device. When
installation is complete, a message appears telling
you the camera is ready to use.