


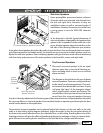

Page 22
Page 23
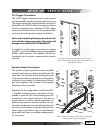
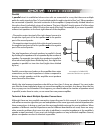
12V Trigger Connections
The 12 VDC trigger connection shown can be used to
turn the amplier on when the preamplier turns on.
This trigger will actually trigger with any switched DC
Voltage from 5-24 VDC, however the majority of home
theater components use a standard 12 VDC trigger
connection for this function. This is the preferred con-
nection as it has the greatest degree of reliability.
Never switch anything that plugs directly into the
wall with this trigger connection. This action will
damage the unit and VOID THE WARRANTY.
If unable to use the trigger connection to activate
the MPS-1, you could alternatively use the amplier’s
SIGNAL switch position. The amplier will then au-
tomatically turn on when a preamp audio signal is
received.
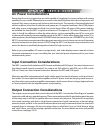
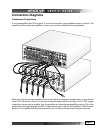
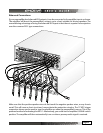
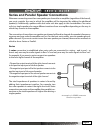
Speaker Output Connections
The speaker output terminals for each amplier
channel are located just below the balanced XLR
input jack. The top post of each binding post pair
is the positive output, and connects to the positive
(red) post of your speaker. The bottom post of each
pair is the negative, and connects to the negative
(black) post of your speaker.
Regardless of the conguration used for the MPS-
1 amplier channels, proper connection of each
speaker is essential. The 5-way binding posts can
accept bare wire, spade terminals, and dual or
single banana connectors. Spade connections or
banana plugs ensure a simple, solid t in the ter-
minal whereas bare wire may be awkward when the
terminal is screwed down to compress the wire into
place. Keep in mind that if you use “dual banana”
plugs and “stack” them, you will be creating a paral-
lel connection.
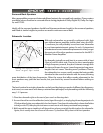
Spade connections ensure a tidy and safe connection
to each speaker output binding post.
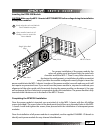
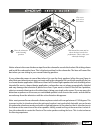
The trigger connection plug and turn-on selector
switch are located on the top right corner of the back
of the MPS-1 chassis