ENGLISH
22
n
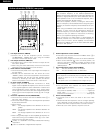
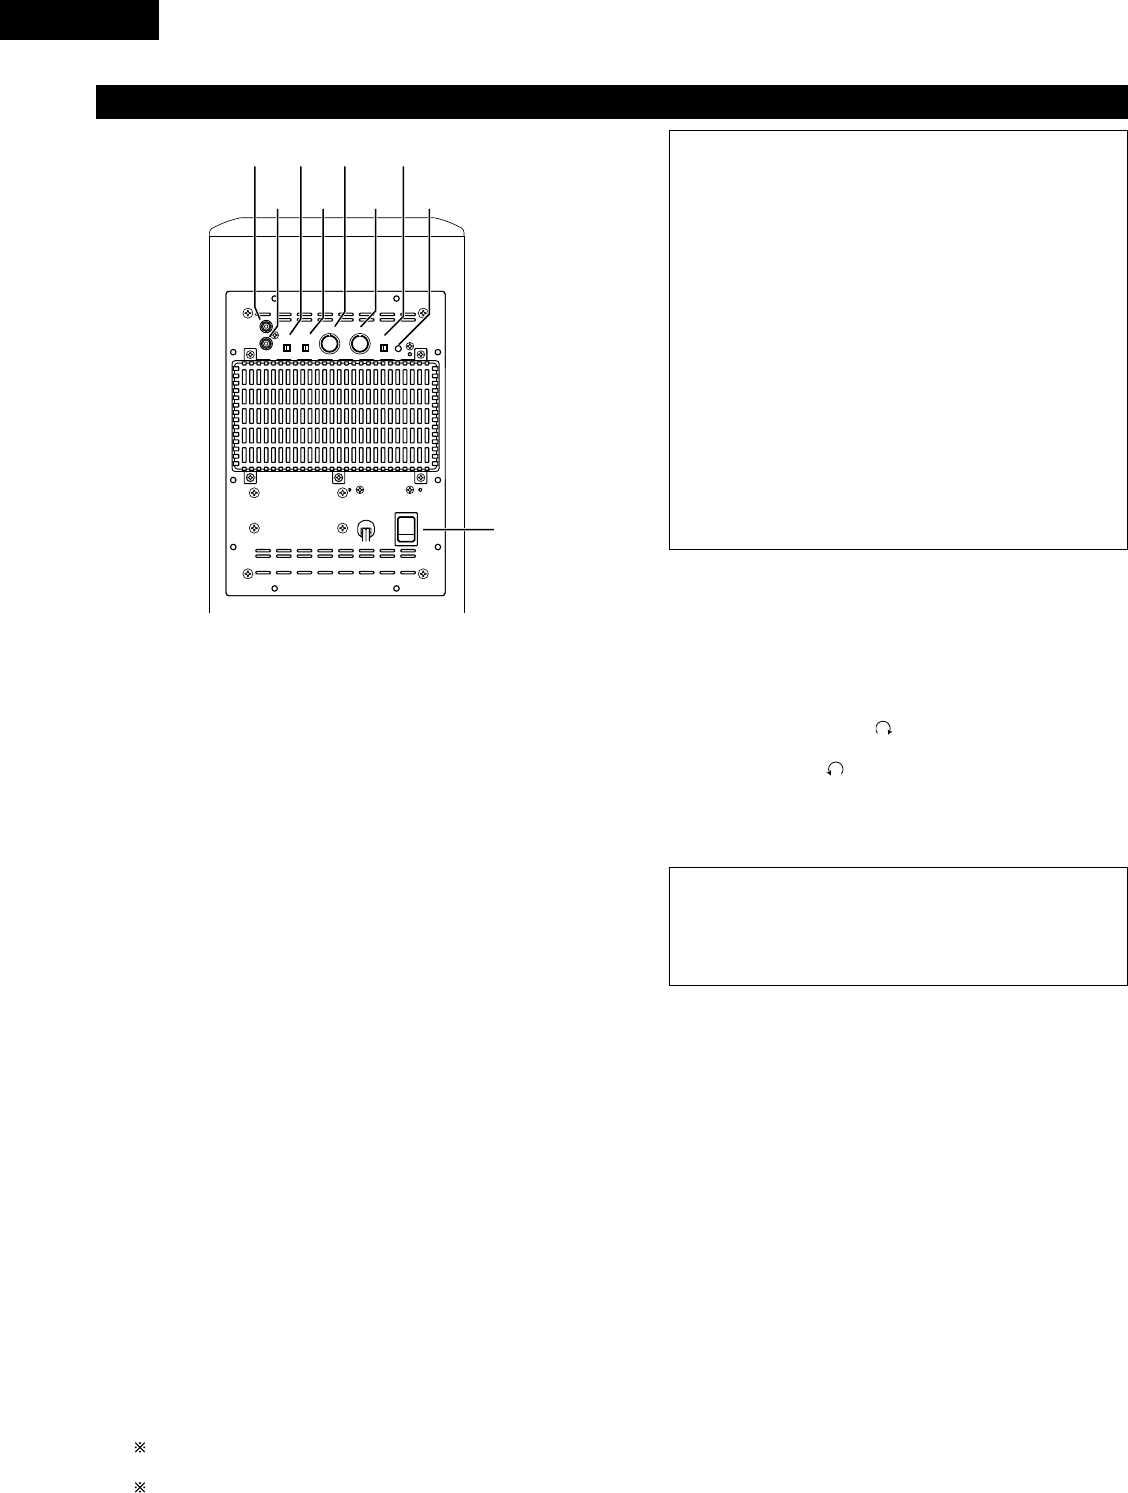
Volume adjustment control (LEVEL)
• This control only functions when the LF DIRECT switch (v) is
set to the “OFF” position.
• Use this control to adjust the volume of the active subwoofer.
• When turned clockwise ( ) from the center position, the
volume of the active subwoofer increases, and when turned
counterclockwise ( ), the volume decreases. Set to the
desired position.
m
Auto standby selector switch (AUTO STANDBY)
ON : The auto standby function is activated
OFF : The auto standby function is deactivated
z
Line input connector (LINE IN)
• Connect this to the AV amplifier’s pre-out connector
(“SUBWOOFER”, “MONO OUT”, etc.) using the included
connection cord (3-meter RCA pin cord).
x
Line output connector (LINE OUT)
• The signal input to the line input connector is output as such
from here in parallel.
• When using two active subwoofers, connect the other active
subwoofer’s line input connector to this connector.
c
Phase selector switch (PHASE)
• This switches the phase of the output signal with respect to
the input signal.
• Normally use the subwoofer with this switch set at the
“NORM.” position. If the continuity between the sound of the
active subwoofer and the left and right speakers seems
unnatural, try switching to the “REV.” position, and set the
switch to the position in which the sound is most natural.
v
LF direct switch (LF DIRECT)
• When using the active subwoofer connected to a Dolby
Digital- or dts-compatible AV amplifier, if this function is turned
on the signals bypass the active subwoofer’s crossover and
volume adjustment circuits, resulting in purer, higher quality
sound. Note that when this is done the crossover adjustment
control (b) and volume adjustment control (n) will no longer
function.
b
Crossover adjustment control (CROSSOVER)
• This control only functions when the LF DIRECT switch (v) is
set to the “OFF” position.
• This control sets the upper limit of the frequencies reproduced
by the active subwoofer.
• Setting criteria
50Hz : For left/right speakers with diameters of 20 cm or
greater
100Hz : For left/right speakers with diameters between 10
and 25 cm
200Hz : For left/right speakers with diameters of 12 cm or
less
• When using a Dolby Digital- or dts-compatible AV amplifier, we
recommend turning the LF DIRECT switch (v) to the “ON”
position and not using this function.
“Dolby” is a trademark of the Dolby Laboratories Licensing
Corporation.
“dts” is a trademark of Digital Theater Systems.
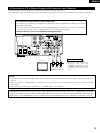
LINE IN
PHASE LF DIRECT
CROSSOVER(Hz)
REV. NORM.
AUTO STANDBY
ON
ON:GREEN
STANDBY:RED
OFFON
50
ON
POWER
OFF
OFF
200
LEVEL
MIN MAX
LINE OUT
z
x
c
v
b
n
m
,
.
Active subwoofer (DSW-3L) rear panel
About the AV amplifier’s crossover frequency selection
The crossover frequency of the satellite speaker/center
speaker and the active subwoofer (the boundary between the
frequency range produced by the active subwoofer and the
other speakers) is set on the connected AV amplifier, and is
usually fixed at between 80 and 120 kHz.
With some amplifiers, however, including the Denon ADV-
M51, this frequency can be selected. When using this type of
amplifier, the crossover frequency can be selected to suit your
tastes.
When using the DSW-3L active subwoofer with this type of
amplifier, a richer sound can be achieved by setting the
crossover frequency to around 150 Hz. Adjust the crossover
frequency to suit your tastes. For instructions on switching,
refer to your amplifier’s operating instructions.
When connecting to a Dolby Digital- or dts-compatible AV
amplifier, whether one on which the crossover frequency is
fixed or one on which it can be adjusted, we recommend
setting the LF DIRECT switch of the active subwoofer (DSW-
3L) to the “ON” position.
Auto Standby Function
• The amplifier is automatically set to the standby mode if no
signal is input for 5 to 11 minutes, thereby saving
electricity.
The power turns on immediately when a signal is input.
,
Status indicator
• The two-colored LED indicates the active subwoofer’s
operating status, as follows:
Power “ON” .........................................................Lights green
Auto power off (standby mode)................................Lights red
Power “OFF”................................................................LED off
Protective circuit activated ....................................Flashing red
.
Power switch (POWER)
• The power turns on when this switch is set to the “ON”
position.
• Several seconds are required for the set to begin operating.
This is because the set includes a built-in muting circuit to
prevent noise when the power switch is turned on and off.
• When set to the “OFF” position, the power turns off.


