Advanced Setup – Part 1 Advanced Setup – Part 1
49
ENGLISH
ENGLISH
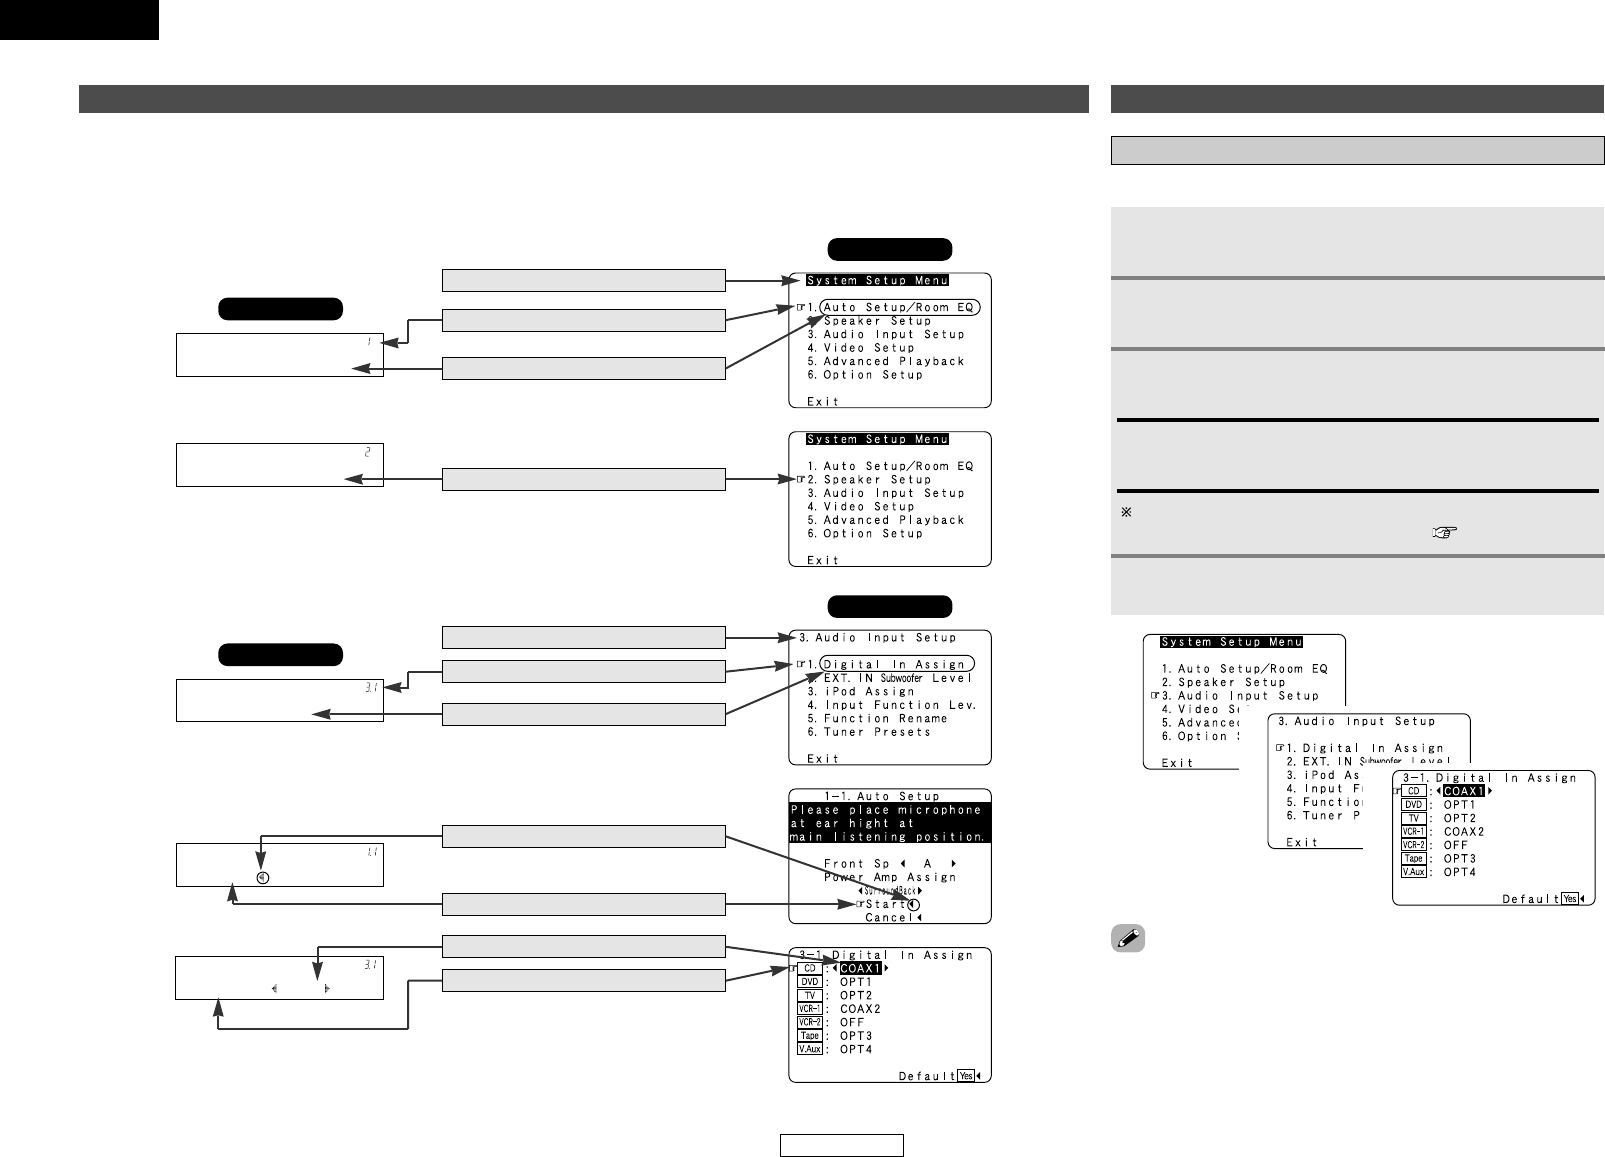
The AVR-2307CI is equipped with an intuitive and easy-to-understand on screen display, and is equipped with an alphanumeric front panel
display that can also be used to check and adjust settings. We recommend that you use the on screen display when you make system
adjustments. Some representative front display and on screen display examples are shown below.
About the on screen display and front display
[ On screen display ]
Top menu
Main menu
[ Front display ]
Auto Set/RoomEQ
Top menu
Screen title
No.
Sub-menu title
S
p e a k e r S e t u p
To select a menu, press
DD
or
HH
.
D
i g i t a l I n
Main menu
Screen title
No.
Sub-menu title
* A u t o S e t u p
S
t a r t
Press
FF
to execute.
Currently selected line
*Digital In
CD : COAX1
Current setting
Currently selected line
Audio Input Setup
Setting the Digital In Assignment
This assigns the digital input terminals for the different input sources.
Press
DD HH
to select “Audio Input Setup”, then press
ENTER.
Press
DD HH
to select “Digital In Assign”, then press
ENTER.
Press ENTER.
Press
DD HH
to select the input source, then press
FF GG
to set.
• “PHONO” and “TUNER” cannot be selected on the “Digital In
Assign” screen.
• It is not possible to make the “Digital In Assignment” settings for
the function assigned at “iPod Assignment”.
3
2
1
COAX1, COAX2, OPT1, OPT2, OPT3, OPT4:
Assign the different terminals according to the devices connected
to the AVR-2307CI’s input terminals.
4
1
2
3
The HDMI input terminal is displayed when it is assigned to the
input source at “HDMI In Assignment” ( page 53).


