


XDZ716 1514 XDZ716
Top function
The top function resets the CD player to the first
track of the disc. Press TOP button
"
to play the
first track (track No. 1) on the disc.
Scan play
The scan play locates and plays the first 10 sec-
onds of each track on a disc automatically. This
function continues on the disc until it is cancelled.
∗ The scan play is useful when you want to select a
desired track.
1. Press the SCN button
5
to start scan play.
“SCN” lights in the display.
2. To cancel the scan play, press the SCN but-
ton
5
again. “SCN” goes off from the display
and the current track continues to play.
Repeat play
The repeat play continuously plays the current
track. This function continues automatically until
it is cancelled.
1. Press the RPT button
6
. “RPT” lights in the
display and the current track is repeated.
2. To cancel the repeat play, press the RPT but-
ton
6
again. “RPT” goes off from the display
and normal play resumes.
Random play
The random play selects and plays individual tracks
on a disc in no particular order. This function con-
tinues automatically until it is cancelled.
1. Press the RDM button
7
. “RDM” lights in the
display, an individual track is selected ran-
domly and play begins.
2. To cancel the random play, press the RDM
button
7
again. “RDM” goes off and normal
play resumes.
CD Operations
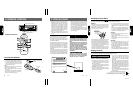
Ejecting a CD
1. Press the EJECT button 4. The SLOPING
CONSOLE opens and a CD ejects. “EJECT”
appears in the display.
CAUTION
Be careful not to get your fingers caught when
opening and closing the SLOPING CONSOLE.
2. Remove the CD and press OPEN button 4
to close the SLOPING CONSOLE.
Notes:
• Be sure to close the SLOPING CONSOLE after
removing the CD.
• The SLOPING CONSOLE closes automatically 30
seconds after removing the CD.
∗ If a CD (12 cm) is left in the ejected position for 15
seconds, the CD is automatically reloaded. (Auto
reload)
∗ 8 cm CDs are not auto reloaded. Be sure to re-
move it when ejected.
Note:
• If you force a CD into before auto reloading,
this can damage the CD.
Selecting a track
● Track-up
1. Press the right side of SEARCH button % to
move ahead to the beginning of the next track.
2. Each time you press the right side of SEARCH
button %, the track advances ahead to the
beginning of the next track.
● Track-down
1. Press the left side of SEARCH button % to
move back to the beginning of the current track.
2. Press the left side of SEARCH button % twice
to move to the beginning of the previous track.
Fast-forward/fast-backward
● Fast-forward
Press and hold the right side of SEARCH button
% for 1 second or longer.
● Fast-backward
Press and hold the left side of SEARCH button
% for 1 second or longer.
Loading a CD
1. Press OPEN button 4. The SLOPING CON-
SOLE opens.
CAUTION
.
Be careful not to get your fingers caught when
opening and closing the SLOPING CONSOLE.
2. Insert a CD into the centre of the insertion
slot with the label side facing up. The CD plays
automatically after loading.
Notes:
• Never insert foreign objects into the CD insertion slot.
• If the CD is not inserted easily, there may be an-
other CD in the mechanism or the unit may re-
quire service.
• Discs not bearing the
mark and CD-ROMs
cannot be played by this unit.
Loading 8 cm compact discs
∗ No adapter is required to play an 8 cm CD.
∗ Insert the 8 cm CD into the centre of the insertion
slot.
3. After loading a CD, the SLOPING CONSOLE
closes automatically.
Notes:
• Note that SLOPING CONSOLE close immediately
after a CD is inserted into CD insertion slot.
• If no CD is loaded in the SLOPING CONSOLE, it
closes after 30 seconds.
Listening to a CD already inserted
Press FNC button 3 to select the CD mode. Play
starts automatically. If no CD is loaded in the unit,
“NO DISC” appears in the display.
Pausing play
1. Press Play/pause button & to pause play.
“PAUSE” appears in the display.
2. To resume CD play, press Play/pause button
& again.
CD Operations
2. Press and hold AS button 5 for 2 seconds or
longer. The stations with good reception are
stored automatically to the preset channels.
∗ If auto store is performed in the FM bands, the
stations are stored in FM3 even if FM1 or FM2
was chosen for storing stations.
Preset scan
Preset scan receives the stations stored in pre-
set memory in order. This function is useful when
searching for a desired station in memory.
1. Press PS button 5.
2. When a desired station is tuned in, press PS
button 5 again to continue receiving that sta-
tion.
Note:
• Be careful not to press and hold PS button
5
for
2 seconds or longer, otherwise the auto store func-
tion is engaged and the unit starts storing stations.
Radio Operations