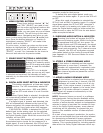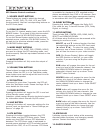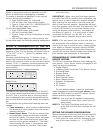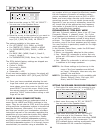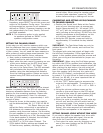
2. Move the cursor to the Optical Input (OPT1 or
OPT2) you want to change the input assign-
ment for. Hit ‘Select’. (see figure below)
3. Now you can assign the optical input to any
one of the 6 inputs selectors. Doing this will
override the digital coax connector on that
input. Hit ‘Select’ when finished.
NOTE: On the pro model, ‘AES’ will show up
in the ‘Other Settings’ Menu (instead of OPT1
and OPT2), to setup the AES/EBU input assign-
ment.
6: TAPE/RECORDING OUTPUTS
The SP2 provides two analog outputs for the TAPE
and VCR sources. The front panel selected input
signal is always routed to these tape outputs,
except when TAPE or VCR is selected. In those
cases the appropriate output is automatically
muted to prevent feedback.
7: REMOTE 12V TRIGGER OUTPUTS
Two trigger outputs are provided. The output
labeled “ON/OFF” provides a 12V voltage level
whenever the unit is fully powered up. When the
unit goes into standby, the level is 0 Volts. The
output labeled “AUX” is programmable from the
LCD menu as described below. This means that
the terminal supplies the 12 Volt signal only when
you switch to certain, specified inputs. The Centre
(Common or Ground) terminal is always used with
the “ON/OFF” or “AUX” terminals to complete the
circuit loop. The 12 Volt connector will accept 1/4
- inch stripped wire ends, inserted into the square
holes provided, and the adjacent screws carefully
tightened to hold them in place. These can be used
to control any Bryston Power amplifier and many
other components such as motorized screens and
drapes. Be sure to determine what type of trigger
signal the selected components requires and what
function will be enabled by the trigger signal’s volt-
age.
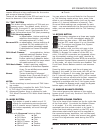
Programming the AUX Trigger Output
1. Enter the main menu by pressing on one of
the menu buttons on the SP2 front panel.
Move the cursor to “OS”. Hit ‘Select’ - You are
now in the Other Settings (Optical/THX) Menu.
2. Move the cursor to “T”. (T = Trigger) Hit
‘Select’. Now you can assign the AUX Trigger
output to ON or OFF, for each of the 6 input
sources.
CONNECTIONS
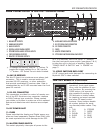
1: BALANCED OUTPUTS
2: UNBALANCED OUTPUTS
The SP2 offers both balanced (5.1) and unbalanced
(7.1) outputs for power amplifiers or powered
loudspeaker systems. The type you select to use
will be determined by the input configuration of
your amplifiers or self-powered loudspeakers.
NOTE: XLR and RCA connectors can be simultane-
ously utilized. (Example - Surround fill channels)
Back channel(s) are only available from the RCA
outputs.
3: ANALOG INPUTS
A paired stereo analog input with gold RCA jacks
(labeled L and R, for Left and Right) is provided for
each source button on the front panel. The sensi-
tivity of these Inputs is set to the industry stan-
dard of 2 Vrms, which should accommodate the
vast majority of available source components. In
Bypass mode, the input sensitivity is equivalent to
the BP26 preamplifier.
A 5.1 channel analog input is also provided on
6 RCA connectors. This is typically used for Multi-
channel DVD-Audio, SACD, or external processors.
In Bypass 5.1ch mode, the signal from the 5.1
channel analog inputs (RCA) will be routed through
the volume controls and to their respective out-
puts, balanced and unbalanced. No bass manage-
ment is available with the 5.1ch bypass mode.
4: DIGITAL AUDIO COAXIAL INPUTS
The TV/SAT, DVD, CD, and AUX front panel select-
able sources are also supplied with a standard
SPDIF gold RCA jack digital audio input. These
four inputs will accept any standard SPDIF source
including DAT, CDR and similar components.
5: TOSLINK DIGITAL AUDIO OPTICAL INPUTS
The SP2 offers two assignable TOSLINK optical
inputs. These can be designated to any input using
the OS menu (“Other Settings”)on the LCD screen.
Please note that if you choose to assign an optical
input to an input with a coaxial input, the coaxial
will be over-ridden and the optical input signal will
be used by the SP2.
AES/EBU
PUSH
The pro model replaces the two TOSLINK
connectors with a single AES/EBU Digital
connector.
Setting the Optical Audio Input Assignment
1. Enter the main menu by pressing on one of
the menu buttons on the SP2 front panel.
Move the cursor to “OS”. Hit ‘Select’ - You
are now in the ‘Other Settings’ (Optical/THX)
Menu.
7


