


Headzone Hardware
- 9 -
5. Headzone hardware
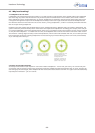
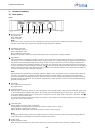
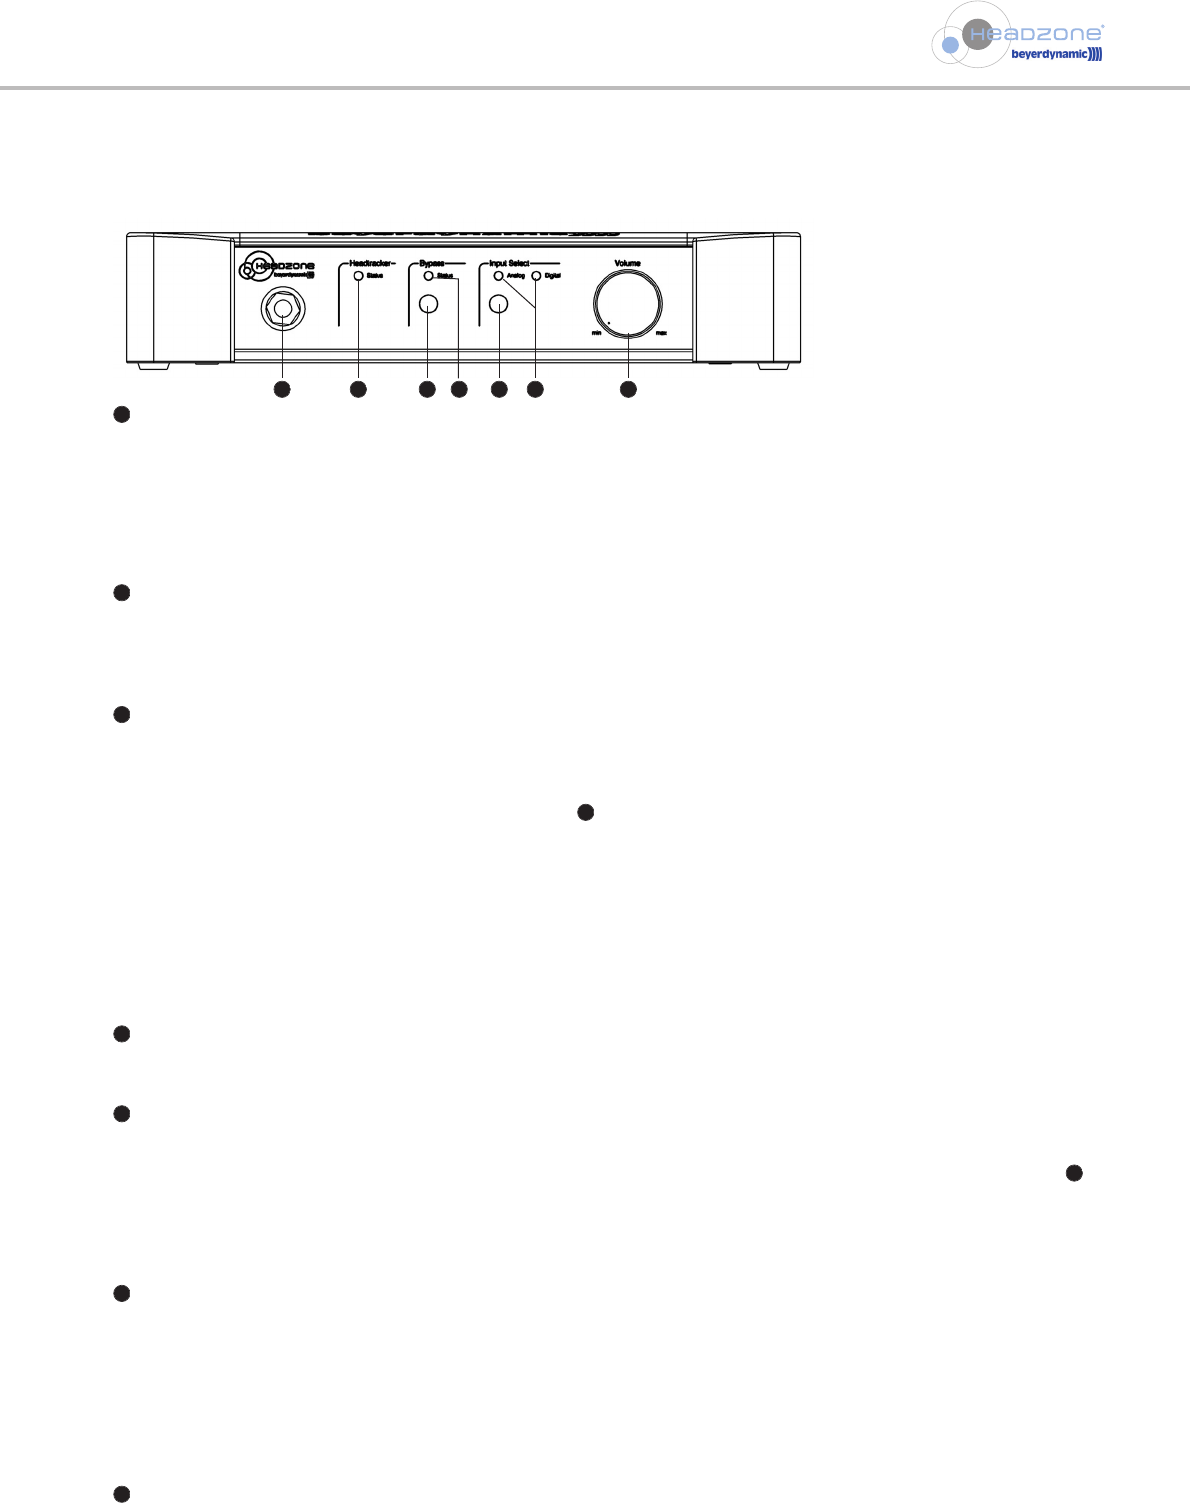
5.1 Base station
Front
6.35 mm jack socket
Tip = Audio Left
Ring = Audio Right
Sleeve = Ground
Note:
Please never connect more than one pair of headphones to the phones jack (using Y adaptors) as this will prevent proper
operation of the head tracker system and could permanently damage your hardware.
Headtracker Status LED
Off = Headtracker inactive
Green = Headtracker active
Red = Headtracker out of range
Blinking slowly red/off = Device is in upload mode (please refer to chapter 8.8.3 “Updating the DSP”)
Bypass Button
Although Headzone is designed to simulate a virtual 5.1 control room, there might be situations where you want Headzone to
operate like a “normal” headphones amplifier when checking a stereo mix or a CD. By pressing the “Bypass” button Headzone
will deactivate all processing (including head tracking) and put out a stereo downmix of all surround signals. Headzone then
works as a reference stereo headphones amplifier. In this mode, the “Processing” LED on the status panel (refer to chapter 8.5
“Control / Status Panel”) and the “Bypass processing” LED on the front of the Headzone base will both turn red. The “Bypass”
button has the same function as the “Bypass processing” tick box in the Headzone software control panel (refer to chapter 8.5
“Control / Status Panel”) and is therefore interactive.
Note:
Although the surround processing is completely disabled in “Bypass” mode, the playback volume will still be influenced by the
”Distance” and “Ambience” parameters as described in chapter 8.3.2 “Room settings”. This is because switching between
processing and bypass could otherwise lead to a dramatic increase of volume and therefore damage your hearing. Locking the
playback volume to the ”Distance” and “Ambience” parameters will always provide a convenient volume balance between by-
pass and processing mode.
Status LED
Off = Headzone processing active
Red = Bypass mode
Input select button
By pressing the “Input Select” button you can switch between the analog (RCA jacks) or digital (Firewire IEEE1394) audio inputs
on the rear panel of the Headzone base station. The selected input will be displayed by the “Audio input” LEDs in the “Status”
panel of the Headzone software control panel (refer to chapter 8.5 “Control / Status Panel”) and by the “Input select” LEDs
on the front of the Headzone base.
The “Input Select” button is interactive with the “Input select” control element in the Headzone software control panel (refer to
chapter 8.5 “Control / Status Panel”).
Input select LEDs
Analog LED Green = Analog inputs are selected
Analog LED Red = Analog inputs are selected, but at least one input is close to clipping
Digital LED Green = Digital input is selected
Digital LED Red = Digital input is selected, but at least one input is close to clipping
Note:
The clipping LEDs will light up when less than 6dB of headroom is left for at least one audio input. Separate clipping LEDs for
every audio channel are displayed in the Headzone software control panel.
Volume knob
Master headphone volume.
When working with Headzone, set the master volume to minimum first and then slowly increase to a suitable volume.
1
2
3
4
4
5
6
6
7
1 2 3 4 75 6