RPC Operations Guide, Page 12
How to Edit a Ramp
• Using the “Mode” and “Type” radio buttons in the Ramp Editor, choose a ramp mode and ramp
type. If you do not know what those are, choose “Ramp Tutorial” from the “Help” menu. Please note
that Internal Ramps are limited to a 100 second shoot time duration.
• Using the “Camera” and “Compensation” menus in the Ramp Editor, choose a camera and
compensation method you will be using. This will impose the exact same limits on this ramp as the
chosen camera and compensation method have. If you are unfamiliar with those limits, choose the
Help item from the Camera or Compensation menus.
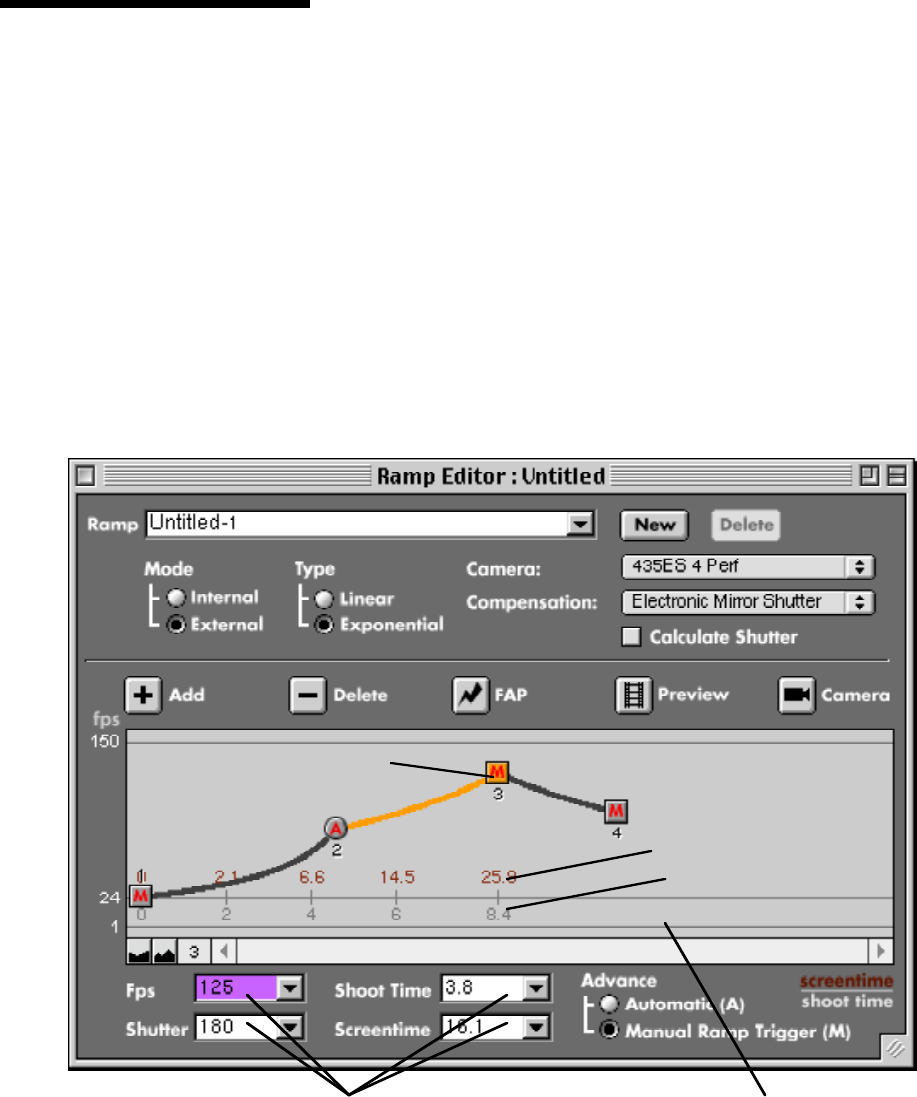
• Now grab a ramp point and drag it somewhere else on the ramp graph. A ramp point is a point
representing a camera speed and shutter angle. You will see the screentime (red numbers) and
shoot time (gray numbers) change as you drag the ramp point. A ramp segment consists of a ramp
point and all speed, shutter and duration values from the previous ramp point to this ramp point.
When a ramp point is clicked, the whole ramp segment is selected and turns orange (see picture).
• You will also see the Ramp Segment Properties (fps, shutter angle, screentime, shoot time)
change. If you want to, you can select a ramp segment by clicking its associated ramp point, and
then type a new value into one of the Ramp Segment Properties fields, or chose a predefined value
from the Ramp Segment Properties menus.
Ramp Point
Ramp Graph
amp Se
ment Properties
Screentime
Shoot time
• When editing an external ramp, new ramp points can be created with the Add button. It will be
inserted after a selected ramp point or at the end of the whole ramp.
• Selected ramp points can be deleted with the Delete button.
• Selecting a ramp point and clicking the “FAP” button makes that ramp segment as Fast As
Possible, given the limitations imposed by the chosen camera and compensation method.


