


20
GB
NAS-E35HD.GB.3-292-247-11(1)
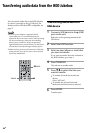
When carrying this unit
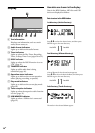
1
Remove a disc from the disc tray to
protect the CD mechanism.
2
Press FUNCTION repeatedly to select “CD”.
3
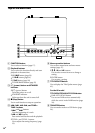
Press and hold OPTIONS on the main
unit, and then press (power) on the
main unit until “STANDBY” appears in the
display.
4
After “LOCK” appears, disconnect the
power cord.
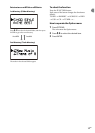
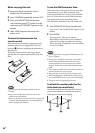
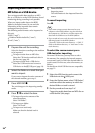
To insert the batteries into the
remote control
Slide and remove the battery compartment lid,
and then insert the two supplied R6 (size AA)
batteries ( end rst) matching the polarities as
shown below.
When the remote control is no longer able to
operate the unit, replace both batteries with new
ones.
Notes
With normal use, the battery should last for six
months.
Do not mix an old battery with new one or mix
dierent types of batteries.
If you do not use the remote control for a long period
of time, remove the batteries to avoid damage from
battery leakage and corrosion.
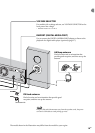
To run the DAB Automatic Scan
When you turn on the unit for the rst time aer
you purchase the unit, DAB Automatic Scan
starts automatically and creates a list of available
services. If you want to run the DAB Automatic
Scan again, perform the procedure below.
is function is available on the UK model only.
1
Press DAB AUTO SCAN on the main unit.
“Auto Scan?” and “Push ENTER” appear in the
display.
2
Press ENTER.
Scanning starts. “Auto Scan” appears.
Depending on the DAB services available in
your area, scanning may take a few minutes.
When scanning is completed, a list of available
services is created.
Notes
If your region does not support DAB broadcast, “No
Service” appears.
Do not press any button on the unit or the remote
control during DAB Automatic Scan. Scanning
is interrupted and service list may not be created
properly. In this case, run the DAB Automatic Scan
again.
If you move to another area, repeat this procedure to
store the stations for your new area.
is procedure clears all previously stored presets.
Before unplugging the DAB antenna, make sure the
unit is turned o to preserve your own DAB settings.
is tuner does not support data services.
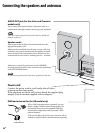
To attach the speaker pads (for the
Latin American model only)
Attach the supplied speaker pads to the bottom
corner of the speakers to stabilize the speakers
and to prevent them from slipping.