


17
Getting Started
Receiver Operations
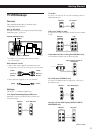
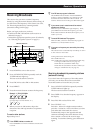
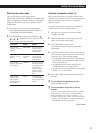
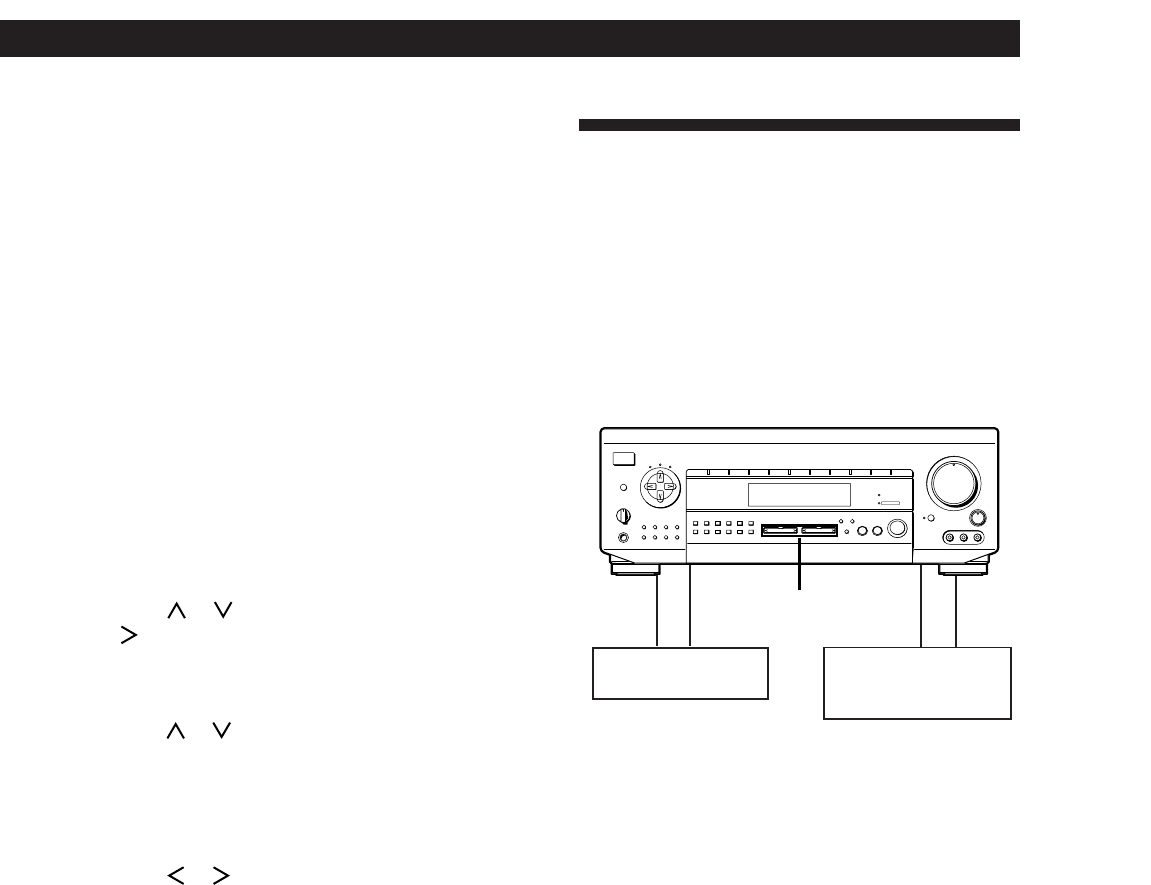
Playback component
(program source)
c
ç
ç
c
Recording component
(tape deck, DAT deck,
MD deck, VCR)
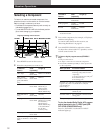
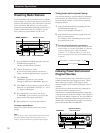
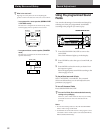
1 To index a preset station
Press AUDIO FUNCTION repeatedly until the
TUNER indicator lights up.
The last station you received is tuned in.
To index a program source
Select the program source (component) to be
named, then go to Step 3.
2 Tune in the preset station you want to create an
index for.
If you are not familiar with how to tune in preset
stations, see “Tuning preset stations (preset
tuning)” on page 16.
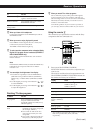
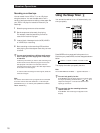
3 Press DPC MODE repeatedly until the INDEX
indicator lights up.
4 Create an index name by using the digital
processing control buttons as follows:
Press
or to select a character, and then press
to move the cursor to the next position.
The index name is stored automatically.
To insert a space
Press or until a blank space appears in the
display (the space is between “"” and “A” (STR-
DE915/DE715/D660Z) or “]” and “A” (STR-
DE615/D560Z)).
If you’ve made a mistake
Press or repeatedly until the character you
want to change flashes. Then select the right
character.
To assign index names to other stations
Repeat Steps 2 to 4.
z You can display either the preset station name
(program source name) or frequency (component
originally meant for the selected jacks)
Each time you press DISPLAY, the display switches
between the frequency (or component originally meant
for the selected jacks) and the preset station name
(program source name).
z You can create an index name for the component
connected to the 5.1 INPUT jacks (STR-DE715/DE615/
D660Z/D560Z only)
Press 5.1/DVD INPUT and do the procedure above
starting from Step 3.
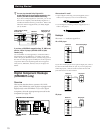
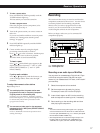
Recording
This receiver makes it easy to record to and from the
components connected to the receiver. You don’t have
to connect playback and recording components
directly: once you select a program source on the
receiver, you can record and edit as you normally
would using the controls on each component.
Before you begin, make sure you’ve connected all
components properly.
SHIFT
INPUT
MODE
DIRECT
0
5
9
4
8
3
7
2
6
1
VIDEO FUNCTION AUDIO FUNCTION
GENRE
MEMORY
PRESET
TUNING
TUNING
TONE
SUR INDEX
+
DISPLAY
–
FM / AM
+
FM MODE
–
SET UP
DIRECT
PASS
MODE
DIRECT PASS
SOUND FIELD
ON / OFF
BASS
BOOST
BALANCE
LR
DISCRETE
5
0
1
3
9
7
4
6
2
8
1
0
•
•
•
•
•
•
•
•
•
•
•
•
•
•
•
•
•
•
•
•
•
•
•
•
•
•
•
•
•
•
•
PHONES
POWER
SPEAKERS
DPC
MODE
A
OFF
A
+B
B
g
MASTER VOLUME
VIDEO 2VIDEO 1 VIDEO 3 LD / DVD TV/DBS TAPE DAT / MD CD TUNER PHONO
RLVIDEO AUDIO
VIDEO 3 INPUT
VIDEO/AUDIO FUNCTION
ç: Audio signal flow
c: Video signal flow
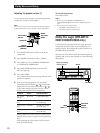
Recording on an audio tape or MiniDisc
You can record on a cassette tape, Digital Audio Tape
or MiniDisc using the receiver. See the instruction
manual of your cassette deck, DAT deck, or MD deck if
you need help.
1 Select the component to be recorded.
2 Set the component to be ready for playing.
For example, insert a CD into the CD player.
3 Insert a blank tape or an MD into the recording
deck and adjust the recording level, if necessary.
4 Start recording on the recording deck and then
start playing the component.
Notes
• You cannot record analog audio signal from a program
source connected to the LD/DVD IN AC-3 RF/OPTICAL,
LD/DVD jack (STR-DE915 only), or 5.1 INPUT jacks (STR-
DE715/DE615/D660Z/D560Z only).
• Sound adjustments do not affect the signal output from
the DAT/MD OUT OPTICAL jack (STR-DE915 only),
TAPE REC OUT jacks, and DAT/MD REC OUT jacks .