


Tape – Recording
23
GB
Tips
• When setting the PBC function to on, change the
setting to off and then start recording.
• To check the required tape length for recording a
disc, press EDIT on the unit until “EDIT” flashes
after you have loaded disc and pressed CD. The
required tape length for the currently selected disc
appears, followed by the total playing time for side A
and side B respectively (Tape Select Edit).
• You cannot use Tape Select Edit for discs containing
over 20 tracks or MP3 audio tracks.
You can record just the portions you like from a
CD, tape or radio program on a tape.
You can also record from connected
components (see “Hooking up optional
components” on page 35).
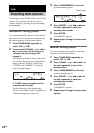
1 Load a recordable tape into deck B.
2 Press TAPE A/B to select deck B, then
press nN repeatedly to select
recording side. And press x to stop
playback.
The indicator of recording side lights up.
3 Press CD, TAPE A/B, TUNER/BAND,
GAME or MD (VIDEO) to select the
desired source to record.
• CD: To record from this system’s CD
player.
• TAPE A: To record from this system’s
tape deck A.
• TUNER: To record from this system’s
tuner.
• GAME: To record from the connected
video game machine to GAME INPUT
AUDIO L/R jacks.
• MD (VIDEO): To record from the
connected MD or VCR to MD (VIDEO)
IN jacks.
4 Press REC PAUSE/START on the unit.
Deck B stands by for recording.
“REC” flashes.
5 Press DIRECTION on the unit
repeatedly to select “g ” to record on
one side. Select “j” (or “RELAY”) to
record on both sides.
6 Press REC PAUSE/START on the unit,
then start playing the desired source to
record.
Recording starts.
Recording on a tape
manually
— Manual Recording
continued