


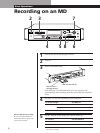

Recording on MDs
10
Monitoring the input signal (Input Monitor)
Before starting recording, you can monitor the selected
input signal through the recorder’s output connectors.
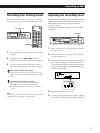
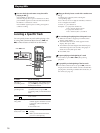
1 Press §EJECT to remove the MD.
2 Set INPUT according to the input signal you want
to monitor.
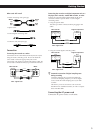
When INPUT is set to ANALOG
The analog signal input through LINE (ANALOG) IN is
output to DIGITAL OUT after A/D conversion, and
then to the LINE (ANALOG) OUT connectors and
PHONES jack after D/A conversion.
When INPUT is set to DIGITAL
The digital signal input through DIGITAL IN is output
to DIGITAL OUT, and then to the LINE (ANALOG)
OUT connectors and PHONES jack after D/A
conversion.
Note
Even if you set REC MODE to MONO, the monitor
signal does not become monaural.
3 Press r.
If INPUT is set to ANALOG, “AD-DA” appears in
the display.
If INPUT is set to DIGITAL, “-DA”appears in the
display.
If “Auto Cut” appears in the display
(Auto Cut)
There has been no sound input for 30 seconds while
INPUT is set to DIGITAL and the source is connected
through DIGITAL IN. The 30 seconds of silence are
replaced by a blank of about 3 seconds and the
recorder changes to recording pause.
You can turn off the Auto Cut Function
For details, see “If “Smart Space” appears in the
display” below.
If “Smart Space” appears in the display
(Smart Space)
When there has been an extended silence of up to 30
seconds in length, and the signal is input again, the
silence is replaced by a blank of about 3 seconds and
the recorder continues recording.
Note
However, if you begin recording during such an extended
silent portion, the smart space function will not be activated.
To turn off the Smart Space Function and Auto Cut
Function
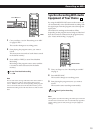
1 While the recorder is stopped, press EDIT/NO twice to
display “Setup Menu”.
2 Turn AMS until “S. Space” menu appears in the display,
then press AMS.
3 Turn AMS until “S. Space Off” appears in the display,
then press AMS.
4 Press EDIT/NO.
To turn on the Smart Space Function and Auto Cut
Function again
1 Carry out Steps 1 and 2 in “To turn off the Smart Space
Function and Auto Cut Function” above.
2 Turn AMS until “S. Space On” appears in the display, then
press AMS.
3 Press EDIT/NO.
Notes
• When you turn off the Smart Space Function, the Auto Cut
Function is also turned off automatically.
• The Smart Space Function and Auto Cut Function are
factory set to on.
• The Smart Space Function does not affect the order of the
track numbers being recorded, even if the blank space
occurs in the middle of a track.
• If you turn off the recorder or disconnect the AC power
cord, the recorder will recall the last setting (on or off) of
the Smart Space and Auto Cut Functions the next time you
turn on the recorder.
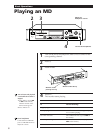
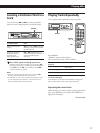
Playing back tracks just recorded
Follow this procedure to play back tracks that have just
been recorded.
Press · immediately after stopping recording.
Playback starts from the first track of the material just
recorded.
To play from the first track of the MD after recording
1 Press p again after stopping recording.
2 Press ·.
Playback starts from the first track of the MD.