


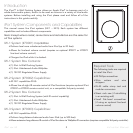


iPort ver. IW
Instruction Manual
• If you are unsure about obstructions, drill a small hole in the center of the outline
and insert a coat hanger wire into the hole to feel-around for possible obstructions.
5. Cut the opening using a drywall saw.
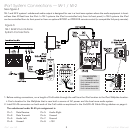
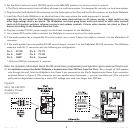
6. Make all cable connections according to
iPort System Connections
, above, bringing
the wires through the wall opening. Double-check that all the connections are correct.
7. Insert the iPort utility box into the opening in the wall.
• First insert the top edge into the opening, then rotate the bottom edge into the
opening.
Note: The RotoLock system can accommodate a maximum wall material
thickness of 1
3
/8”.
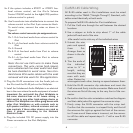
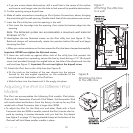
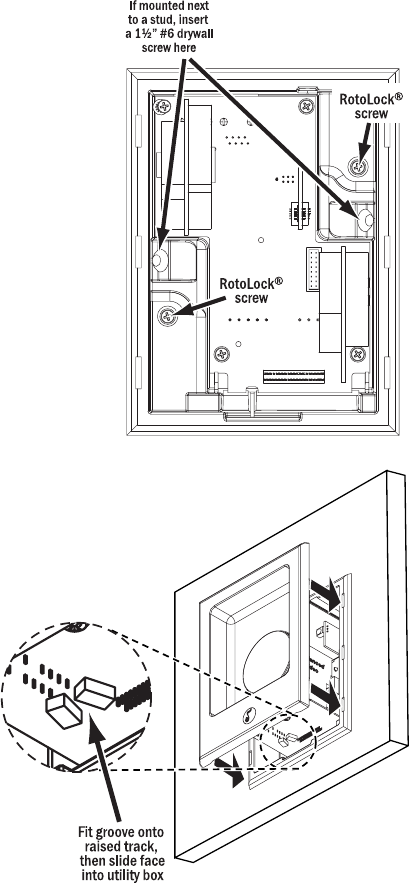
8. Hand-tighten the two RotoLock screws on the iPort utility box (see
Figure 7
). The
RotoLock clamps will automatically rotate into position behind the wall and begin
clamping the iPort.
• When you notice resistance on the two screws the iPort has been clamped successfully.
Important: NEVER over-tighten the RotoLock screws.
9. If there are wall studs up against either side of the utility box that prevent the
RotoLock clamps from operating, secure the box by hand-driving a 1½” #6 drywall
screw (not provided) through the angled hole on the side of the chassis and into the
wall stud (see
Figure 7
). Important: Do not over-tighten the drywall screw.
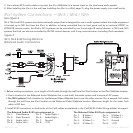
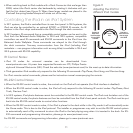
10. Attach the iPort face to the utility box (see
Figure 8
).
• Fit the track on the bottom of the rear chassis into the groove
formed by the two angled capacitors on the underside of the
circuit board at the bottom of the iPod face.
• Slide the face into the chassis until it fits snugly into place.
Adjusting the iPort for Different iPod
Models
The iPort can accommodate the following iPod models: iPod photo,
iPod mini, 4th Generation iPod with Click Wheel, 3rd Generation iPod
with touch wheel and buttons. From the factory it is set-up for any iPod
model with a Dock Connector that is larger than 30GB.
• To adjust the iPort for the iPod mini and other iPods with a Dock
Connector that are 30GB or smaller, extend the iPort’s center disc for-
ward by rotating it counter-clockwise until you feel the first detent
(see
Figure 9,
on page 11). Spring-loaded clamps at the bottom of the
iPod well will hold these smaller models in place.
Figure 8:
Attaching the face
to the utility box
Figure 7:
Attaching the utility box
to a wall
10