05/2/2 HT-X1W(LA)E3.fm
E-22
ENGLISH
TINSZA048AWZZ
HT-X1W
7
Preparation for Use
! Connecting the AC power lead
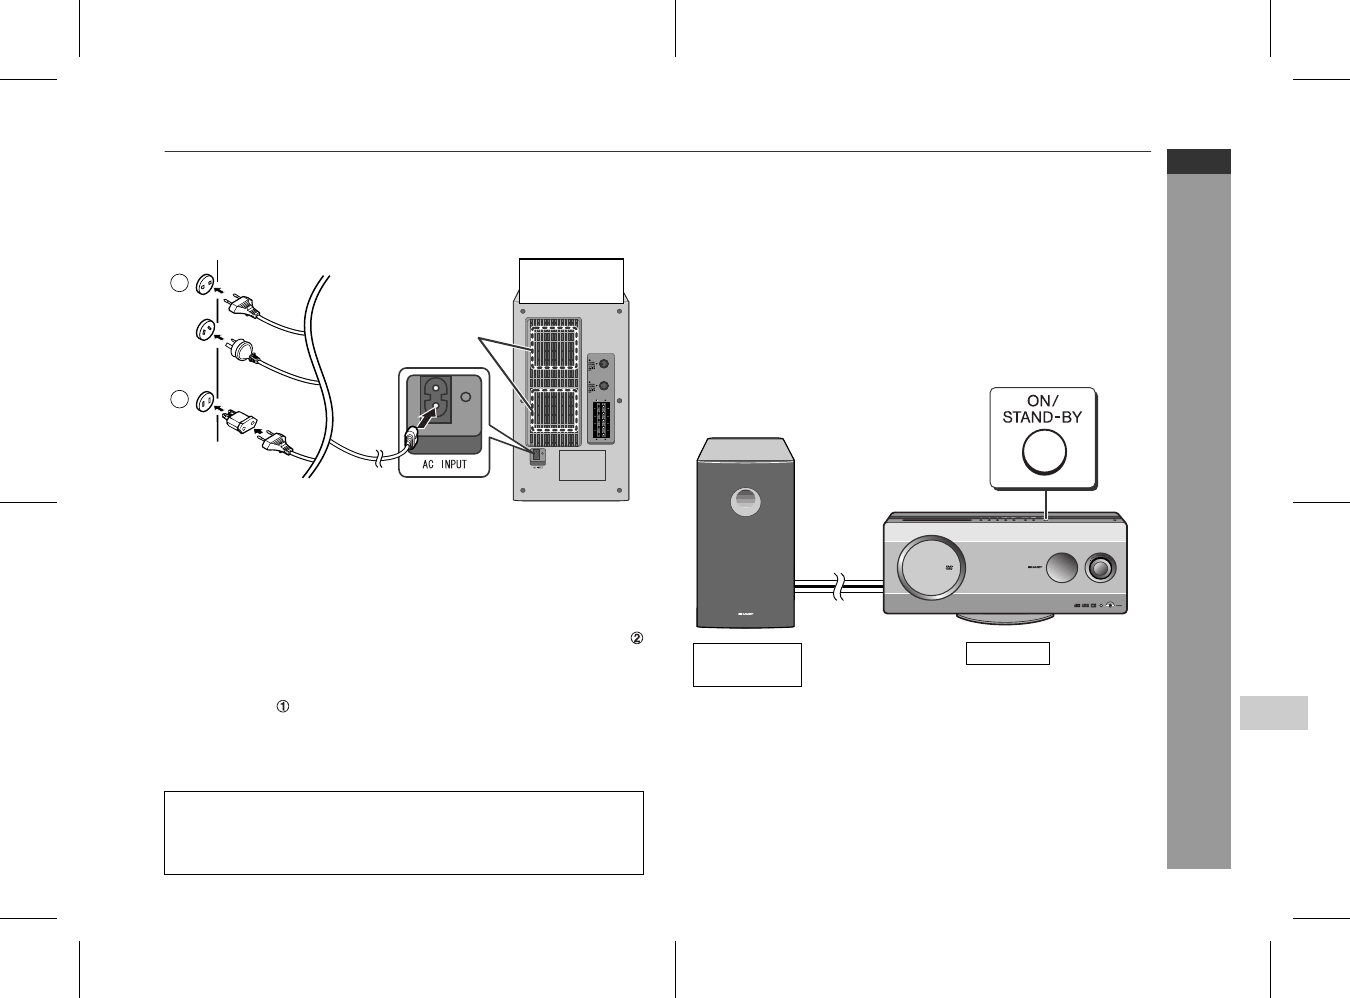
After checking all the connections have been made correctly, plug
the AC power lead to the AC power input socket of the subwoofer/
amplifier unit, and then to the wall socket.
Notes:
"
Never use a power lead other than the one supplied. Otherwise,
a malfunction or an accident may occur.
"
Unplug the AC power lead from the wall socket if the subwoofer/
amplifier unit will not be in use for a prolonged period of time.
AC Plug Adaptor
In areas (or countries) where a wall socket as shown in illustration
is used, connect the unit using the AC plug adaptor supplied with
the unit, as illustrated. The AC plug adaptor is not included in areas
where the wall socket and AC power plug can be directly connected
(see illustration ).
Note for users in Australia and New Zealand:
An AC plug adaptor is not supplied if the lead has an Australian
Standard plug.
! To turn the power on
Press the ON/STAND-BY button.
If the power does not turn on, check if the AC power lead and sys-
tem connection cable are plugged in properly.
To set the system to stand- by mode:
Press the ON/STAND-BY button again.
Note:
After the system enters the power stand- by mode, wait a few sec-
onds to turn on again.
Cooling fan:
A cooling fan is built into this subwoofer/amplifier unit for better heat
radiation. Do not cover the opening in this section with any obsta-
cles to avoid damage to the subwoofer/amplifier unit.
Subwoofer/
amplifier unit
Cooling fan
Wall socket
(AC 220 - 240 V, 50/60 Hz)
1
2
Subwoofer/
amplifier unit
Main unit


